Showing posts sorted by relevance for query coasters. Sort by date Show all posts

day 11 - how to make a coaster set

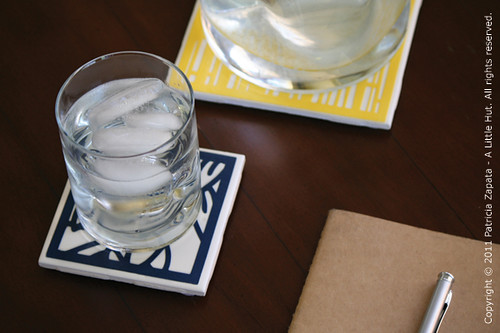
day 11 - coasters

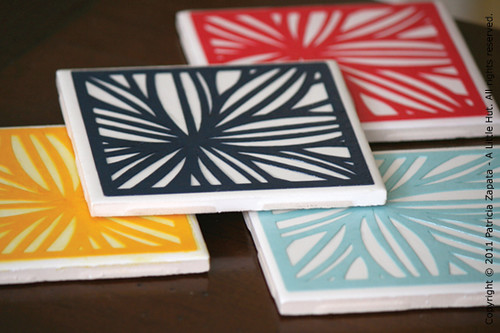
I have a thing for coasters. I don't know what it is but I always need to see what selection is available in whatever shop I'm in. I don't own very many (a good thing that I'm not a compulsive buyer!), but I just find them interesting—maybe because they come in so many different colors and styles. It's amazing how one little square (or circle) can have so many interpretations. I have the same fascination with boxes (may have mentioned that before—can't remember at the moment).

So, you'll imagine how much fun it was to make my own set. I've been wanting to try this out for a very long time—and opening the Mod Podge yesterday was the only nudge I needed.

Materials
- Blank tiles (found at the hardware store for $0.10 each!)
- Paper cut outs
- Mod Podge or glue
- Brush
- Clear spray paint (gloss or satin)
- Felt circles for the corners of the tiles or felt squares that are as large as the tiles
- Adhesive for the felt

day 11 - coasters wip

First a disclaimer! - I'm a novice when it comes to the use of Mod Podge. I'm just going to describe what I did—which may not necessarily be what is supposed to be done. All I know is that this worked‚—in the end.

1. Have your cutouts ready before you start. Paint a thin layer of Mod Podge on to the surface of the tile and set it aside (step 2 needs to be done quickly so this doesn't dry).

2. Hold the paper cutout by one corner (not completely flat) on a plastic surface so it won't stick to your work area. I used the plastic cover of an old Cricut mat, but I'm sure that a saran wrapped piece of cardboard would work just as well. After the cutout is completely covered in Mod Podge, let it air dry for a moment or two and lay it over the tile, making sure there are no trapped air bubbles. Use the brush and maybe just a bit more of Mod Podge to completely flatten the paper.

Don't overdo it with the Mod Podge. I think it's more effective if you use more thin layers than fewer with heavier coverage.

3. Let the tile and paper completely dry. Add two more layers (drying time in between) of Mod Podge to seal the coaster completely. I think I'll be adding two more layers, on top of this, just to make sure that no moisture will affect the cutout.

4. Once the tiles are completely dry (overnight preferable), add a coat of clear spray paint to seal the surface of the tile. Make sure to do this outside or in a very well ventilated area.

5. Glue the felt to the bottom of the tiles.

Lesson learned: I had no idea that the Mod Podge would make the color of the paper bleed onto the tile. I don't know if that happened because of the quality of the paper I used, because that's something that usually happens with Mod Podge or because I made a newbie mistake. All I know is that I was really disappointed. After thinking about it for a bit, I came up with the idea of sealing the surface of the paper with Mod Podge before attaching it to the tile (step 2). I worked on the yellow tile first and you can see the yellow stains on the tile. The dark blue tile was my second attempt (with the sealing step) and you can see that it worked like a charm—no bleeds.

day 11 - coasters - yellow bleeding :(

Isn't this a great gift idea? And it definitely does not break the bank.

I'm hoping that at a minimum a pretty coaster like this will improve my water drinking during the summer (I'm horrible at that!). I can only hope!

EDIT : If you are interested in making your own set of coasters a Four Pack of patterns is now available in my shop as PDF, SVG or DXF files.


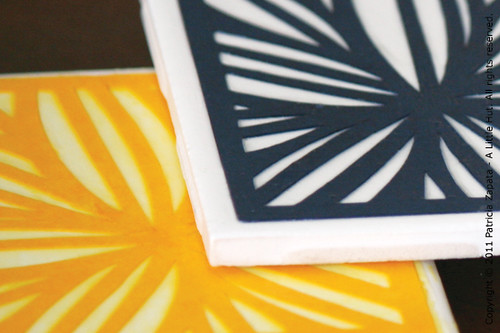
day 11 - coaster

• • •

This is part of a my 26 days of making series.

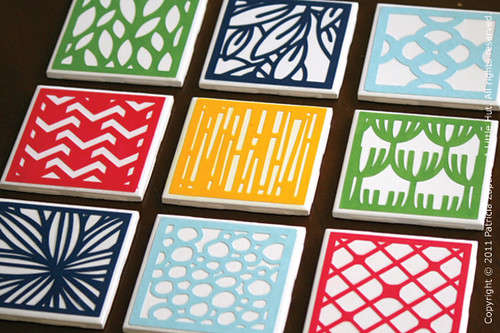
day 13 - just more coasters

anthropology
[Random photo - I saw these amazing torn paper flowers in Anthropologie a few weeks ago - the center was made of some sort of rubber and about the size of a melon. They all looked so striking!]

The photo session I had planned for Thursday was completely cut short because of dark clouds and thunderstorms. We desperately needed the water, so I'm not complaining. That just means that my reveal has to be postponed. While I waited for the weather to clear I made sure we won't be lacking in the coasters department. Now we have more patterns. I know... What a tease! I'll show you next week for sure. For those of you that asked, the new patterns will be in my shop next week.

Today it's perfectly sunny, but I've seriously run out of steam. The fact that Blogger was down since yesterday gave me the perfect excuse to just relax a bit.

By the way, my apologies for all the extra posts—old & new—being sent to the inboxes of my feed subscribers. It was all out of my control. It looks like Blogger is back to normal again. Let's hope!

This weekend I will be "making" but in a different way. I'll be...
- making the house look decent for Sunday visitors
- making lasagna from scratch for said visitors
- making sure all our Sunday outfits are ready
- making wonderful family memories on Sunday—while we celebrate with my little C on the day of her First Communion (which happens to be my birthday too)

Like I said, there will be a lot of making—just not of the paper crafting type. It's all about priorities, right?

Happy weekend everyone. Go and make something fun yourselves!

day 16 - coaster tutorial update

day 16 - coaster tutorial update

I realize that the last thing you want is another coaster update but this is actually an important one. My coasters had their first real test yesterday and some of them didn't pass. I thought I had done a good enough test (prompted by your comment Jessie!) regarding the resistance to the effects of water condensation. It turns out that I hadn't.

The circle that forms when a glass is set down was marked on the coasters. The Mod Podge got a bit white and translucent. After they dried up they were ok again (maybe a slightly different opaque look to them) but I wasn't satisfied with that. I decided to hunt down a solution in the hardware store and I purchased clear spray paint, hoping it would work. I applied a generous coat to one of the tiles, and after it dried, I set a wet glass on on it for more than a couple of hours. The surface of the tile wasn't affected at all. So, the last step to the tile coaster tutorial is now added as step 4.

Now, I can move on to other things, with a lot of sketching and photography.

I'm really trying with the water—with lots, and lots of lemon added (no sugar)!

Happy Monday!

• • •

This is part of a my 26 days of making series.

day 14 - one last coat

day 14 - just one more coat

Here they are. These are the coasters that I just finished with one final coat of Mod Podge. For those of you that missed it, the tutorial to make them is here.

Off to get the rest of things taken care of today!

• • •

This is part of a my 26 days of making series.

get out of your comfort zone - i went skydiving!

skydive 1
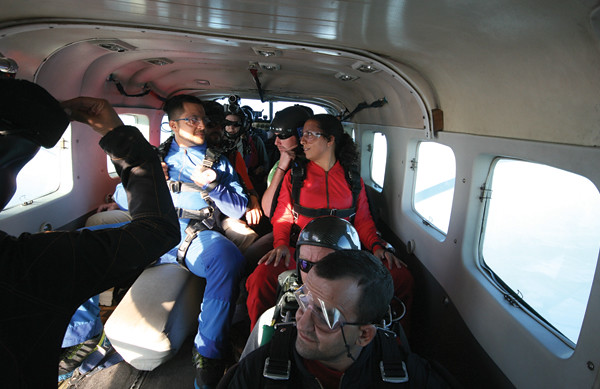
[climbing, climbing to 14,000 ft. my brother in blue]

Something a little different for today.

Shaking up things a bit can be a good thing. A really good thing.

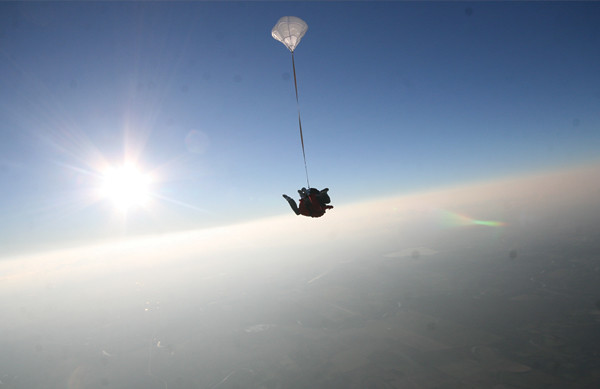
I did it by skydiving on Saturday and it was SO, SO AWESOME! However many hours later and I still feel like I'm running on the effects of the jump. I want to hop on a plane and do it all over again. It was the most fun experience I have ever had.

skydive 3

My advice for whoever is thinking about doing it—just DO IT and if you can convince family and/or friends to go it's even better. I'm glad that I got to share the experience with my brothers and sister-in-law. It wouldn't have been the same if I'd gone alone (the original plan).

Mr. Z, the kids, my parents and my other sister-in-law also went for moral support. Our daughter was seriously upset that she couldn't jump with me (even at 9 she's definitely our little daredevil—oh scary!), but I promised her that we'll go together on her 18th birthday.

skydive 4
[if I look like I'm in a crazy position, what about the photographer?!]

Things I didn't really expect because I hadn't thought about them:
- It's pretty cold at 14,000 ft—more than I would've thought but it didn't phase me. I was more concerned with other things!
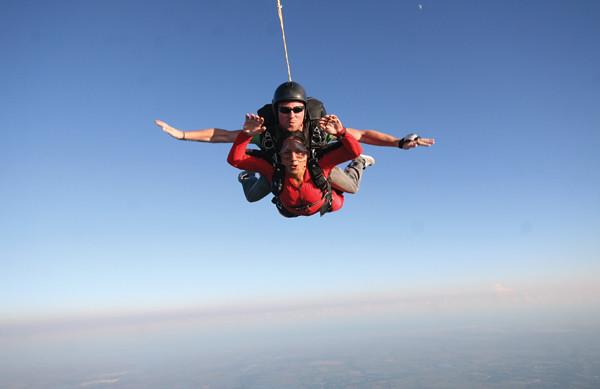
- Free falling is loud... like REALLY loud—like having all your car windows open while driving down the freeway x10!
- The stopping force when the parachute deploys is incredible! Wow.
- I thought I'd scream at some point and I didn't but like my DD said I was probably screaming on the inside all the way down—not out of fear but just out of shear excitement.

skydive 5
[free falling at 120mph!]

But... I'm no daredevil. Today I was asked if I would:
- Bungee jump — Nope! Never. It scares me to death and I don't see the point.
- Go down a zip line — Nope! Something just freaks me out about hanging by a 'thread'.
It doesn't make sense does it?

Oh and I don't like roller coasters although I've been on several. I keep thinking one will help me understand what everyone likes about them—still waiting. For those that have asked, no, skydiving doesn't feel like that at all. No yucky stomach upturn feeling.

skydive 6
[the best view of a sunset- EVER!]

What you don't see... At least 5-8 minutes of dropping peacefully with the parachute and looking out as far as the eye can see (our side of Texas is so boringly flat!). It's as peaceful and quiet as I imagine what a hot air balloon ride would be like. It gave us enough time to have a conversation with my instructor about how people react to the experience so differently. His weirdest experience = in midst of the serene descent his jumping partner started crying and said that she needed to ask her husband for a divorce! What!?

skydive 7
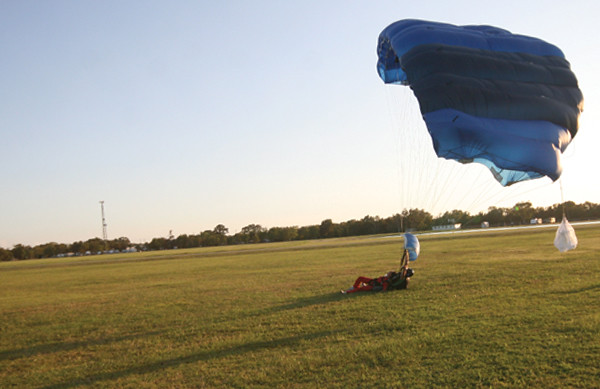
[whew! made it!]

I seem too calm in the video—it's not a reflexion of what I was really feeling. After the jump I wanted to literally scream my head off, jump up and down and high-five everyone. The adrenaline rush was just incredible and the feeling of just WOW was overwhelming—it's hard to describe. I couldn't even come up with anything other than "awesome"-ha! I don't know how I kept it all in check. Thank you to my instructor Kieran and videographer Nick for making the experience so incredible (really nice guys!).

You may not want to go the skydiving route but I highly recommend getting out there and just doing something different. It's so worth it! What are you waiting for?

In the video, right before I start speaking, you'll see my younger brother (blue suit), my sister-in-law (long hair and in red) and her husband/my brother (black suit). Oh and please ignore the crazy hair—quite justified right? ;)

Have a fantastic day!

(All photos and video taken by Nick at Skydive Spaceland)
The video is embedded below. If you are reading this post in a reader you may not see it but you can click here to see me in all my craziness.


day 17 - new svg files for gift boxes

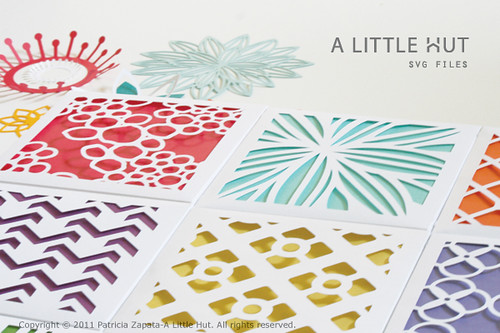
ALittleHut-SVGPatternBoxes

A bit late today but it still counts, right?

I'm really excited at how these all turned out. I've been working with the patterns that I created for the coasters and more ideas are in the works. I wish I just had more time! I really could go on and on with these sort of projects. My mind doesn't stop, so my sketch book is getting a work out.

The boxes are great for small gifts and when cut out in smaller sizes, they would work for jewelry. I'm not offering them as PDFs simply because I'm not sure that anyone would be interested in cutting these out by hand—but if you are, just order the SVG and email me to let me know that you prefer the PDF.

Here's a look at what the production line looked like on our kitchen table.

day 17 - production line


I'm saving the tops of the boxes to work on a large art piece which I'll reveal in a few days.

The SVG files for 9 different patterns are now available in my shop.

• • •

This is part of a my 26 days of making series.

day 17 - new pattern boxes

halloween kit - svg & dxf cutting files

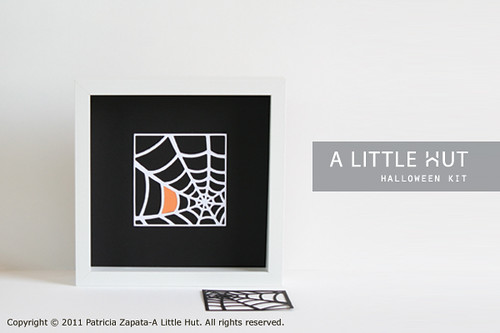
halloween - spider web

Typically, I'm not one to put a lot of effort in decorating for Halloween. I do it because the kids enjoy it, but that's about it. However, with my new designs and C's excitement about them, I'm feeling a bit different.

The pieces you see here are what I created for my shop, but I already promised my little C that we'd work on getting our own set of decorations ready for next month. My to-do list with her is getting longer and longer (decorations, Wee Wonderfuls doll, another doll outfit, a bigger paper doll house—ahhh!).

I suppose you can't tell, but I really had a great time designing this set. I think it's because I enjoy working with illustrations that are simple and graphic. I can imagine these being used for a fun whimsical party or for a more sophisticated event. The colors you use for the backgrounds will make all the difference.

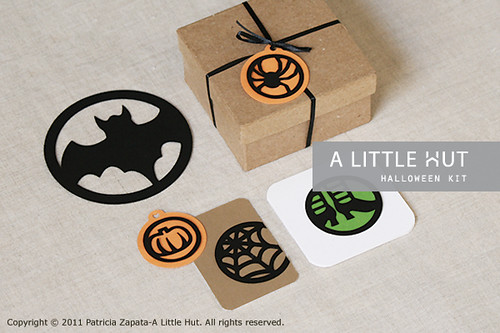
Medallions
These would work really well as wine charms, gift tags, on cards, as coasters or cut them larger and make a Halloween mobile.

halloween - medallions


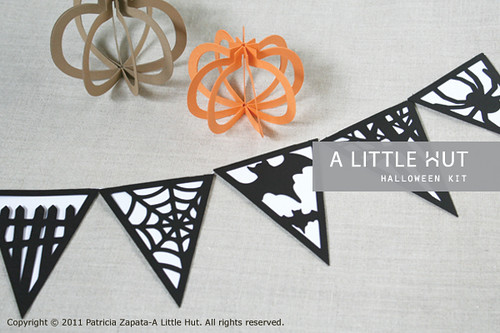
Bunting and 3D pumpkins
The bunting could decorate a doorway or a mantle and the pumpkins can be placed on tables, used for a mobile or as decorations on a wreath.


halloween - bunting and pumpkins


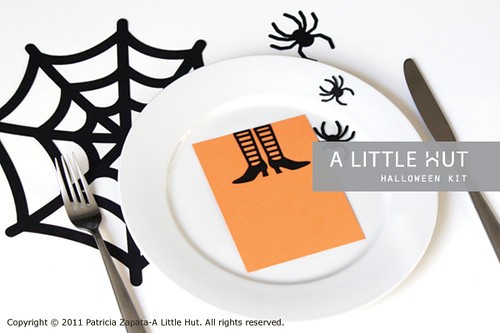
Graphic elements
These designs are very versatile too. I can see them on cupcakes, on any paper craft and wrapped around votive candle holders. I love this simple idea for a table setting.


halloween - place setting


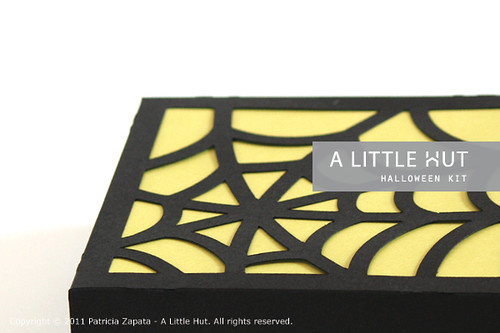
Gift box
I had the idea that it would be fun to greet guests with a web paper quilt (spiders hanging and all!) and at the end of a party use them as covers for the party favors.

halloween - gift box

All these files are included in my Halloween Kit. If you would rather work on something smaller, I'm also selling the bunting and the spider web box as individual products—digital cutting files and as PDFs for those of you that would like a cutting project!

So that's it—Halloween 2011!

Now to work on getting the kids to tell me what they're going to dress up as. I need to start working on that now—or else!

Have a great day everyone!

day 20 - paper quilt

day 20 - paper quilt

As I played with, what you know as box covers, I realized that I hadn't shared how the whole project really got started.

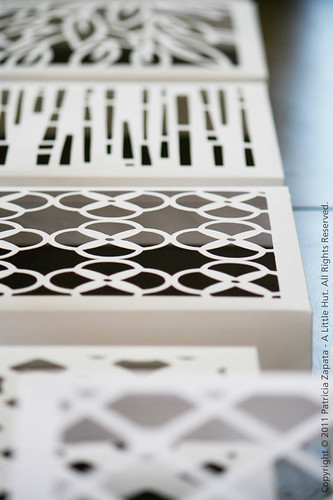
The first time I revealed these patterns you saw them in my coasters project. But my initial thoughts were really to make a hanging paper quilt.

Making a fabric quilt is completely out of the question for me. I entertained the idea at some point but I just know that I wouldn't have the patience for the sewing machine. So, paper popped into mind one day and I'm kicking myself for not thinking of it sooner.

Today I finally made my way towards making my quilt 'blocks' come together. I played around with the order in which I should place them. The background colors will not be staying—but I wanted to see all the color before getting rid of it. I really want to see what the 'quilt' would look like completely white. Another idea is to work minimally with color, the way I did here.

If you notice that the whole piece looks a bit crooked, it's because it is. It's being temporarily held with clothespins (see them on the left side of the piece?)—it's a complete work in progress.

Now it rests on the floor in my studio.

Where am I going to put everything?

day 20 - paper quilt

In an ideal world I would have all the time I could possibly want to make something new every day. The thing is that creativity can be spontaneous (like my mini doll house) or it can be a process as with these patterns. You're seeing more of the same from me, because my daily making has been in fact part of the process. I still have other applications for the patterns coming up next week... but hang in there, new things are coming too.

Update :: If you'd like to make your own quilt the files (PDF, SVG, DXF) are now available in the shop.

• • •
This is part of a my 26 days of making series.


varying results

This is going to take a while, but I can't wait to see it complete. This project came to mind as soon as I saw this lamp that Holly bought for her new apartment. I'm going to make a paper version. I'll be cutting a small section at a time, between breaks from my other projects. I figure I'll be done by the end of the week. So far so good.


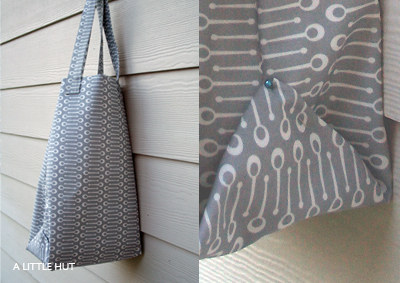
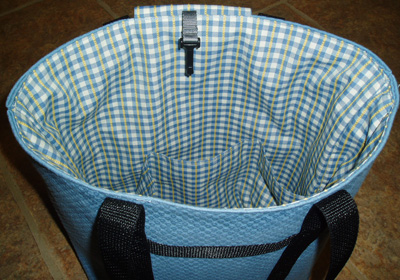
The lamp idea came about on Saturday, after I tried my hand at sewing a tote of sorts. It didn't work out the way I planned it so I've already pulled it apart. The only evidence it existed are these photos. I still had pins in the bag and I already knew it wasn't working. I wanted a tote but I wanted one that didn't exactly look like one - if that makes sense. The straps were all wrong and the actual bag was too long (it's much wider than appears in the photo - the sides are tucked in). So that was that.

Even though I don't like the bag, I decided to show it here to hopefully show a progression (improvement!) of my sewing projects as I make my sewing machine my friend. But I'll freely admit that it makes me uncomfortable to show something I'm not happy with. No taking it back now.


The good thing here, is that the idea is out of my head and I can move on to something different. I had to spend a couple of minutes explaining this to my lovely engineer husband (the part where I didn't consider it a waste of time... lol). I'm trying to decide what to make next. For some reason I think this pattern is better suited for something home related like a pillow, coasters or place mats. Maybe that's just me. It'd be interesting to see what someone else would make with fabric I've designed. Any suggestions on what to make? Not that I'll be sewing any time soon.

I'm going to have a very busy week ahead of me. I'll be editing the manuscript for my book, maybe for the last time, and I need to take more photos. So I've decided that there will be no internet for me. I'm going to my little corner of the world and sticking my head in my work for several days.

Have a great week and good luck to the kiddos that are starting school in the next few days. We're starting our second full week and everything is going great so far. I hope your weekend was as relaxed as our was.

weekend project

weekend project

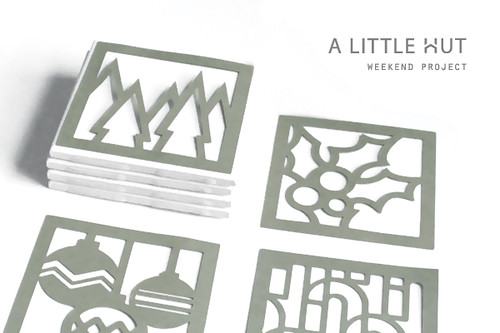
This is a fun project I want to take on this weekend. Will it get done? Who knows. But I will give it a serious try. Those of you that have my Christmas Paper Quilt collection can easily do it by editing the box covers.

What will you be making?

• • •

Friday Tidbits
- Origami Christmas tree: my favorite paper find of the week!
- Geometric steel bracelets: yes, please!
- I desperately want to make this cowl! Maybe I should trade the coasters for this? Hmm...

Have a great weekend everyone!

rainy day

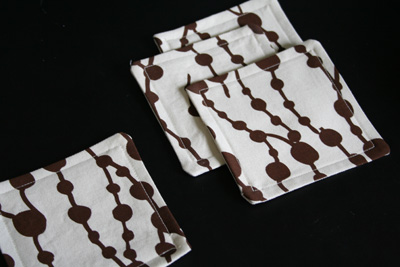
A little bit of sewing. I finished the coasters! For all you sewing experts out there, I know this isn't terribly exciting but for me, the novice, it is. Trust me. The mere fact that I've actually completed a project using a book (Lotta's) as a guide is even more of a feat. Yes, I'm one of those compulsive "I'll reinvent the wheel without help" types.

The black background is not an attempt at being somber/modern or whatever. It just happens to be the top of my desk - where the most decent light is available on a gloomy day!


A little bit of frustration (ok... more like a lot!). Now I'm really not getting ANY notifications of comments made on my blog. I'm trying to keep track of them but if I miss anything just let me know. And as always... thank you for visiting and all your comments are always appreciated!

book review: mod podge rocks

I was so happy to get Mod Podge Rocks!: Decoupage Your World by Amy Anderson for review because I've been curious about the medium but I never had a way to know exactly what formula to use with what project. My first attempt was making coasters (remember?) and I've worked on other not so successful projects. This book is a must for anyone that wants all the answers and many ideas (over 40 projects) on how to use Mod Podge.

The book is divided into sections that include wearables, home decor and holiday. The first part of the book is what really drew me in. I finally understand what each of the formulas are used for and the projects are useful, decorative or just for fun. Below are some of my favorites. I have a feeling that we'll be using some Mod Podge this summer!


I see myself making something like this for Christmas.


This is a sure way to brighten up any piece of dull looking furniture!


Great idea for some family fun. 


Amy starts her book with the following (and I couldn't agree with her more):


I believe anyone can be creative. But I also believe each person needs to find what specifically works for him or her.
- Amy Anderson

Book: Mod Podge Rocks!: Decoupage Your World
Author: Amy Anderson
Amy's blog: Mod Podge Rocks (a lot more ideas there too!)

revisting a dusty friend

Remember I said that my summer schedule would be different? Well I didn't expect it to be this different! I went to bed last night (more like this morning) at 5am. I'm still working on the book project. The good news is that it's due to the printer on Monday so after this weekend I'm a free woman. Thank goodness my hubby took the last couple of days off from work or I would've been in a heap of trouble.

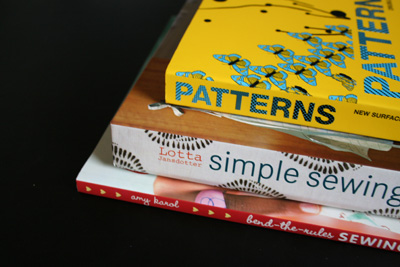
I'm not the type to write a "woe is me" type post so the above is only to emphasize my frustration (but extreme delight too!) upon receiving the books I ordered and not being able to enjoy them fully yet. Here they are:


As I mentioned in my previous post I will be tackling some sewing. I think these books will give me a good starting point. Leafing through them, I realized that I don’t think construction is my problem. I can figure out how to put something together. I just don't know the little tips and tricks that are part of sewing something.

I've only tackled 3 or 4 sewing projects since my husband bought me my sewing machine as a birthday present years ago. Shameful I know! Here, in all its glory, is my first project ever – a tote/diaper bag. Excuse the awful pictures - they're circa 2004. I used fabrics/materials that really aren't me - I have no idea why. I used the bag more out of pride than anything else. And what's up with using that fabric with backpack-type straps? Yikes! I do remember that I didn't use a template or anything of the sort. I sketched the idea out, figured out some appropriate measurements and just dove right in. I even learned about interfacing and I think I used a double application of it.

The bag is pretty banged up now and I haven't used in a while, so I can finally let it go. My plan is to replace it with something more ‘me’. I’m really looking forward to that. So much so that I’ve been designing one for several weeks in my sketch book and I keep changing it around. I just need to make one and get the ball rolling.


I've been staring at the Lara Cameron fabric sitting on my desk for too long now. I started making some coasters with it tonight (just before another 6hr work session started). I'll take a photo of them tomorrow - if it's a decent day. It's been raining for the last couple of days here. We had a dreary/gloomy albeit fun 4th of July celebration at the neighbor's house.

The use of the buttons from my previous post are on the back burner. I have a new idea - a different shape - an oval. Like the one I used in my last cards.

Ok...It’s 2am...the earliest I’ve been to bed in several days. I need to take advantage of this! Good night! :)