Showing posts with label review. Show all posts

book review: past & present


Combining history with creativity and modern projects is pure genius. That's what Past & Present: 24 Favorite Moments in Decorative Arts History and 24 Modern DIY Projects Inspired by Them is all about. The author Amy Azzarito, is the managing editor of Design*Sponge and creator of the popular  "Past & Present" column. She teamed up with some of today's most well-known designers to create projects that not only have historic influence but are easy to make and will fit in with present day influences and design. Julia Rothman's illustrations bind everything together in a beautiful tone and feel—like a perfect bow.


Branch and Crystal Chandelier

I'll admit that I'm not one to really dig deep into the introduction paragraphs of a project in any craft book. In this case, I feel that it is something that simply cannot be skipped. If you do, not only are you missing the whole point of the book, you are choosing to ignore fascinating historical facts that you may otherwise never come across. The book is on my night stand and I can honestly say it's one of the very few times I've actually read (not skimmed) a DIY book.


Empire-Inspire Plate


Tassel Blanket

Make sure to watch the video to get a better insight into the flavor of the book and the author's thoughts.


Past & Present Book Trailer from STC Craft / Melanie Falick Books on Vimeo.


review: amy chomas adjustable pen holder

review: adjustable pen holder

When Amy Chomas was kind enough to send me her Adjustable Pen Holder my first thought was that I was going to work with an intricate pattern that would really put it to the test. So, I thought of my Just Leaves Lattice and it worked out perfectly.

To be honest using the holder was much easier than I thought. I don't know why I had imagined something more complicated or that it wouldn't give the results that it did.

review: adjustable pen holder

The set up was extremely easy—just as easy as setting up a new blade—it just with a minor extra step that involves using a popsicle stick (for measuring the distance between the pen and the mat).

I used a Signo Uniball white gel pen and kraft colored paper. I made the pattern about 8" wide and let the machine do the rest of the work. I thought I'd have to babysit the machine (in case the pen got stuck or something like that) but after waiting for a few seconds I realized that it was going smoothly and left it going on its own (to go do some exciting dish washing—no joke). Within a few minutes I had a pair of lovely pages covered in a design that I used for a birthday card, several gift tags and a gift box.

review: adjustable pen holder

Using an adjustable pen holder like this gives you more use of your files and even though I just used white think of all the colored inks you can use—a lot of fun possibilities. I can see this as a great tool for repetitive projects like Christmas cards or party invitations.

review: adjustable pen holder

Amy has generously offered a coupon for those of you interested in getting a holder for yourselves or give it to a crafty friend as a fun stocking stuffer! Just use the code below.

Code: littlehut10
Discount: 10%
Date: Through the end of December

Visit Amy's site for more tutorials and inspiration (engraving and embossing too!).

review: adjustable pen holder

book review: mod podge rocks

I was so happy to get Mod Podge Rocks!: Decoupage Your World by Amy Anderson for review because I've been curious about the medium but I never had a way to know exactly what formula to use with what project. My first attempt was making coasters (remember?) and I've worked on other not so successful projects. This book is a must for anyone that wants all the answers and many ideas (over 40 projects) on how to use Mod Podge.

The book is divided into sections that include wearables, home decor and holiday. The first part of the book is what really drew me in. I finally understand what each of the formulas are used for and the projects are useful, decorative or just for fun. Below are some of my favorites. I have a feeling that we'll be using some Mod Podge this summer!


I see myself making something like this for Christmas.


This is a sure way to brighten up any piece of dull looking furniture!


Great idea for some family fun. 


Amy starts her book with the following (and I couldn't agree with her more):


I believe anyone can be creative. But I also believe each person needs to find what specifically works for him or her.
- Amy Anderson

Book: Mod Podge Rocks!: Decoupage Your World
Author: Amy Anderson
Amy's blog: Mod Podge Rocks (a lot more ideas there too!)

review - hand in hand: crafting with kids

I've already informed the kids that this will be a very crafty summer, so when I was offered the opportunity to review Hand in Hand: Crafting with Kids by Jenny Doh I was very interested. I wanted to see if there were any ideas that would contribute to the plan. I wasn't disappointed at all.

The projects in the book are simple for little hands and entertaining enough for older kids. I know my 9 yr old will enjoy it. I don't know about my 12yr old—but you never know.

What is completely unique about this book (in comparison to other kids crafting books that I can recall) is the fact that the projects are created by 20 extremely creative mothers (many well known in the online blogging world). Not only that, but they share their stories of creativity and how they relate to their children. I haven't read it all but so far much of what they share are either things I can relate to or be inspired by. Just this part of the book makes it an interesting read in itself.


The projects are simple but fun. Anyone can tackle them.


The instructions for all the projects couldn't be any clearer. 


This is definitely a great addition to our library and I can't wait to put it too good use in the slow summer days to come. 

(visit Jenny's blog for a full list of the contributing artists and other details)

review: luxe business cards by moo


I love thick business cards and these are the thickest I've ever seen. I was looking forward to receiving a box of Luxe business cards by Moo (in association with Mohawk paper) but I didn't know if they'd live up to my expectations. Oh they did! They're beautiful.


The cards are really, really thick, a true matte and the back of the cards can be printed with any image you send. They really do feel luxe in every way. Even the packaging (magnetic closure box) feels that way. Custom designs are available but I used my own.

If you order 50 cards you can have 50 different images on the back. What a great opportunity to show off products or portfolio work. I had a hard time selecting the images I wanted to use. I decided to go with a variety of colors to see how they would print. They held up really well and stayed true to the images I uploaded to the site.


The cards are made of three layers of paper and the middle layer can be either black, blue, red or white—your choice! I got my set in black and I can't wait to get more.

For more information about the Moo Luxe business cards visit the Moo web site, where they even have a video that explains this new product with more detail.

Thank you Moo!


Disclosure: I was sent a box of cards for review but, you know me, this post is a personal opinion.

review: martha stewart crafts for valentine's day

origami boxes

I have a confession to make. I can act just like my eight year old daughter when I see cute paper. We were both oohhing and ahhing over the sheets inside the paper pack that I received from Martha Stewart Crafts.

The package included:
Martha Stewart Crafts Enchanted Woodland Paper Pad
Martha Stewart Crafts Valentines Day Heart Shape Treat Bag (6 bags per package)
Martha Stewart Crafts Hearts Stamp and Ink Set

martha stewart valentine's day

Yes, I love contemporary lines and designs but there is still that little girl inside of me that enjoys a little cute every now and then. My little C has already staked a claim on some of the sheets and I played with them a bit too. Some of the sheets have Valentine's Day message cards that C wants to use to give her classmates next Tuesday with goodies in the heart bags that we received too. I like that the goodie bags have everything you need: hearts in pink and red, name tags, ribbon strips and pointed cello sleeves that fits in nicely.

What you can't see in photos is that this paper pack has a lot of foil in it. The darkest red hearts you see in the photos of the pad cover (center and a few of the sample squares) are foil paper. There are a some glitter pages too. I was curious and I a piece of the foil through the Silhouette and it cut like butter. I thought it would chip around the edges but it didn't. I also like the weight of all the card stock—thick and sturdy.

martha stewart valentine's day

I purchased the Martha Stewart Crafts Stamp And Ink Set Valentines Day Heart & Key set last year, but I prefer this year's version because the hearts are bigger and the set seem more versatile. I'm probably going to stick this little card into next week's Project Life layout.

(The hang tag version is a preview of something you'll see later today.)

origami boxes

To make the base of these origami boxes I used the instructions shown in this video.

The instructions for the cover:
If you'd like the cover to be slightly larger and have some of the bottom of the inside box show (like the photo above) there is one slight change you need to do. I changed the step that you see 47 seconds into the video (the step where there are folds that meet at the center). Instead of having the folds meet at the center they are each 1/4" away from the center so there will be a gap between the sides that meet. The same for the other two sides of the square. I made my boxes from a 12" square sheet of paper so if you make it smaller you'll have to adjust the 1/4" accordingly.

Step in minute 2:00 of the video: since the change above was made the folding over of the sides may not be exact. Just adjust the folding over the edge as needed. You'll see what I mean if you try it.

If none of this makes sense then just email me and ask! Haha!

• • •

Thank you Martha Stewart Crafts for the goodies!

review: silhouette cameo

silhouette cameo

I ordered the Silhouette Cameo 
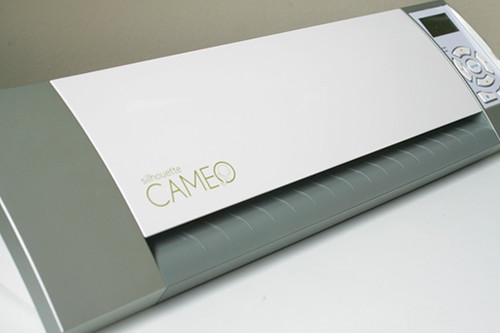
a few weeks ago and just had a chance to use it this week. So far I'm quite pleased with the results.

It is an electronic cutting tool that is simple to use. It hooks up to your computer and with the help of the Silhouette Studio (a free software provided by the machine maker) you can cut purchased files or make your own. I like that the machine is clean in design (not pink or girly) and that it's fairly small (smaller than a Cricut).

silhouette cameo

I tried using the instructional video to learn how to use the machine but it didn't work with my Mac. It kept skipping parts of the presentation. I used the instruction manual to fill in the gaps of information that I missed. I later discovered that I had to download the entire video on to my computer in order to see it. It never played directly from the CD but it played on my computer without problems.

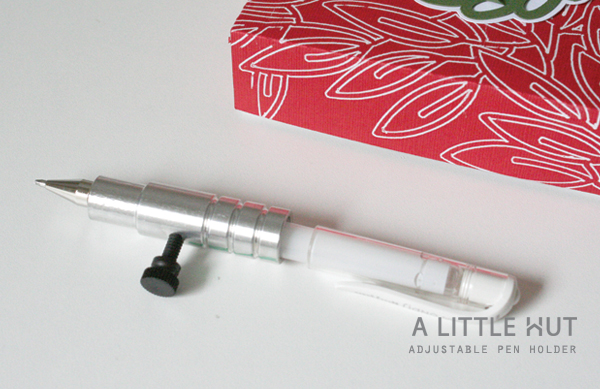
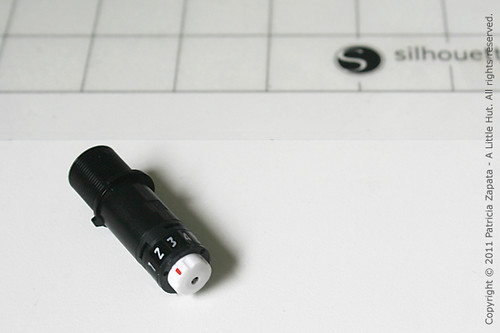
The blade was easy to install. With the use of the software the cutting depth and speed can be easily adjusted. I've heard that there are people having trouble with the blade but I haven't had any yet—then again I just started.

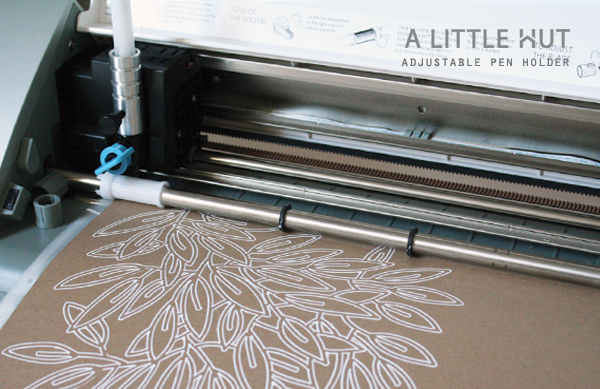
The cutting mat holds up to 12" square sheet of whatever material you're cutting. So far I've only cut paper but vinyl and fabric are other materials that can be used. The width (12") is what finally made me go with the Cameo. The previous SD Silhouette option only cut paper up to 8.5" wide. The cutting mat is  really sticky. I had a hard time detaching larger images. I'm assuming that will not be the case after I've used the mat a couple more times.

silhouette cameo

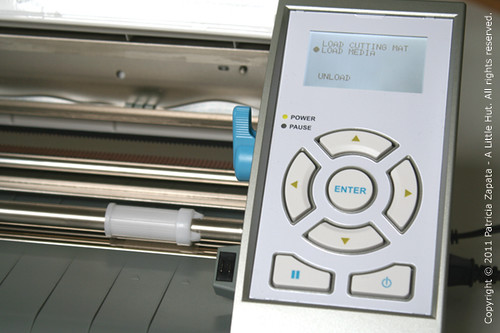
The control panel and buttons are very easy to use and understand. One particular feature that I like is the pause button. If you've cut the wrong size, the wrong color of paper or you changed your mind about anything, this button is key.
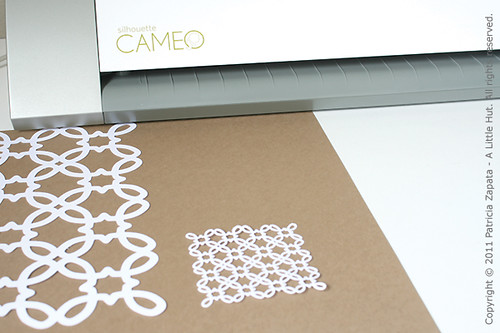
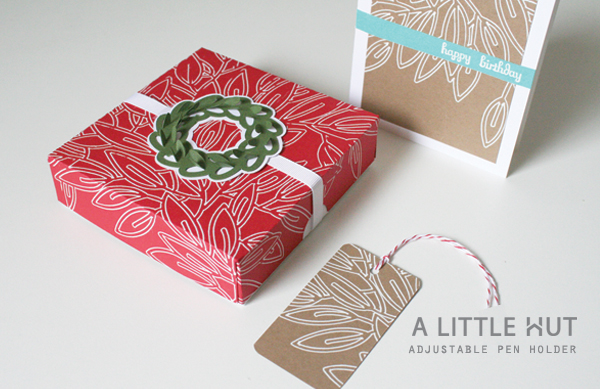
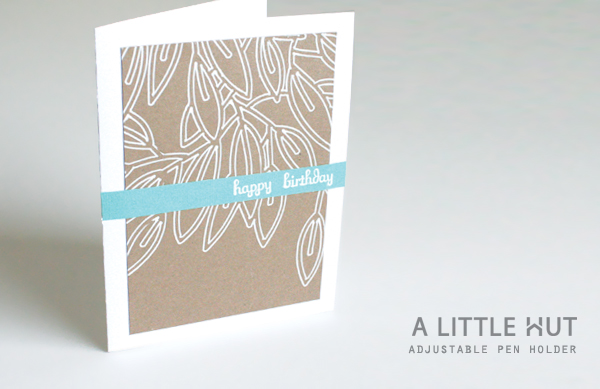
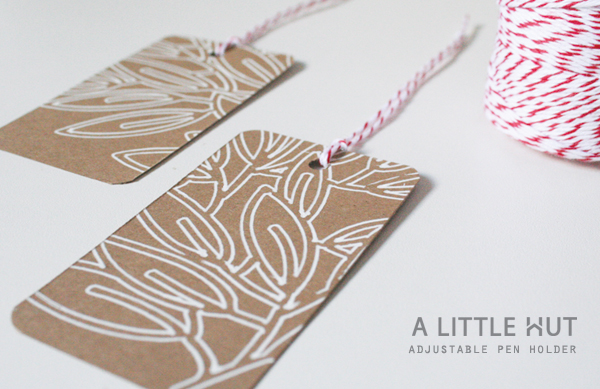
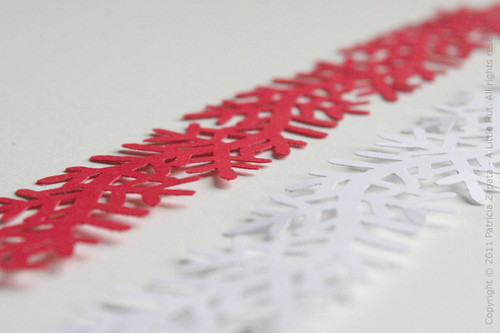
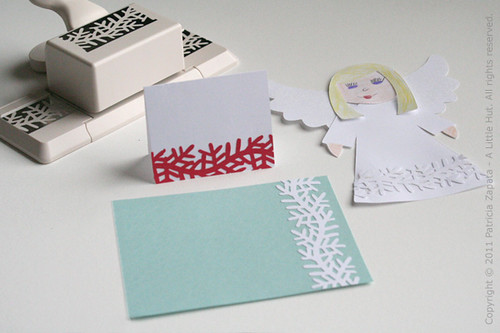
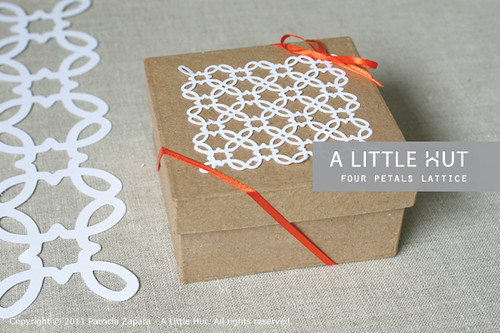
silhouette cameo

I cut my Four Petal Lattice at the 10" square size and it was difficult to remove from the mat without tearing the paper. I suppose that after a couple of uses the stickiness will be more manageable. What I really wanted to see was a smaller version of the file to see how the cutting would hold up with detail. It didn't disappoint. The shapes are crisp and the machine had no trouble at all. The bottom square is only 3" wide.

So...
Pros: 
- I like the way the machine looks and works. I specially like the detail work it can cut.
- Good price point. I ordered my machine when it was $260-ish.
- Free software to use with the machine. I like that it has an easy way to sort and label all images in a library.

Cons:
- As far as I've seen the replacement blades and mats aren't sold anywhere near me. That means I'll be ordering online. Not a big deal, but if I happen to need something urgently, it will be an inconvenience.
- The mat is definitely too sticky but I'm sure that will change with time/use of the mat—it's not a deal breaker.
- When the machine cuts it seems louder than what I'm used to—again, not a big deal.

So far I'm very happy with this machine. The next thing I want to try (if I only had the time now) is the print and cut feature. That will be really interesting to see in action. I'll post my thoughts when I get to it.

lattice

Typically the Silhouette Cameo is sold for $299 but as I said, it can be found at a lower price on occasion. The replacement blade is $19.99 and the cutting mat is $14.99.

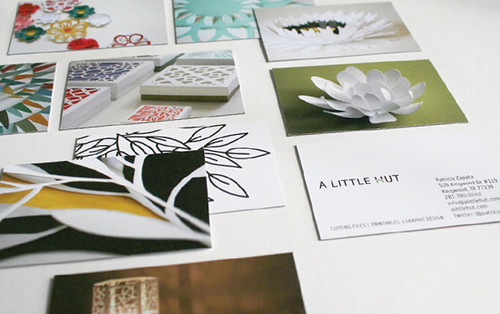
For those of you that have asked—all A Little Hut files can be cut with the Silhouette Cameo. If you have the free version of the software you can import DXF files. If you have the designer edition (additional cost involved) then SVGs can be used.

One last thing...
This was a personal purchase. I was not sent this machine for review, nor was I asked to comment on it.  Only my personal opinions are part of this post.

• • •

EDIT —It's been a few days since this post. I just wanted to add a tip regarding the mat. I know I said it wasn't a deal breaker but it's getting frustrating. The mat is too sticky and the paper tears when I pull it up—and yes I'm carefully using a spatula. I rubbed a piece of fabric on and off of the mat to remove some of the stickiness and it worked.

Another thing... the setting for the depth of cut is something I'm still struggling with. The machine doesn't completely cut through my Paper Source card stock. The Cricut does it with no problem. I guess it's another learning curve.

review: martha stewart paper punch & glitter markers

double-edge paper punch

I received a package from Martha Stewart Crafts and to be honest the Martha Stewart Crafts Pine Needles Trim Double Edge Punch was the thing that got me the most excited. I've seen different designs at the craft store but I had never used one until now.

double-edge paper punch

The cuts are really clean and making a trim only takes a few punches. It really couldn't be any easier to create this embellishment. Even my little C added some trim to an angel that I made for her to put on our tree. Can't you see this on all sorts of projects? Cards, scrapbooking, gift wrapping... the uses are endless.

glitter markers

Martha Stewart Glitter Markers were another lovely surprise. The ink is metallic and it has glitter in it. Very appropriate for this time of the year. Christmas decorations, cards and gift tags will be spiced up with these. This is a four pack of red, yellow, green and silver markers.

All I did was zig-zag the marker back and forth over the red paper. Then I cut the leaves out after the ink was dry. Very easy and I love the look. The kids have been using scraps of paper as bookmarkers (blasphemous in a crafty household—but they take after me!) so the striped version will definitely be for them.

glitter markers

I decided that this Christmas I am going to make a serious attempt at baking something other than the usual cookies I make—so when I saw these boxes I had to grin. They came just in time. For those of you that don't bake I think the Candy Cane Boxes or the Bakeable Trays would be a cute way to give someone some treats (maybe a gift card tucked in there too!). Little C has already claimed the Treat Wrappers—so there is some duo-baking coming my way. 

My waistline? Ahem. Yes, I'm just going to pretend it doesn't worry me for now.

martha stewart packaging

For US residents: The Martha Stewart Crafts products can be found at Michaels and JoAnn Fabric and Craft stores.