
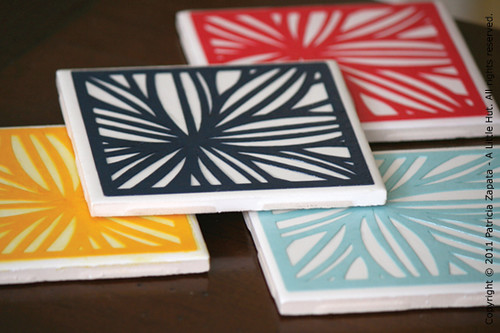
I have a thing for coasters. I don't know what it is but I always need to see what selection is available in whatever shop I'm in. I don't own very many (a good thing that I'm not a compulsive buyer!), but I just find them interesting—maybe because they come in so many different colors and styles. It's amazing how one little square (or circle) can have so many interpretations. I have the same fascination with boxes (may have mentioned that before—can't remember at the moment).
So, you'll imagine how much fun it was to make my own set. I've been wanting to try this out for a very long time—and opening the Mod Podge yesterday was the only nudge I needed.
Materials
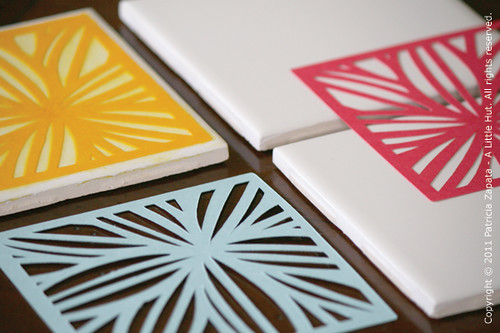
- Blank tiles (found at the hardware store for $0.10 each!)
- Paper cut outs
- Mod Podge or glue
- Brush
- Clear spray paint (gloss or satin)
- Felt circles for the corners of the tiles or felt squares that are as large as the tiles
- Adhesive for the felt
First a disclaimer! - I'm a novice when it comes to the use of Mod Podge. I'm just going to describe what I did—which may not necessarily be what is supposed to be done. All I know is that this worked‚—in the end.
1. Have your cutouts ready before you start. Paint a thin layer of Mod Podge on to the surface of the tile and set it aside (step 2 needs to be done quickly so this doesn't dry).
2. Hold the paper cutout by one corner (not completely flat) on a plastic surface so it won't stick to your work area. I used the plastic cover of an old Cricut mat, but I'm sure that a saran wrapped piece of cardboard would work just as well. After the cutout is completely covered in Mod Podge, let it air dry for a moment or two and lay it over the tile, making sure there are no trapped air bubbles. Use the brush and maybe just a bit more of Mod Podge to completely flatten the paper.
Don't overdo it with the Mod Podge. I think it's more effective if you use more thin layers than fewer with heavier coverage.
4. Once the tiles are completely dry (overnight preferable), add a coat of clear spray paint to seal the surface of the tile. Make sure to do this outside or in a very well ventilated area.
5. Glue the felt to the bottom of the tiles.
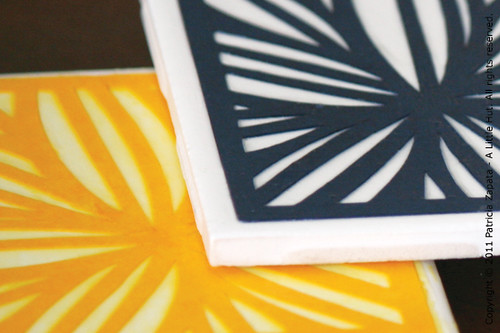
Lesson learned: I had no idea that the Mod Podge would make the color of the paper bleed onto the tile. I don't know if that happened because of the quality of the paper I used, because that's something that usually happens with Mod Podge or because I made a newbie mistake. All I know is that I was really disappointed. After thinking about it for a bit, I came up with the idea of sealing the surface of the paper with Mod Podge before attaching it to the tile (step 2). I worked on the yellow tile first and you can see the yellow stains on the tile. The dark blue tile was my second attempt (with the sealing step) and you can see that it worked like a charm—no bleeds.
Isn't this a great gift idea? And it definitely does not break the bank.
I'm hoping that at a minimum a pretty coaster like this will improve my water drinking during the summer (I'm horrible at that!). I can only hope!
EDIT : If you are interested in making your own set of coasters a Four Pack of patterns is now available in my shop as PDF, SVG or DXF files.

No comments:
Post a Comment