Showing posts with label tutorial. Show all posts

valentine's day flashback


Valentine's Day will be here before you know it! Make has posted a flashback (circa 2011!) project I designed for them. It's a matchbook card/wall art piece that includes easy to follow instructions and a downloadable PDF. Check it out here!

Typically I don't like revisiting old work but this is a rare project that I still like very much. Enjoy!


made in paper


I'm very happy to share that a couple of my projects can be found in the latest issue of Made in Paper! This is the 4th issue of the magazine and I think this is my favorite so far. It's full of a lot of paper goodness, inspiration and easy to make projects.

The Apple Newsstand iPad edition is available today (you can order and see a preview here). It's available in the UK starting today and in about 4 weeks it should be in the US at Borders, Booksamillion and JoAnn's.

Thank you to Made in Paper for letting me join in the fun!


made in paper


I'm very happy to share that a couple of my projects can be found in the latest issue of Made in Paper! This is the 4th issue of the magazine and I think this is my favorite so far. It's full of a lot of paper goodness, inspiration and easy to make projects.

The Apple Newsstand iPad edition is available today (you can order and see a preview here). It's available in the UK starting today and in about 4 weeks it should be in the US at Borders, Booksamillion and JoAnn's.

Thank you to Made in Paper for letting me join in the fun!


gift wrapping: tape border


As you can imagine after winning Scotch Brand's Most Gifted Wrapper contest and the TV presentations that followed I have accumulated a serious stash of Scotch Expressions Tapes. I had seen the tapes on previous occasions but I could never really think of a way of using them. But now the ideas are coming, so I'll be sharing my ideas in the coming weeks 
(just to make it clear—these are not posts that are sponsored by Scotch in any way—yes, I got the products from them, but in connection to the contest and that's it).


Tape border wrapping
This is an idea that I came up to use during the contest. [Insert big laugh here!] That round was a disaster! Things definitely did not go as planned. I thought it would be cool to show a different way of using the tapes and here it is...

Steps
  1. Measure and cut the wrapping paper (this project is perfect to enhance something more mundane like butcher or kraft paper!) making sure to add an extra 3in. or so.
  2. Crease the paper at three points (along the width of the paper) as you can see in the second photo. The second area will need to be the widest since it will be the section that will show off the tape designs and colors.
  3. Add alternating strips of colorful tape across two of the folds but not past the third one. As you can see another beauty of this idea is that you can do this fairly quickly and the ends of the strips of tape don't need to line up. The pleats will hide the "messy" work.
  4. Turn the wrapping paper over and tape the creases down so that the pleat stays in place.
  5. The nice thing about this idea is that the seam will not be visible because the gift is wrapped and taped at the TOP of the box. So start by wrapping the box at the top and make your way around until the taped edge is on the top and covering the seam of the opposite end of the wrapping paper. I like to keep the colorful band of tape off center to make it look a bit more interesting. 
  6. Finish wrapping the gift the way you normally would, add a tag (I decorated it with tape and attached it with the same crochet thread I used in my 3D paper embroidery project) and you're done!

martha stewart circle edge punch tutorial


I was approached by the team at Martha Stewart and asked to use the Circle Edge Paper Punch and the Diamond Lace Punch for any type of project that I wanted to make. These layered flowers are the result. 


If you'd like to make these Paper Punched Flowers and other projects using these punches you can follow the tutorials on the Martha Stewart site here. The punches make these flowers very easy to make. They really are simpler to make than they appear!

how to make a teardrop ornament

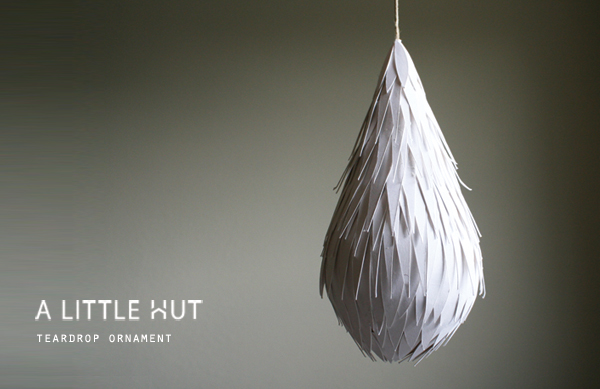
teardrop ornament

This is a project where you can make use of your scraps stash and make something for the holidays. There's still time to make a brighter, more colorful version for yourself. It's really easy to make too!

For those of you keeping track—yes, this was another project that would've been in book #2 but in this case I don't have the step-by-step photos. However, I think it's fairly easy to follow. I just wish I would've posted it sooner!

Materials
- A letter-sized sheet of office paper or similar
- Scraps (all one color or multi-color - you decide!)
- Stapler
- Twine
- Scissors
- Glue
- Styrofoam ball (at least 3" or 8cm wide)

Steps
1. Print out the template found here. Cut out the shape and roll it until it forms a cone shape. Open or tighten the bottom opening until half of the styrofoam ball fits snugly inside. Staple the edges of the cone shut.

2. Thread a piece of twine through the top of the cone (if you forget this step you can always glue it to the side of the cone and cover it with all the scraps as you add them to the cone).

3. Glue the styrofoam ball inside the bottom of the cone. Half of the ball should be outside of the cone.

4. Cut a bunch of triangles out of the scraps of paper—eeach approximately 1" (2.5cm) tall and 0.5" (13mm) wide.

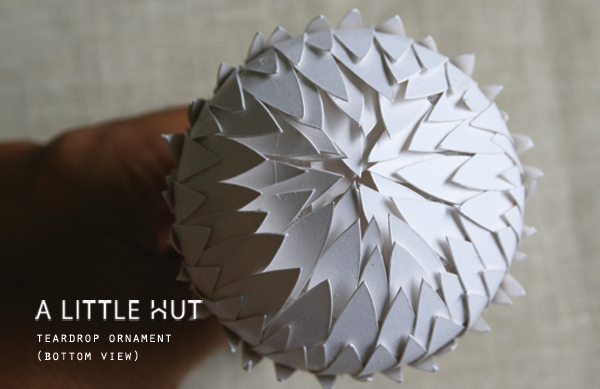
5. Start gluing the scraps on the base of the ball. Work in layered circles until the entire ornament is covered. The last layer of paper scraps at the top of the ornament needs to be more oval in shape (narrow on both ends) so that they cover the top neatly.

Done!

More ideas to use your scraps? Look in my tutorials section.
Have a great day!

teardrop ornament

simple monday - paper punch flower

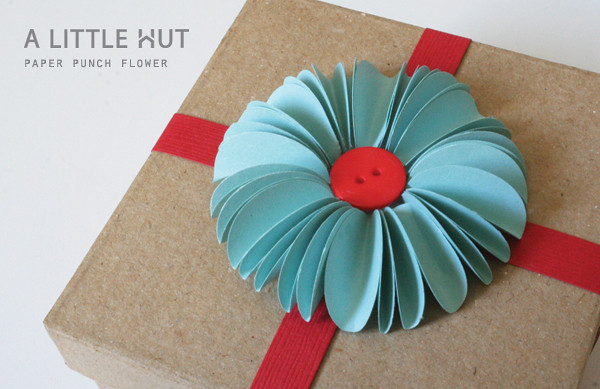
paper punch flower

Sometimes you just need a quick project that you can mindlessly work on while watching TV or listening to good music. This is one of those—super easy.

Materials
- 1.75 in. circle punch
- 1 in. circle punch
- Button
- Foam dots
- Glue

Instructions
- Punch out one 1.75" circle to use as a base and 30 1" circles for the petals.
- Attach the button with foam dots to the center of the large circle.
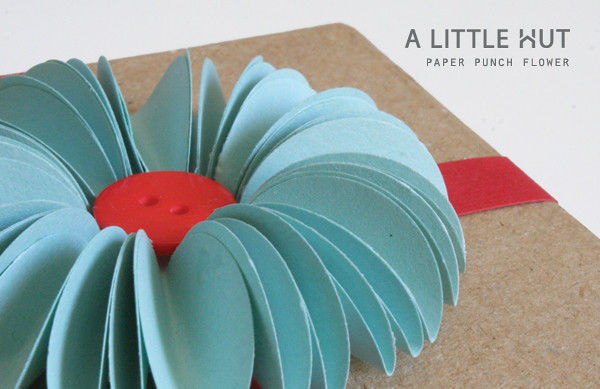
- Fold all the small circles in half. Glue them around the button (with the edge of each circle tucked under the button). I creased some all the way and some only slightly which make the latter petals appear more open—giving the flower an uneven look/texture.

This flower is similar to the one in a previous tutorial but the difference is that these petals are standing upright and not on their side.

Tips!
- Leave the center empty (no button) and use green paper to use it as a wreath gift topper!
- This is a perfect project to use up scraps—make it multicolored!
- It can also be a recycling project by using magazine pages.

Happy Monday!

paper punch flower

simple monday: lacy card

lacy card

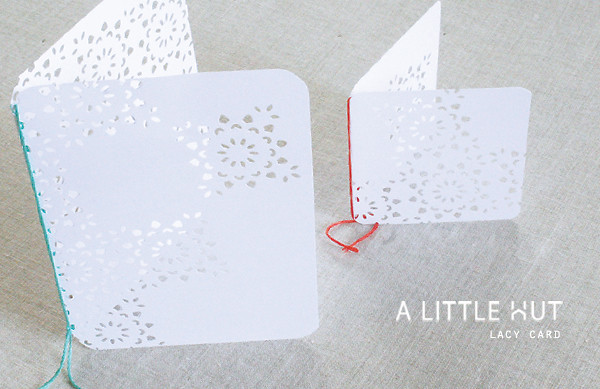
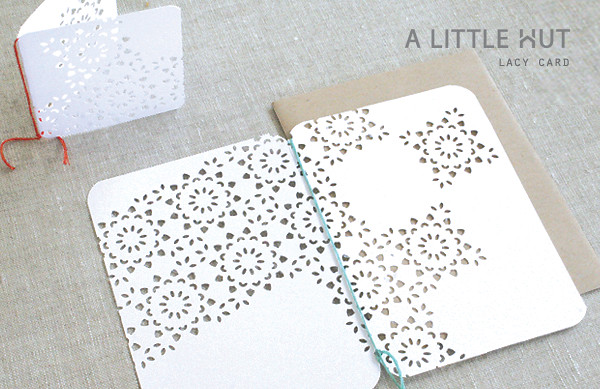
In a moment of being absolutely stuck on a project I decided to take a break and make a thank you card for a friend. I had no idea what I was going to make but since I was short on time I knew it had to be simple. I went for my safe bet—white paper and a paper punch—and I piggy-backed on my idea from  last Monday.

I used the Martha Stewart Crafts Stained Glass Punch all Over the Page design. My first thought was to add a sheet of colored paper inside the card but I decided to go a little unconventional and leave it as is. I made sure to leave enough space for a message, added embroidery thread for a touch of color and rounded the corners. A small scrap became a gift tag. That's it!

I always say... simple is so much better!
Happy Monday!

lacy card

simple monday: cut out designs on box covers

simple monday - decorative cover

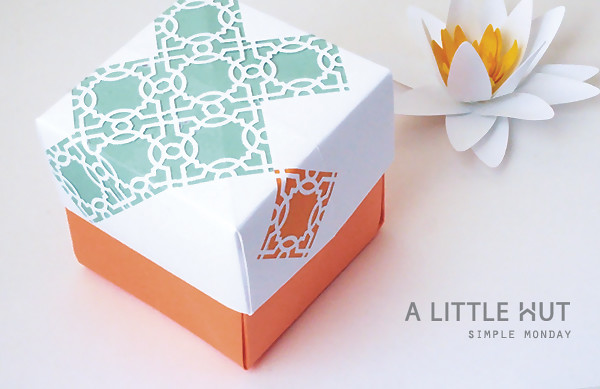
You're going to think that I'm a one-track mind, but when I work on a particular project or use certain tools my mind keeps going and going. I can't help trying to come up with something else—a different angle or idea. So here's today's simple project...

Materials

- 12" x 12" sheet of white card stock
- 12" x 12" sheet of orange card stock
- Scraps of contrasting colored paper just large enough to cover a select amount of cut out designs.
- Optional : an extra sheet of card stock to make an extension like I showed you in my previous post.
- Martha Stewart Crafts All Over The Page Punch, Caning (video of how to use it)
- Glue

simple monday - decorative cover

Steps
- Fold the cover and bottom of an origami box (just like in my previous post).
The advantage of an origami box for this project idea is that once it is all folded up the colored paper used in the background is all covered and secured within the folds.

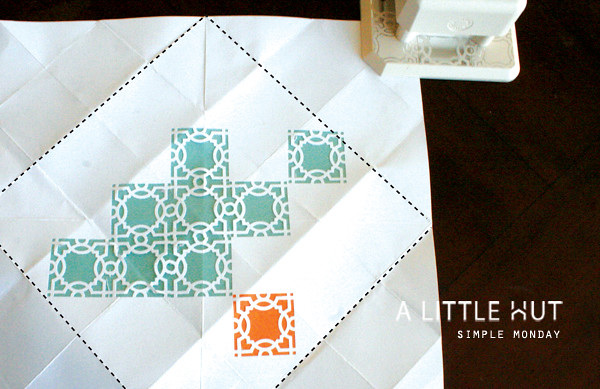
- Unfold the cover and use the All Over The Page punch in a random pattern. Leave some negative spaces too—white areas are visually attractive too!
I don't recommend punching anything beyond the black dotted lines (see photo below). Anything punched beyond those lines would end up inside the box cover and the opening and closing of the box may tear the cut out design.

- Glue the scraps of colored paper to one side of the white sheet.

- Refold the box cover. You will need to re-crease the folds firmly in order to fold the colored paper. Be careful not to tear the cut out sections of paper.

- Optional - add an extension to the base.

- Cover your box.
That's it!

TIP!—For those of you that have cutting machines
Use one of your favorite SVG flourishes and repeat it in a similar pattern to get the same effect. Just make sure the lay the paper really well by flatting out all the folds in the sheet.


Happy Monday!

[The flower is one of my favorite designs: Water Lily]

simple monday - decorative cover

how to make a larger origami box

origami boxes 1

Yesterday I had a little break that I needed to fill with making something—anything. You know that feeling when your hands need to be busy?

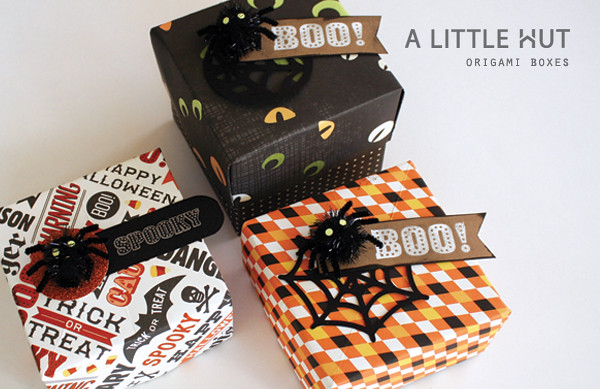
I stood in front of my materials and tools and I decided on tackling something for Halloween. I ended up making some goodie boxes for the kids and my Mr. Z.

When I was completely done with the folding, stamping, decorating, etc. I thought that it would be fun to figure out how to make them larger without having to resort to making a geometric/complicated project and using what I had already finished.

[Confession: There are times that when I make something for fun I don't like using my computer or cutting machine. I think that's why I enjoy crocheting and knitting so much—no fancy gadgets—just your hands and yarn. The same applies to paper projects. Just give me some scissors/trimmer, paper and glue. Bliss! Then again there's the occasional "just for fun" project that ends up like this—talk about a lot of math—lol!]

Materials
- Spider webs from my Halloween Kit
- Martha Stewart Crafts Designer Paper Pad, Carnival
- Martha Stewart Crafts Cling Rubber Stamp Set, Carnival
- Martha Stewart Crafts Sticker, Carnival Pom-Pom Spider (surprise! when I placed the boxes in a dark corner last night I discovered that the spiders' eyes glow in the dark—very cute! I'm surprised it isn't mentioned anywhere on the packaging.)
- White embossing powder
- Silver embossing powder
- Strips of black and kraft paper
- Martha Stewart Crafts Heat Tool

Steps for the top and bottom of the box
To make the origami boxes simply follow the steps here (you just need to watch the first 2:40 minutes  to do what I did). I used to make origami boxes by using scissors in one step. I no longer make them that way.

Paper sizes:
Top of box: 12" x 12"
Bottom of box: 11.5" x 11.5"

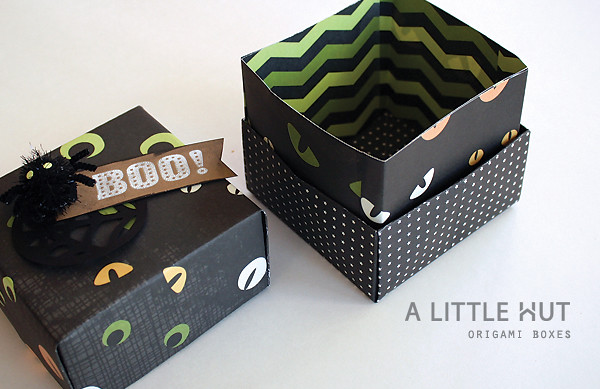
Size of the finished box with extension: 4" x 4" x 3.5"

origami boxes 2

Steps for the extension
- Cut two pieces of paper that are 3.5" x 11.5"
- Fold each one in three sections by sliding a sheet inside the bottom box and pinching it where it meets the corners. Pull it back out to crease completely.
- Repeat the process with the second sheet.
- Glue the sheets to one another as you see in the bottom graphic (two U shapes facing one another). Make sure that they are going to be in the right position—not to tight to slide into the box and not too loose either.
- Once the glued pieces are dry tuck them back into the boxes and there you have it—larger boxes!

In the photo above the extension is just placed inside the box and I hadn't glued it to the sides. As you can see, this is definitely a way in which you can play with what patterns are placed inside vs. outside.


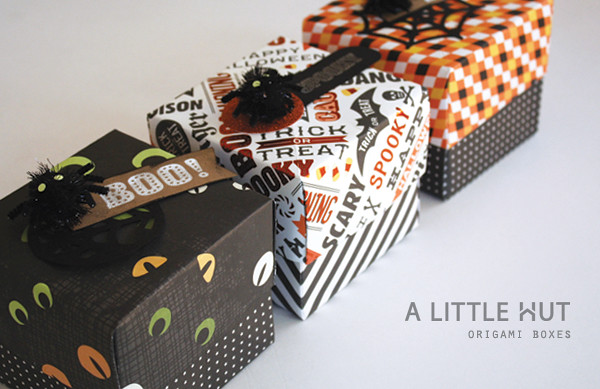
Now that all the boxes have the extensions in place they are almost twice as big and the patterns of the bases are visible. Can you see how this can translate to Christmas or any other occasion?

The embellishments for these boxes are really simple. I simply selected a stamp and heat embossed it onto a strip of black or kraft card stock. Each strip is stacked with either a cut out of a web design or a glitter paper circle and a spider. That's it!

origami boxes 3

Have a wonderful weekend everyone!


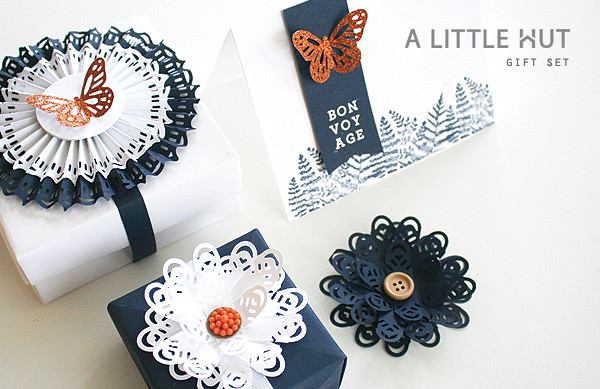
how to: card & embellishments gift set

gift set 1

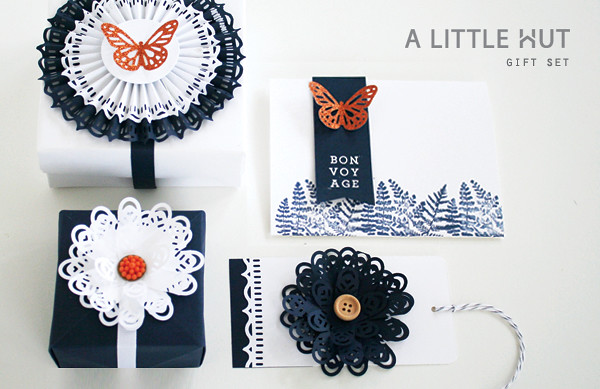
Since the busiest gift giving season will soon be upon us (whether we want to believe it or not) I decided to create a set that shows you how to combine different tools to make gift embellishments and a card idea. Keep in mind that the flower idea can be made with many colors and even be a useful way to use small scraps (you know I enjoy those projects).
gift set 2

Flower

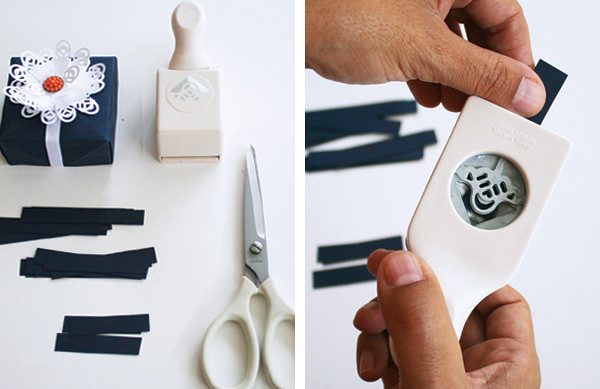
The Martha Stewart Punch Around sets are a great way to add a decorative border to any project. But instead of showing you how that works (you can see that here) I decided to make something that uses them in a different way. This simple flower just uses the corner punch!

Materials:
- The corner punch of a Martha Stewart Punch Around Punch set
- One letter-sized sheet of dark blue paper
- Paper trimmer or scissors
- Glue
- Button
gift set 3

Steps:
- Using the paper trimmer cut 20 - 1/2" x 3" strips of paper and 3 - 1/2" x 2" strips of paper

Note: If you have a different corner punch design, experiment with the width of your strips to see what makes the most pleasing design for the tips. I started with a wider strip and started narrowing it down until I liked the shape that was formed.

- Punch the design centered on both ends of all the strips.
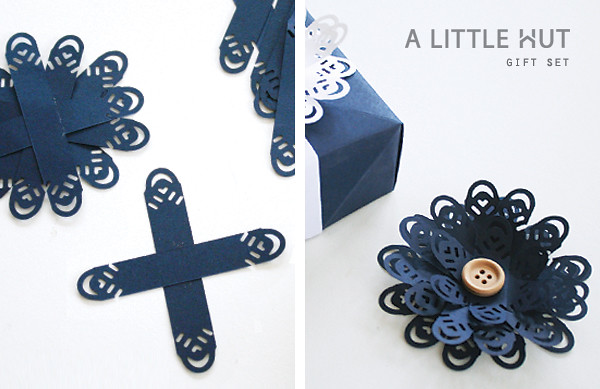
- Glue 10 strips in a crisscross fashion and keep them flat.
- Do the same with a second set of 10 strips but curl them up when dry.
- Glue and crisscross the 3 smallest pieces and curl them as well.
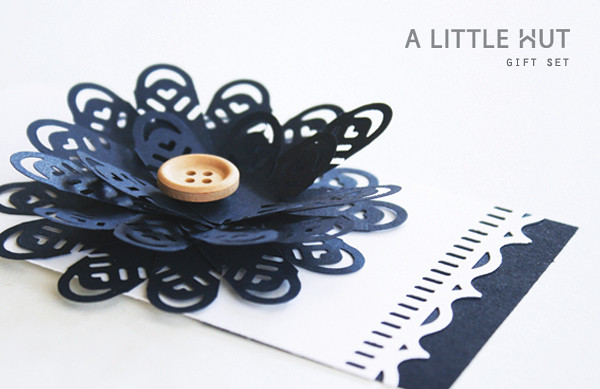
- Stack and glue all three flower pieces with the smallest one at the top.
- Attach a button or other embellishment to the center.

Other ways to use this flower: frame several as wall art, add them to napkin rings, use as a gift topper or include one in a gift tag, scrapbook page or card design.
gift set 4

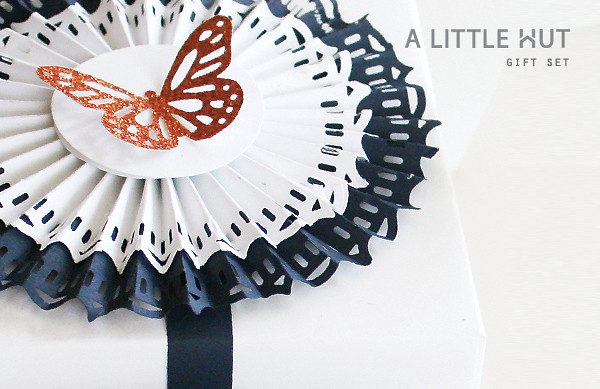
Rosette

Materials:
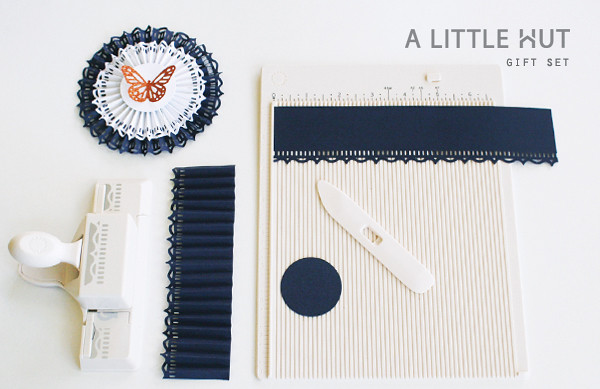
- The edge punch of a Martha Stewart Punch Around Punch set
- Martha Stewart Crafts Mini Scoring Board
- Martha Stewart Crafts Large Punch, Monarch Butterfly
- 1.25" Circle punch (punch one white circle and one dark blue circle)
- Paper trimmer or scissors
- Two 2" x 8.5" strips of dark blue paper
- Two 1.5" x 8.5" strips of white paper
- Orange glitter paper (in this case I used a sheet that is part of the Martha Stewart Crafts Designer Paper Pad, Carnival)
 - Glue
gift set 5

Steps:
- Punch all four strips of paper along one side with the edge punch.
- Using the mini scoring board, score all the strips every 1/4" and fold them in accordion style.
- Glue the two blue pieces together (along the short end) making sure that the punched designs match up. Glue the opposite ends to form a band.
- Repeat the previous step with the white strips of paper.
- Push and glue the straight edged center of the blue paper (now a cylinder) down and centered over the blue paper circle. Place something heavy on the rosette until it dries.
- Glue the white folded paper over the blue paper making sure that the folded edges match up.
- Glue the white circle over the entire rosette and set it aside to dry with something heavy on top.
- Cut out a paper punch butterfly from the glitter paper. Slightly fold it in the center and glue it to the center of the rosette.
gift set 6

Stamped and embossed card
(a replica of a card I made just last week for a friend that is going to live overseas)

Materials
- 8.5" x 5.5" white card stock folded in half lengthwise
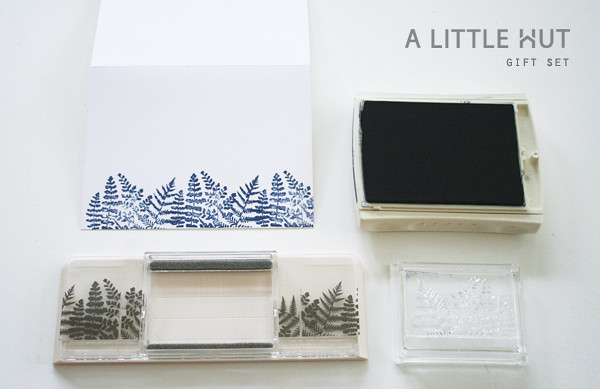
- Martha Stewart Crafts Around the Page Starter Set Stamp
- Dark blue ink pad
- Martha Stewart Crafts Heat Tool
- Martha Stewart Crafts Set Your Own Stamp Case
- Versa Mark ink
- White embossing powder
- Dark blue paper
- Paper trimmer or scissors
- Martha Stewart Crafts Large Punch, Monarch Butterfly
- Orange glitter paper (Martha Stewart Crafts Designer Paper Pad, Carnival)
- Glue
gift set 7

Steps:
- Stamp the fern design along the bottom of the card.
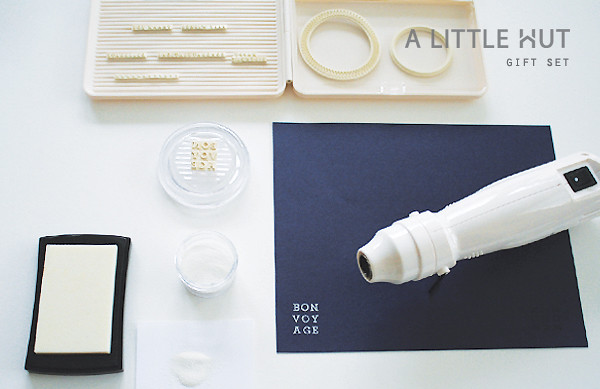
- Arrange the sentiment that you will be adding to your card using the Martha Stewart Crafts Set Your Own Stamp set. It's very easy and quick to do!
- Stamp your sentiment on the dark paper using Versa Mark ink. It will seem almost invisible.
- Before the ink dries dust white embossing powder all the letters. Shake off the excess.
- Heat the powder with the heat tool until you see that all the letters have been embossed. The powder will have a shine to it when it's completely set.
gift set 8

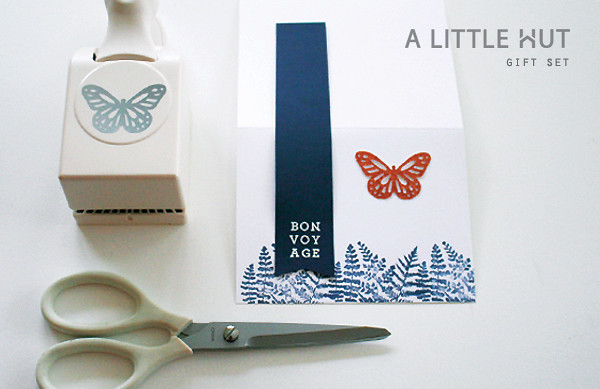
- Cut out the sentiment from your page using a paper trimmer. Allow for some room on either side of the message.
- Use scissors to cut out an upside down V (ribbon-like) ending to the strip of paper.
- Measure and cut the paper so that it fits on the front of the card only.
- Punch out the butterfly from glitter paper, slightly fold it in half and attach it to the blue sentiment paper "ribbon".
gift set 9

Origami gift boxes
I simply used the same steps that I used for this long ago project. Easy!
gift set 10

Martha Stewart craft tools always meet my expectations or exceed them. Their quality and versatility are of great importance to me because I do make a lot of handmade gifts and such and I know that I will be using them for a long time. One more thing, which may be minor for many is the fact that the tools are a neutral light color has always thrilled me to no end—they feel very me.

• • •

Disclosure: I received these craft tools to try them out as part of Michaels Craft Month where you can find all these Martha Stewart products and so much more. All opinions are my own.