
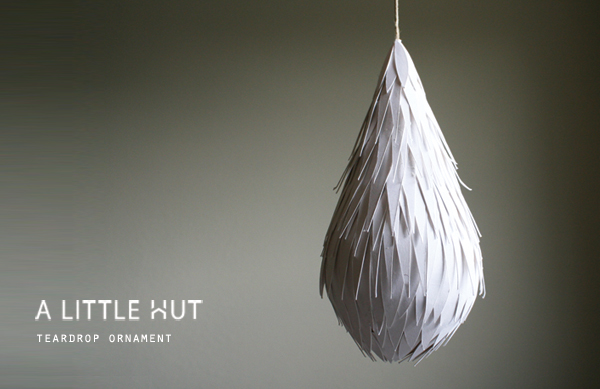
This is a project where you can make use of your scraps stash and make something for the holidays. There's still time to make a brighter, more colorful version for yourself. It's really easy to make too!
For those of you keeping track—yes, this was another project that would've been in book #2 but in this case I don't have the step-by-step photos. However, I think it's fairly easy to follow. I just wish I would've posted it sooner!
Materials
- A letter-sized sheet of office paper or similar
- Scraps (all one color or multi-color - you decide!)
- Stapler
- Twine
- Scissors
- Glue
- Styrofoam ball (at least 3" or 8cm wide)
Steps
1. Print out the template found here. Cut out the shape and roll it until it forms a cone shape. Open or tighten the bottom opening until half of the styrofoam ball fits snugly inside. Staple the edges of the cone shut.
2. Thread a piece of twine through the top of the cone (if you forget this step you can always glue it to the side of the cone and cover it with all the scraps as you add them to the cone).
3. Glue the styrofoam ball inside the bottom of the cone. Half of the ball should be outside of the cone.
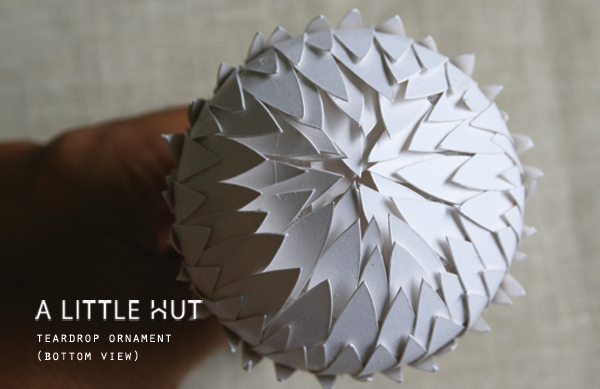
4. Cut a bunch of triangles out of the scraps of paper—eeach approximately 1" (2.5cm) tall and 0.5" (13mm) wide.
5. Start gluing the scraps on the base of the ball. Work in layered circles until the entire ornament is covered. The last layer of paper scraps at the top of the ornament needs to be more oval in shape (narrow on both ends) so that they cover the top neatly.
Done!
More ideas to use your scraps? Look in my tutorials section.
Have a great day!
No comments:
Post a Comment