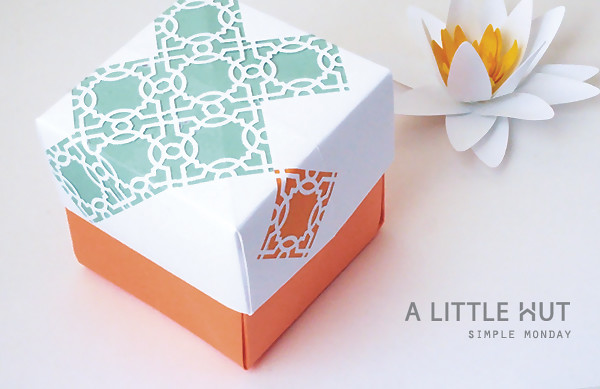
You're going to think that I'm a one-track mind, but when I work on a particular project or use certain tools my mind keeps going and going. I can't help trying to come up with something else—a different angle or idea. So here's today's simple project...
Materials
- 12" x 12" sheet of white card stock
- 12" x 12" sheet of orange card stock
- Scraps of contrasting colored paper just large enough to cover a select amount of cut out designs.
- Optional : an extra sheet of card stock to make an extension like I showed you in my previous post.
- Martha Stewart Crafts All Over The Page Punch, Caning (video of how to use it)
- Glue

Steps
- Fold the cover and bottom of an origami box (just like in my previous post).
The advantage of an origami box for this project idea is that once it is all folded up the colored paper used in the background is all covered and secured within the folds.
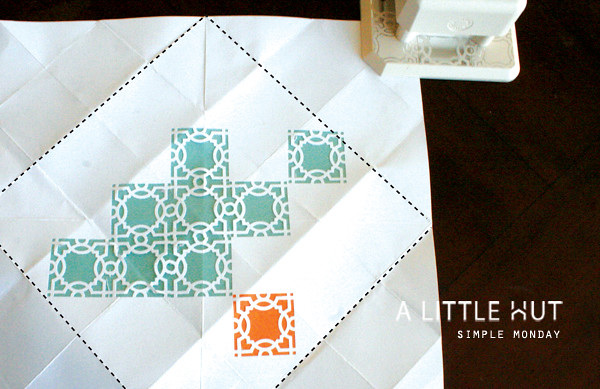
- Unfold the cover and use the All Over The Page punch in a random pattern. Leave some negative spaces too—white areas are visually attractive too!
I don't recommend punching anything beyond the black dotted lines (see photo below). Anything punched beyond those lines would end up inside the box cover and the opening and closing of the box may tear the cut out design.
- Glue the scraps of colored paper to one side of the white sheet.
- Refold the box cover. You will need to re-crease the folds firmly in order to fold the colored paper. Be careful not to tear the cut out sections of paper.
- Optional - add an extension to the base.
- Cover your box.
That's it!
TIP!—For those of you that have cutting machines
Use one of your favorite SVG flourishes and repeat it in a similar pattern to get the same effect. Just make sure the lay the paper really well by flatting out all the folds in the sheet.
Happy Monday!
[The flower is one of my favorite designs: Water Lily]


No comments:
Post a Comment