Showing posts with label recycling. Show all posts

make a storage bin with a cutting mat

recycling project - cutting mat bin

Happy Earth day!

I promised to show you this cutting mat project long ago but it got pushed down my priority list. I decided that today was the day—very appropriate since I'm upcycling something I'm sure many of you have too. By the way, to avoid confusion, I'm not talking about a self-healing cutting mat. I'm talking about the sticky mats used for electronic cutting machines.

I don't know about you but I beat my cutting mats to death (I use the Cricut and Silhouette mats). Once they are done, they are done! I don't like to add new chemicals and whatnot to make them sticky again. Instead I save them and use them for other projects. This is one of the ideas I've actually made and used (great for sock drawers!).

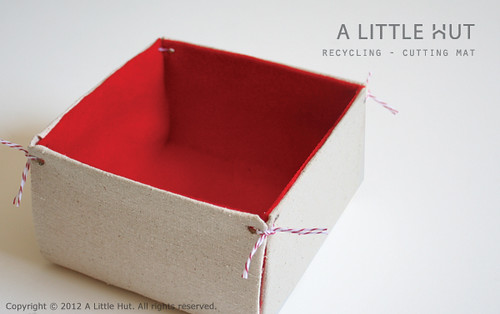
This is a simple project, very useful and there are many ways to tackle this. I've seen similar storage bins made with cereal boxes and such and everyone does it differently.  I decided to use fabric, even though it isn't my first go-to medium (you all know me and sewing!) because it gives the project a 'homier' feel. It happens to look a bit "Christmassy" because I only used what I had.

Here is what I used and the steps I followed...

Materials
- one cutting mat (in this case it's a 12" square Cricut machine cutting mat)
- scissors
- ruler
- pencil
- hole punch
- fabric
- felt
- tape
- Aleene's Tacky Glue
- We R Memory Keepers Crop-A-Dile Eyelet and Snap Punch (optional)
- twine


Step 1
Cut off the excess from the top and bottom of the cutting mat. I measured the width of the green side borders and used that as a guide for the top and bottom. In essence we need a perfect square and keeping the grid of the mat in the center is essential for making the rest of the project go smoothly. Keeping the grid in the center helps to use it as a guide for the following step.
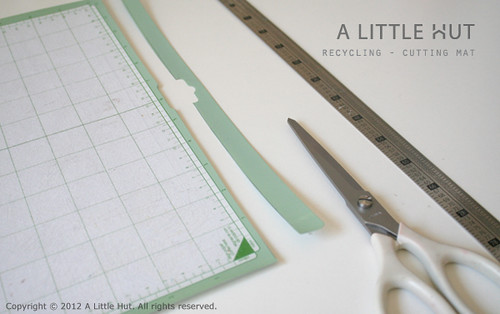
recycling project - cutting mat bin

Step 2
Cut out a square from one of the corners that is a little over 3" (5cm) wide. I cut along the 3" mark on the cutting mat until the adjacent sides intersected. Repeat this for all the remaining 3 corners.

Note: If you don't have a We R Memory Keepers Crop-A-Dile Eyelet and Snap Punch use a regular hole punch to make holes in each of the corners (as shown in the diagram). If you do have one, you can skip this step and do it in Step 6.
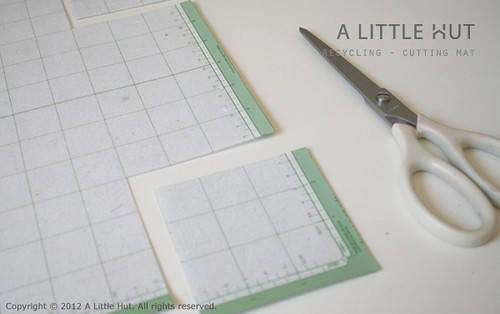
recycling project - cutting mat bin

Step 3
Cut out a piece of fabric that is at least 1" (2.5cm) wider than the cutting mat. Make the diagonal cutting marks shown as black dotted lines in the diagram below. As you can see in the photo (step 5) I didn't exactly follow strict measurements but I will tell you that a minimum of a 1" (2.5cm) border is much better to have.

Gently bend each corner of the cutting mat along the red dotted lines. Be careful that you don't apply to much pressure or crease to roughly. My mat cracked a bit when I tried to make my crease a bit more defined.


Step 4
Place the mat (sticky side down) onto the fabric. Fold over the outer corners of one section of the fabric first and tape them down to the mat (yellow triangles in the diagram). Fold over and tape the remaining three sides (blue areas) like you're wrapping a gift. Repeat the same steps for the remaining three sides of the mat.

Note: the taping doesn't look pretty but it won't be visible in the end. Another option is to do this whole bin as a sewn project but I went the easier (for me) route.

recycling project - cutting mat bin

Step 5
Cut out a piece of felt that is about 1/8" (3mm) smaller than the wrapped cutting mat. Glue the felt to the taped side of the cutting mat.
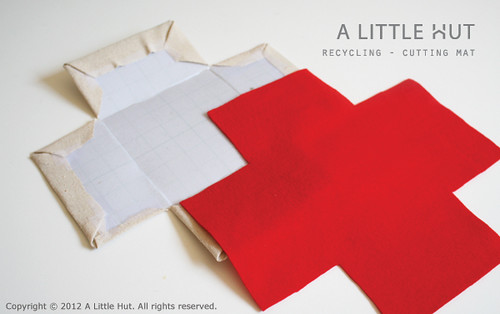
recycling project - cutting mat bin

Step 6
Using the We R Memory Keepers Crop-A-Dile Eyelet and Snap Punch I made holes in each of the corners (it cut through all the layers like butter!). Cut a double strand of twine that is about 4" (10cm) long, thread it through the holes on two adjacent sides and tie it with a double knot.

Note: I decided not to use eyelets (the only thing I have here at the moment) because I didn't want that "flowery" opposite end of an open eyelet to be visible on the inside of my bin.
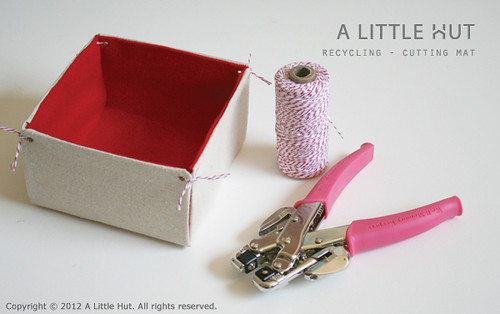
recycling project - cutting mat bin

If you don't have a Crop-A-Dile you can use a simple hole punch. I would recommend punching holes in the cutting mat before wrapping it in fabric. Once you are ready for the twine, use a large embroidery needle to thread the twine through the fabric where you feel the hole that you've made at the beginning of the project.

• • •

There are many other projects that can use cutting mats in place of cardboard for support. Some other ideas include:
- mini-album covers
- small booklets or matchbook covers lined with either fabric or paper
- the inside bottoms of handbags or totes
- etc. etc.

If you have any other options or you try this project let me know in the comments. I'd love to see!

Have fun!

recycling project - holiday ornament

recycling project - ornament

There were so many ways they could've gone. The majority of you that voted wanted me to work in paper (such anguish -- haha!), so I did. I'm not quite sure how I ended up with this version, but it certainly wasn't my first attempt.

Surprisingly, the biggest challenge was making something that would be a compliment to the outer frame and not be overwhelmed by it. A couple of my initial designs were too delicate or small and seemed to disappear inside the ring.

Another challenge (one which I face with all tutorials) is that I wanted to create something that would be very easy to replicate and still look interesting. Incidentally, although I call this a challenge, it is one of my favorite parts of the process.

Materials
Cardboard ring (this one in particular is from a roll of painter's tape)
White paint
Brush
White card stock
Red card stock
Push pin
Red embroidery thread
Glue
Craft knife
Cutting mat
Metal Ruler
Paper trimmer (optional - if it is used, it will eliminate the need for the last three items on the list)

recycling project - ornament

1. Paint the entire ring white. Set it aside to dry.

2. Cut white strips of card stock that are slightly narrower in width than the width of the cardboard ring.

3. Glue the strips to one another by overlapping 1/4" (5mm) of each end of the strips. You should end up with a strip that is at least 60" (152cm) long.

4. Fold the strips accordion style at 3/4" (2cm) intervals. Glue the opposite ends of the folded strip to form a full circle.

recycling project - ornament

5. Using the push pin or something similar, make one hole in the center of the width of the ring. Thread a length of embroidery thread through the hole that is long enough to hang the ornament.

6. Tuck the ring of folded white strips inside the card board ring. Add dots of glue to the edges of some of the outer folds of the white paper and glue to them to the inside of the ring.

7. Cut six strips of red paper that are the same width of the white strip and twice as long as the height of the folds. Fold each red strip in half.

recycling project - ornament

8. Tuck the red pieces inside the folds of the white paper to form a 6 point star. You may need to move the pieces around several times until you find the ones that make the star look symmetrical. Once they are in the right place glue the red paper to the inside of the accordion folds.

recycling project - ornament

VARIATIONS:
- If you don't have a cardboard ring make your own ring by creating a circle with a strip of card stock that wraps around twice.
- To make a "greener" version of this ornament use old book pages or magazine pages instead of the white card stock. You wouldn't need to add the red paper simply because the magazine paper would already be colorful enough.

That's it! Simple and easy. Right?

Happy Monday!


an ornament needs your help

alittlehut-2001ornament1

Ok, I need your help. When I finished using a roll of painter's tape, I was left with this cardboard ring. I decided that it should become a holiday ornament (no use denying that time of the year is nearly here!), but after painting it white (to have a nice place to start from) I got derailed.

I have several ideas that involve different materials, but I can't decide what direction I should take. The pressure is completely off on this project—it's for fun. So, I thought you may want to help me decide. Fear not, I will turn this into a tutorial, so I'll show you what I did next week.

alittlehut-2001ornament1b

I could easily leave it as is. It crudely reminds me of of this beautiful jewelry. But, I want to develop this further. In fact, this is the first of my ornament series for the end of the year. Fun!
Are you game? If so, click here to take my two question survey. I'll keep the survey open until Friday at midnight. Thank you for joining in!
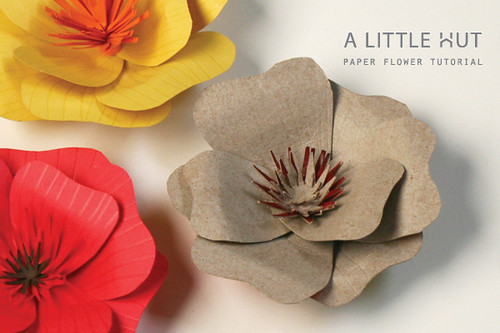
how to make a flower (earth day style)

earth day style

Happy Earth Day!
I'm so glad that you enjoyed my flower project. Thank you so much for your kind comments!

In honor of today's celebration, I decided to make the same flower, but showing you that you really don't need craft store bought materials and tools to make one. This is as simple and as eco-friendly as I could make the project.

Materials
- Thin cardboard (for the flower petals and to replace the use of the cutting mat)
- Pencil
- Scissors
- The dull side of a table knife (instead of the bone folder)
- Scissors
- Clothespins (optional)

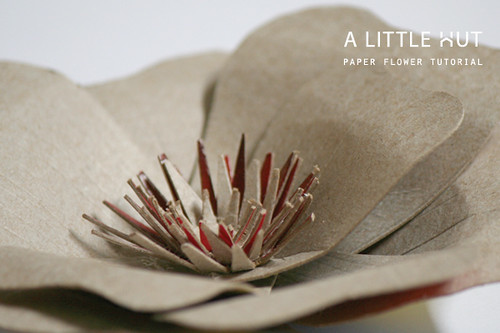
To make this flower I followed the same steps as in yesterday's tutorial. To get a bit of color in the center, I made sure that the two largest stars where cut out of cardboard that had a lot of color on the reverse side. I used the color side (face up) for those two stars and the plain cardboard side for the two smallest stars.

The cardboard color is obviously not as striking as the red paper. The solution is to add paint to the petals, before putting the flower together, or to make the flower out of pages of an old book or a magazine. To be honest paper would probably be a better idea than the cardboard—it's flexibility makes it easier to create a graceful petal and the scoring marks are more visible.

• • •

If you're in search of more recycling projects here are some sites with a variety of ideas:
- Craft - [thank you Craft for yesterday's feature!]

Have a great weekend & Happy Easter!


earth day style

new recycling projects

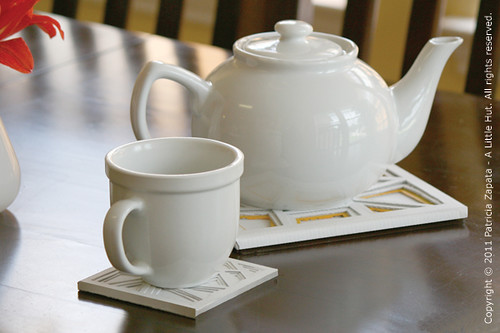
recycling - coaster & trivet

More projects! That's why I've been so quiet—and I can't even show you the majority of what I've been working on. I've dipped my hand alternatively into handmade and design work all week—so that makes me happy, but very busy.

The two that I can show you, are recycling projects that are perfect for Earth Month. They are ideas that I had in the back of my mind for a while and I decided to post them as my entries for the Green Is Universal contest.

Here are my two entries:
1. A coaster and trivet set made out of cereal boxes (top photo)
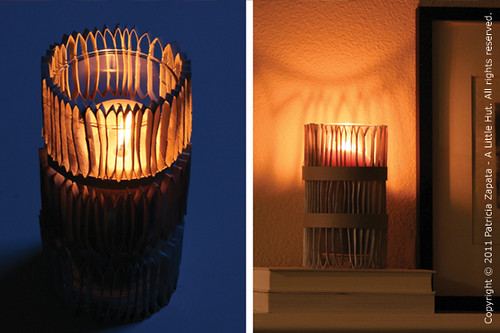
2. A hurricane cover made out of paper towel cardboard tubes

recycling - hurricane cover

This is going to be a month of a lot of behind the scenes work. I'm loving what I've accomplished so far. As I'm able to I'll share. I promise!

Have a great weekend everyone!

• • •
EDIT - Voting is open but only if you create an account using the Login button at the top right. Thank you so much to those of you that have voted! :)

recycling project - wrapped hearts

wrapped heart

Cardboard boxes seem to accumulate very easily, so I keep trying to come up with ways to use them. To end my week of heart projects, this is a really quick and simple one that was inspired by my yarn gift tag.

At first, I used a heart that had a pointy bottom like my SVG heart files and it didn't work. Wrapping the yarn around the pointed part of the shape was difficult. The yarn was also overlapping too much and making the piece look bulky. The solution was to use a heart with curved vertexes.

Materials
- Yarn
- Cardboard
- Heart template (download here)

Cut out the template and trace it onto the cardboard. If your cardboard is thin and you'd like to make your heart sturdier, just cut out two hearts and glue them together. Wrap the yarn around the heart, making sure not to leave any gaps in between the yarn strands. Tie the loose ends and you're done!

If you're interested in making something bigger like a Valentine's Day wreath try using my 4th of July wreath idea. Instead of cutting two circles you'd cut out two hearts and follow the same steps in that project. Remember to use a curvier heart so that the wrapping is even and easier to do. I was going to make one until I discovered that no red t-shirts deserved such death-by-scissors just yet!
• • •

Thank you, thank you!
Thank you so much to the kind people behind the awesome blogs that have featured some of my work. I really appreciate all the support. Thank you to...
- Craft for featuring my basic tools post and my Valentine's Day printable set.
- CraftyPod for featuring my calendar and linking to my post from her Free/Sustainability post (interesting discussion/comments going on with all this)
- Baby Center for including one of my printables in their set of cool calendars.
- Make and Takes for featuring The Basics posts.
- Curbly for featuring my memo holder and gift tags.
Am I missing anyone else?

One more thing... I loved reading about Shane Power's work on Holly's (Decor8) blog and about his collaboration with WestElm. I love those new ceramics... totally me. Holly said that WestElm would be reading the comments for recommendations. I'm thrilled that they are in search of new talent and really trying to think out of the box. My recommendation is at comment #1—but I certainly wouldn't mind if it were me—wouldn't that just be the ultimate dream?

Have a great weekend!

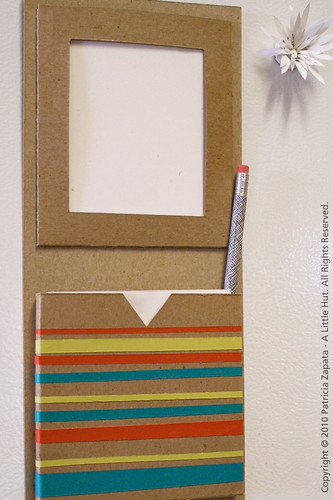
recycling project - memo holder

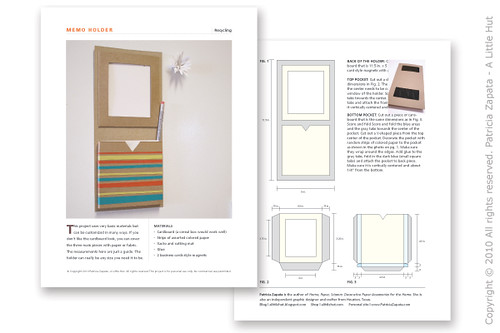
I'm back with another project and video. This segment, for Going Green with Yolanda Green, was shot in August (time sure flies) and it aired a couple of weekends ago. The project is a little more elaborate, because there are more precise measurements involved. But the basic idea is rather simple.

memo holder

Watch the video below. If you're in a reader you'll need to visit my blog to see it - and never mind my very white outdated kitchen (Santa please help!). You can download the tutorial sheet here.


memo holder sheet

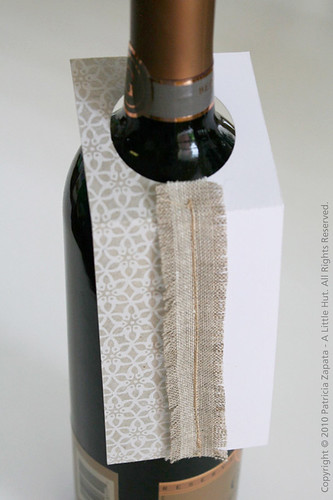
recycling project - wine tag

I was clearing out some projects and found this small one that I made a while back. It's a quick way to spruce up a gift of wine. I put this in the recycling column because I made this using remnants of other projects. I'm sure anyone that has crafty materials can put this together without getting anything new.

Sadly I give more wine away than enjoy it myself. Mr. Z is not a wine drinker and I just can't see myself opening a bottle just for me. Wine just tastes better while sharing it with others.

Materials
- piece of white card stock
- ruler
- pencil
- Xacto knife or scissors
- 1 3/4" hole punch (or use a compass and cut out a circle)
- bone folder
- 1 1/4" x 7 strip of patterned paper
- glue stick
- sewing machine
- narrow strip of linen

recycling project - wine tag

I measured and cut out a 2.5" x 7" piece of white card stock. I used the glue stick to attach the patterned paper over the long half of the rectangle. I punched a hole about 1/2" from the top border of the tag and scored a horizontal line at 2 1/2" from the top.

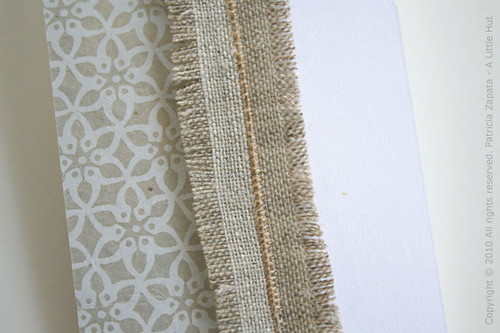
The last thing I did was sew the linen on the card stock with small stitches and pull some threads from both sides.

Done!

recycling project - wine tag

recycling project - security envelopes stationery set

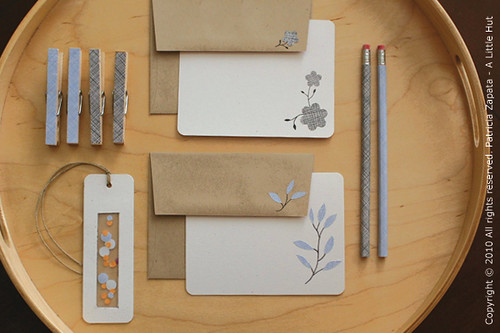
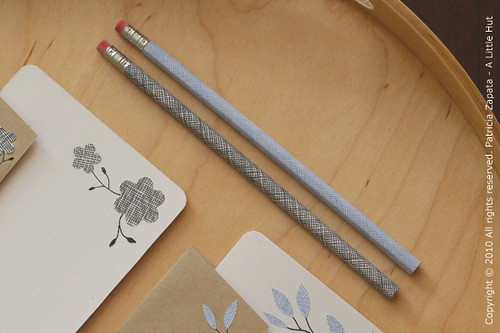
I've been collecting security envelopes for a while now but I hadn't done anything with them recently (there was a small something long ago). My hands were itchy to make anything with paper so I decided to create a small set of stationery goods.

recycling using security envelopes

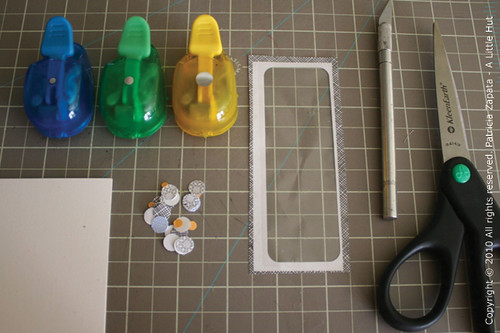
Materials
- security envelopes
- Xacto blade or scissors
- ruler
- cutting mat
- fine tip marker
- glue stick
- hole punches of different sizes and designs
- white card stock
- envelopes
- pencils
- wooden clips

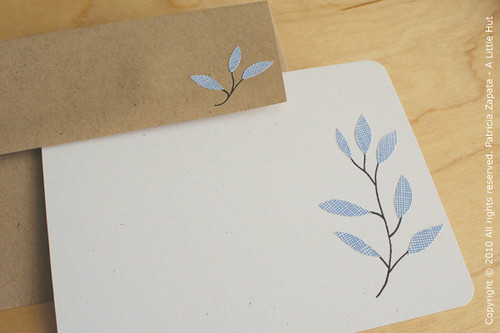
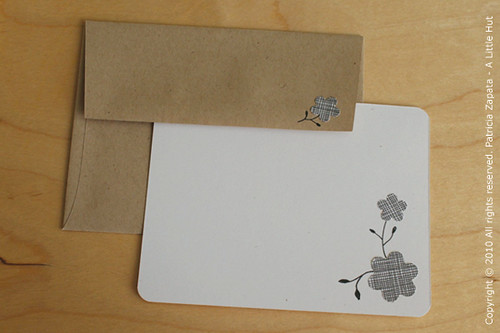
Stationery - Having blank stationery on hand is a must for me. Here I decorated a couple of flat cards with hand drawn branches and leaves and bits of the envelopes. I cut the leaves by freehand with my Xacto and the flowers with a hole punch.

recycling security envelopes - stationery

recycling security envelopes - stationery

Gift tag - The gift tag is made with card stock and the window of a security envelope. Make sure to leave 1/4" frame around the plastic. Using hole punches of different sizes I punched out circles from security envelopes of different patterns and colors. The yellow paper is part of a manila envelope.

recycling security envelopes - gift tag

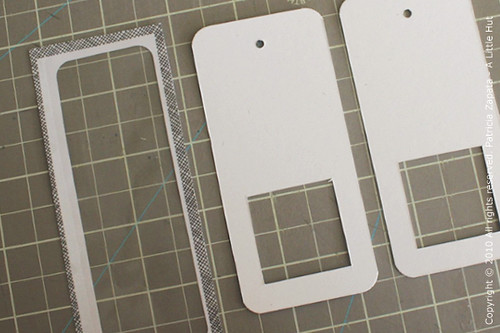
Using white card stock, I cut out two identical rectangles that are slightly wider than the plastic. Each card has a small window and a hole at the top for ribbon or string. I rounded the corners of both with a corner punch.

recycling security envelopes - gift tag

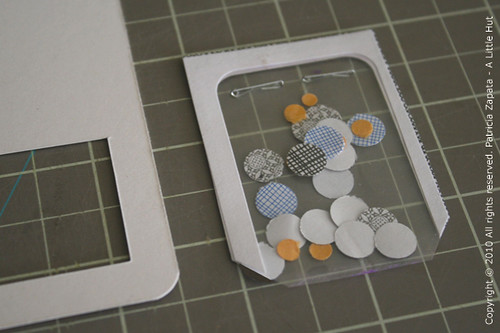
I folded the plastic in half and filled it with the security and manila envelope circles. I added a couple of staples at the top to seal that area off. The other two edges were sealed with a glue stick. I cut the corners on a diagonal so that they wouldn't peek out from behind the card stock.

recycling security envelopes - gift tag

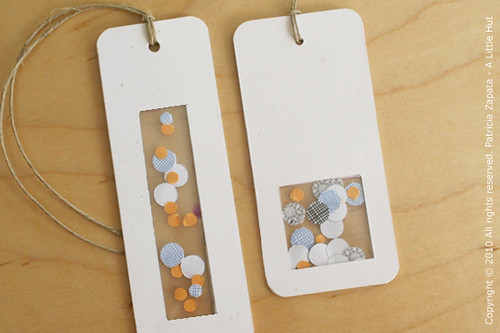
Here is the final result. The tag on the left was made with two windows from different envelopes. They were glued face to face.

Come to think of it these could make good bookmarks too.

recycling security envelopes - gift tag

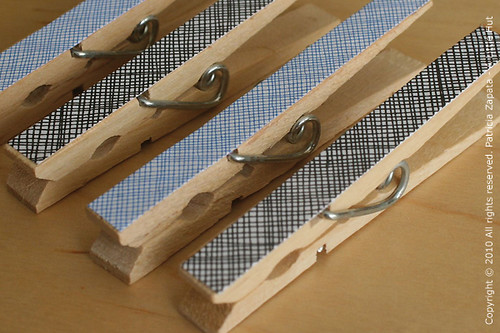
Wooden clips - I measured the top of a clip and cut out a template with card stock. I used the template to measure and cut out each of the pieces of paper and attached them to the clips with the glue stick.

recycling security envelopes - clips

Pencils - I covered the pencils with a rectangle cut out of the security envelope and glue. The paper is a bit over 1in. wide and as long as the pencil. This variation of using mechanical pencils is a great idea so you get to enjoy your handiwork for a longer time.

pencils covered with security envelope paper

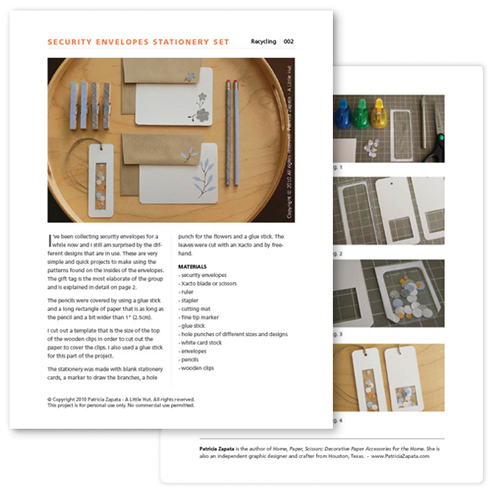
For those of you interested in downloading a project sheet for future reference click here for the PDF.

security envelope - project sheet

recycling project - 4th of july wreath

Here is a simple project that uses all recycled materials. The video was shot in April (for Going Green with Yolanda Green) and was on the air this past weekend.

Materials:
- Two different sized circular objects (in this case - large plate and Tupperware cover)
- Two sheets of cardboard that are slightly larger than the largest circular object
- Pencil
- Xacto blade
- Cutting mat
- Scissors
- Cardboard tube
- Glue
- Fabric scissors
- Old t-shirts in red, white and blue
- Three white stars cut out of white paper
- Tape


This wreath was created for a 4th of July celebration but the colors and size can easily be changed to suit any holiday or celebration that you have throughout the year. I can easily see this wreath at twice the size and monochromatic or multicolored in a different pattern.


If you'd like to have a small laugh at my expense here is a blooper reel that I'm included in at the very end. All I have to say is that the camera man, Scott, is the most patient person EVER! The amount of retakes we do because of my mess-ups is quite awful. So, go ahead and laugh. I did.

recycling project - mother's day card

Last week I shot two segments for the local show called Going Green with Yolanda Green. One was a how-to for an extra special Mother's Day card/gift (which could work for Dad as well) and the other for a 4th of July project. The first one aired this past weekend and below is the video which, by the way, does not show up on Google Reader (psst! you'll be able to see me with my new haircut).


Materials:
- Empty cookie or cereal box
- Pencil
- Ruler
- Scissors and/or Xacto blade and cutting mat
- Tape
- Tissue paper (can be wrinkled/used)
- Mod Podge or craft glue (slightly watered down)
- Bowl
- Brush
- Leftover cardstock or colored paper
- Ribbon
- Round corner paper punch (optional)


I completely forgot to take photos of the process as I made the project so I created a project sheet that you can download below. To save paper just print the first page and then the second on the back side of the same page.

Download here.

If you like the format of these project sheets or you have any ideas on how to improve them please let me know. I'm thinking of continuing them for the projects that I post from now on. Thoughts?

recycling projects for easter

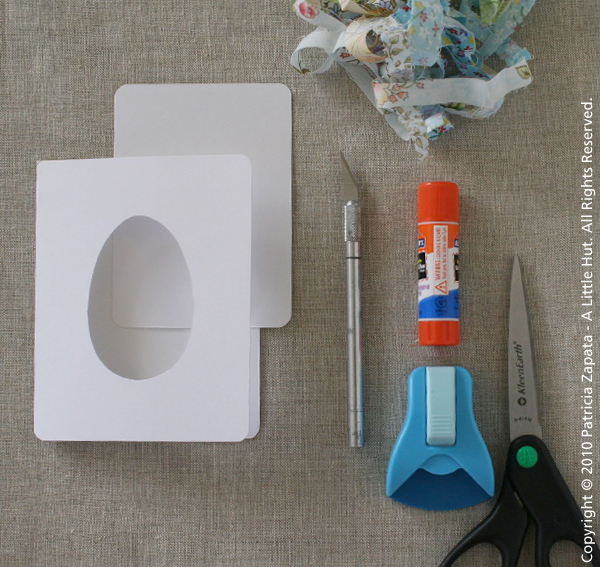
I worked on two simple Easter projects for Going Green with Yolanda Green, a local TV show, and aired over the weekend. One is an Easter card and the other is a bird's nest (different than the one in my book). The materials are very easy to come by and you'll be done with the projects in no time at all (although the bird's nest does involve some extra drying time).

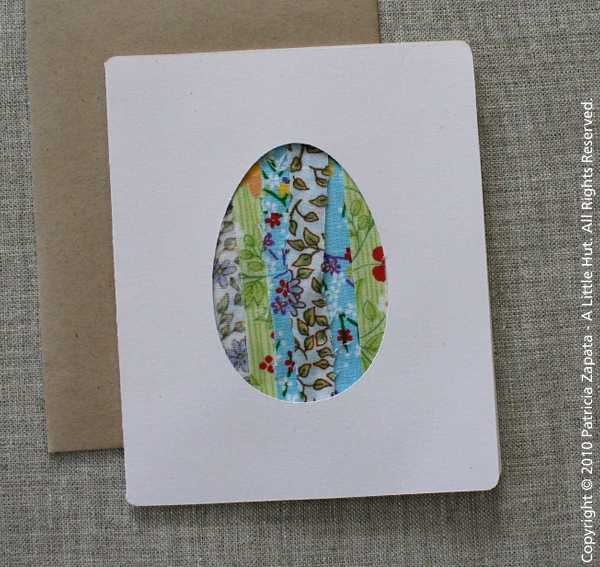
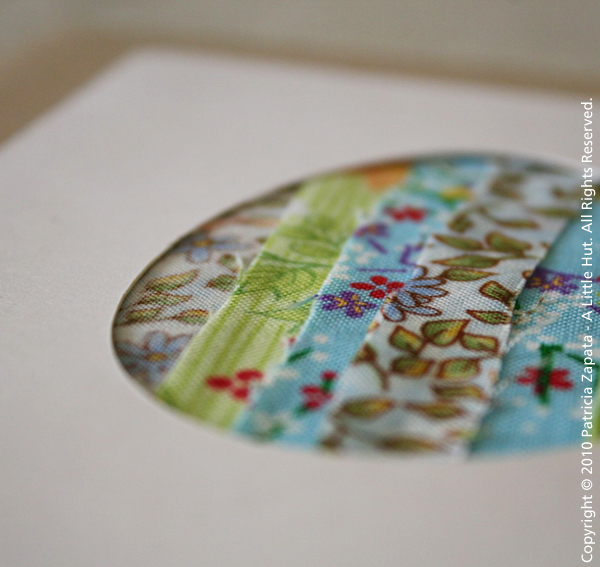
This card project can be used to create all types different types of looking cards simply by cutting out a different shape. How about a heart, a star or something more contemporary like a circle or square? I also think that a monochromatic version (all white fabric with white paper... ooohh) would look great too.

easter card

One small change to materials - I recommend you use a glue stick vs. craft or Elmer's glue simply because the card stock bends out of shape with the dampness of the glue. I don't know why I didn't think of that before shooting the segment... Hindsight is 20/20, isn't it?

easter card - materials

Check out all the how-to in the video below. (Note - I don't think it's showing up on readers).


Please excuse the bare looking house. This was shot several weeks ago when we still hadn't quite moved everything back in from our whole remodeling ordeal. Come to think of it I'm still not done with all that!

You can download the template for the card here.

Happy Easter!

easter card

recycle project no. 21 - matchbox

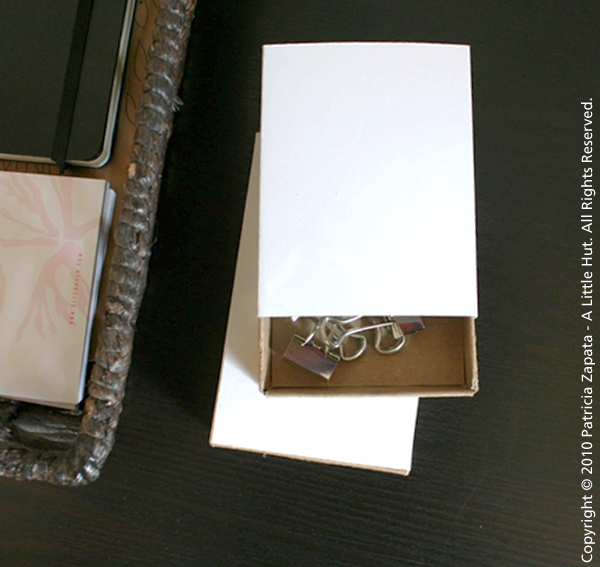
I mentioned this matchbox project I while back. Remember? I finally got around to working on the tutorial and here it is.

I chose white paper for the cover of my box because I want it to match the one that I had already made. I also happen to love all office supplies that look like this. If you prefer more color, any decorative paper would be perfect to wrap around the cover or the inside of the box. The steps that I provide here are just to get you started.

recycle project 21 - matchbox

Materials:
- Template
- Craft knife or scissors
- Cardboard from a cereal or cookie box that is at least 8" x 9"
- Pencil
- Ruler
- Bone folder
- Letter sized sheet of cardstock
- Craft glue and a glue stick

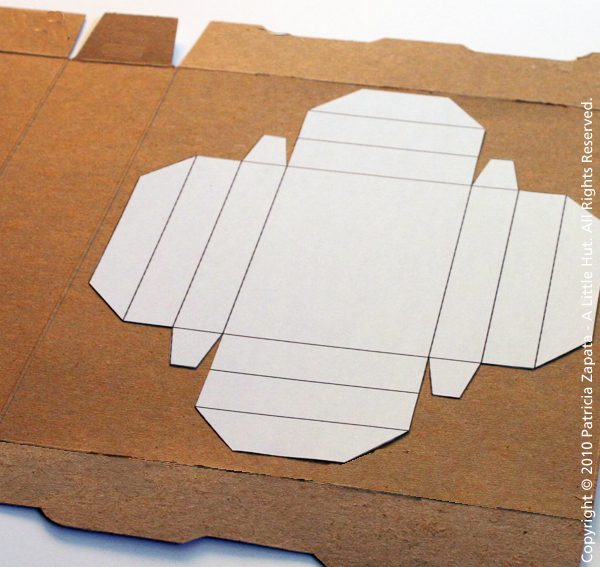
1. Print and cut out the template that you can download here.

recycle project 21 - matchbox 1

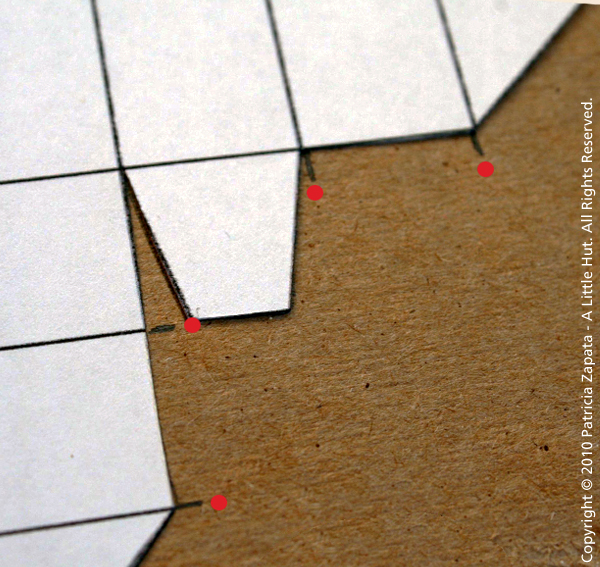
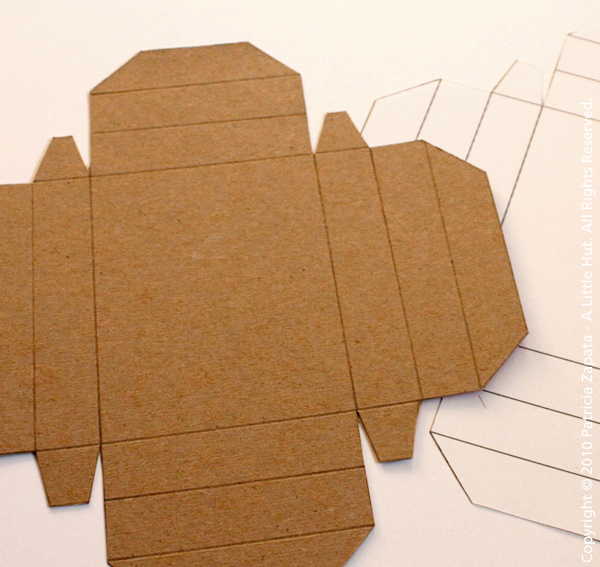
2. Trace the template onto the cardboard. Draw small hatch marks that line up with the interior lines of the template (shown by red dots). This will make it easier for you to score more accurately.

recycle project 21 - matchbox 2

3. Using the bone folder and a ruler, score the cardboard before cutting it out. Score along the solid lines shown in the template. Cut out the box along the drawn outline.

recycle project 21 - matchbox 3

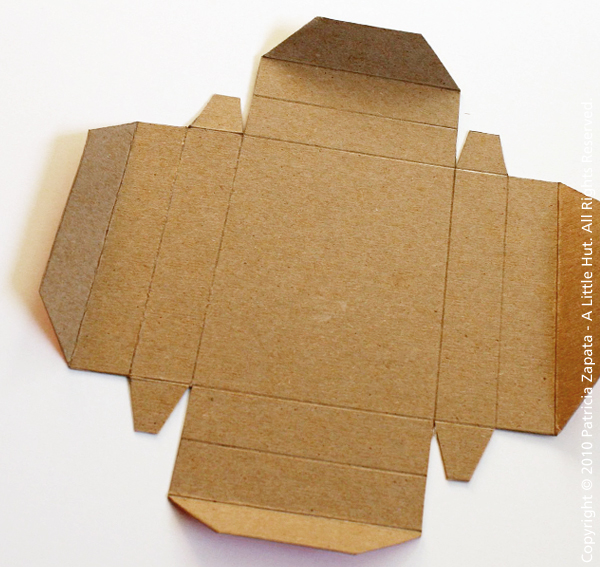
4. Fold the outer most tabs towards the outside part of the box or the craft paper colored side. Fold the other edges towards the inside or the printed side of the cardboard.

recycle project 21 - matchbox 4

recycle project 21 - matchbox 5

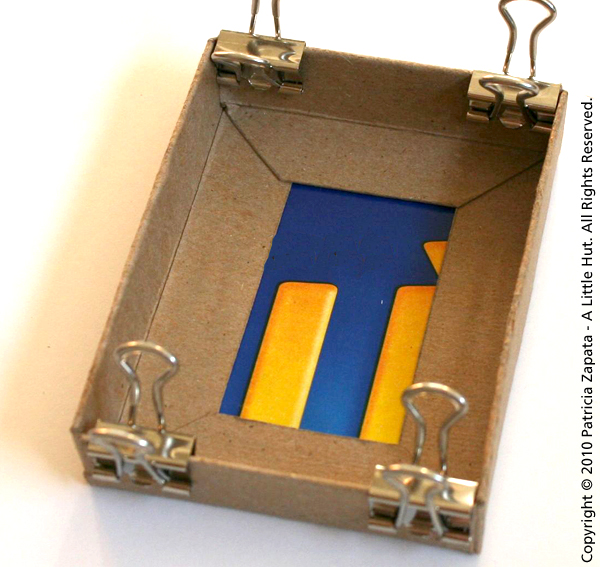
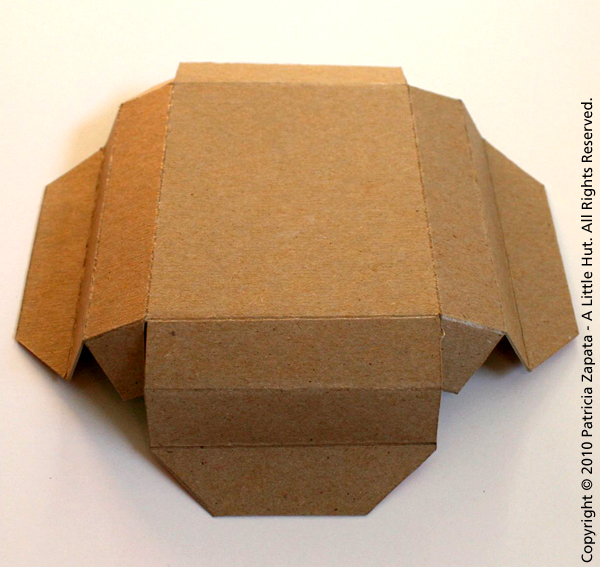
5. Using the craft glue, adhere the longest sides of the box so that the long tabs are flat against the bottom inside of the box. Fold and glue the short sides in the same fashion making sure to go over the small tabs. The small tabs should be sandwiched between the short sides of the box. If necessary clamp the sides with clips.

recycle project 21 - matchbox 6

6. For the inside of the box - Cut out another piece of cardboard that is 3" x 4". That is the exact measurement of the box. Because of thickness of the sides, the inside bottom of the box will be slightly smaller. Trim the length and width of the cardboard as necessary to allow the rectangle to fit on the bottom of the box. Attach it with glue. If you prefer this would be a perfect place to use a contrasting color to give the inside of the box some color.

7. For the box cover - cut out a strip of cardstock paper that is at least 4 1/8" x 8.5". Even though the box is 4" long the thickness of the cardboard makes it necessary to make the cover a bit wider.

recycle project 21 - matchbox 7

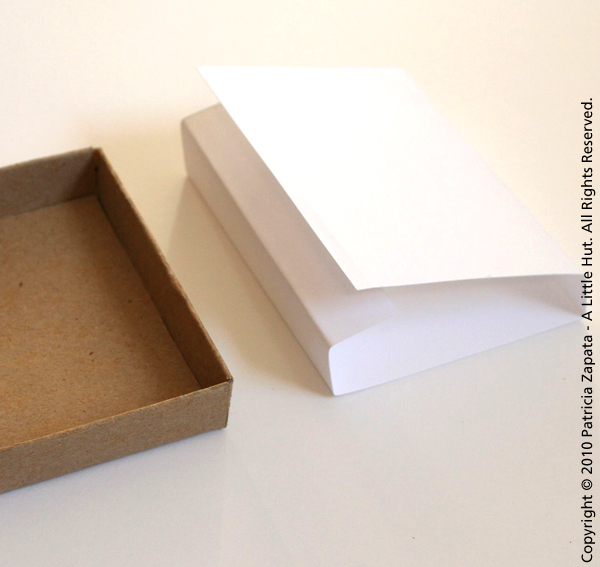
8. Line up the paper with one of the long sides of the box. Pinch and crease as the paper goes around the box making sure that the cover is snug but not too tight. Before gluing it together make sure that your cover will comfortably slide on and off the box. Glue the ends of the paper cover using the glue stick and make sure to let it dry completely. Done!

TIPS
- I used cardboard for the box but a thick cardstock will work just as fine.
- If you have access to a larger piece of cardboard enlarge the template to make as large as you need it.
- To make your box even more customized and use a favorite color of fabric you may want to try adapting this clever tutorial on CraftyPod for the cover of the box.

The opportunity for customizing this type of box is only limited by your imagination. Ribbon, fabric, and so many other embellishments or materials can make every box quite unique. Experiment and make it your own.

Have a great weekend everyone!