boxes and charms

gable box

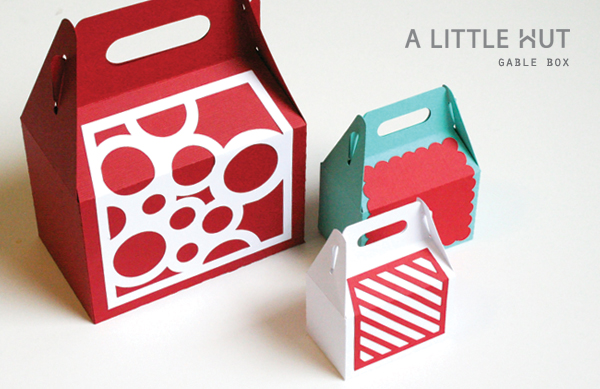
You know how necessity is the mother of invention? That's how these projects came about—a Gable Box and Chain Link Charms (now available as SVG and DXF files).

First off, one can never ever have too many boxes. I've been wanting a gable box for a long time. Yes, I know I can buy one I wanted to make my own (I know you understand, right?) and just a plain one didn't cut it either. I wanted to create different cover designs to suit the occasion. Add flowers or other embellishments and your set for someone's birthday or a hostess gift.

When I was about to add this project to my shop it occurred to me that sometimes a larger box (for bigger gifts or storage) is needed so I'm offering the same project in two different set ups. A one-piece file to make the smaller treat type boxes and a two-piece file that makes the larger box.

chain link charms

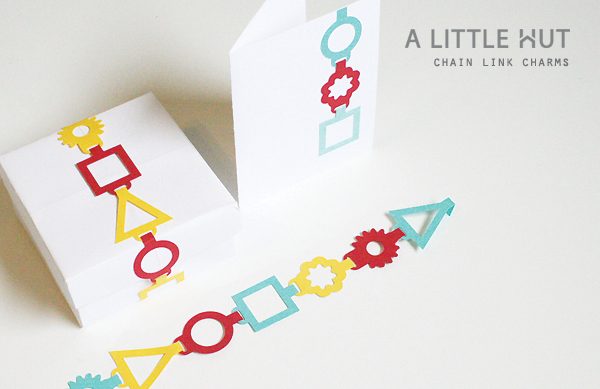
The second idea came about when I wondered what to do with some scraps from another project (you know I love coming up with ideas and ideas for those)—so here's another one. But this one is for those of use that work on cutting machines—Chain Link Charms!

Don't you always have empty paper corners around the cut out shapes that make things like boxes? Well these Chain Link Charms are one way to use up that paper. Every time you have a project ready to go, just pop one of these on the cutting mat. Keep cutting them out as you make all your projects and collect them in a little jar. Once you have enough you can make colorful garlands or use them to wrap around a gift. Presto—fewer scraps!

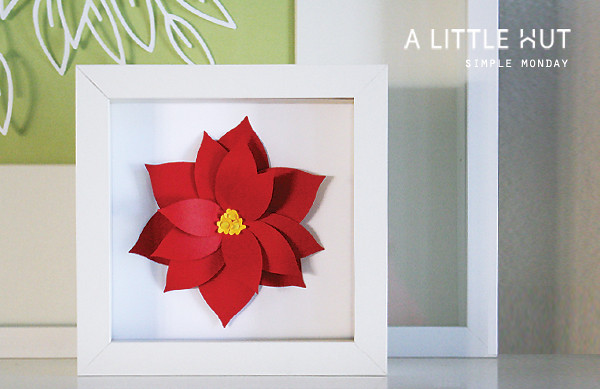
I'm certainly going to be using both of these for the holidays—(Teacher's gifts? Yes!).
Happy Thursday!

postcard swap

postcard swap

"When we do the best we can, we never know what miracle is wrought in our life, or in the life of another." - Helen Keller

These are my empowerment themed postcards for the Hanna Anderson's Postcard Swap. As crazy busy as  I am it's always fun to work on a side project, specially one that's so different for me.

This photo is a little pale. The real postcards are a bit brighter and completely handmade. I used watercolors, black ink and just added a few cutouts (you know I had to pull out the Xacto!) to show the brown paper backing.

Thank you Hanna for organizing such a fun project!

simple monday - news!

simple monday-tag

I hope you all had a wonderful weekend and/or holiday break for those of you here. We had one of those week that were just a blur of relaxing family time. No grand plans—simply hanging out together—perfect! Now I'm trying to put my mind in gear. There's so much to do because I've been accepted to Surtex (May 2013)—NYC here I come! I'm excited, nervous and simply ready to jump head first into the licensing industry. I've dabbled but this will be a real effort to go for it all the way. Maybe one day you'll go shopping and see some of my work somewhere...

What is Surtex?
From their site: "It's a B2B marketplace for original art and design, where artists, agents and licensors connect with manufacturers and retailers to create the next best-selling products in every category imaginable.

Wall coverings, decorative accessories, bed linens, stationery, giftware, tabletop and so many more…if it’s any product with a surface design of any kind, there’s a good chance it originated at SURTEX."


The site boasts 6000 buyers/manufacturers from 49 countries and 1000 artists attend, so needless to say I need to be prepared. Eeek! So, if you miss me around here you can easily guess I'm working, working, working behind the scenes. It's going to be really busy for the next few months. All good though. I'm ready to tackle this!

• • •

Giveaway winners! 

Thank you so much for all your lovely comments on the giveaway post! Even after years of blogging it's always, always nice to hear from so many of you.

The randomly selected giveaway winners are: Maya, Cindy and Debra—Congratulations! I'll be in touch with your winning shop codes.

Happy Monday!

[Starting work on some simple gift tags - this one uses one of the tuck and fold bloom of the Spring Bouquet set and a Papertrey Ink stamp: Peaceful Pinecones.]

nativity, coffee and giveaway

nativity gift set

Setting up the nativity scene is one of the fun parts of decorating for the holidays. Our set is very traditional looking but you know me and wanting things simple so this ornament follows that feeling. I made two to show you how changing just one color can make something look and feel completely different. Big difference right?

nativity gift set

For the coffee lovers in the crew I have these cute holiday and any occasion sleeves in the shop now! 

Giveaway time! 
Since we're celebrating Thanksgiving on Thursday here in the US I think it's the perfect time to offer a giveaway to thank all of you for supporting my work and for visiting here whenever you get a chance. I am giving away three $15 gift certificates to my shop. To enter simply leave me a comment—say hello or whatever you're in the mood to share—include your email address or a way to contact you. The giveaway will be open until Friday at 7pm (central) and I'll announce the winners on Monday of next week. Good luck!

Oh and by the way, my apologies for not getting the weekly freebie posted on Friday. It's up now—here.

Off to enjoy some family time!
Have a great week everyone and Happy Thanksgiving to those of you celebrating!
coffee sleeves

layered illustration

six layers

I've been really busy with projects for the shop and clients—you can tell when the blog is scarce on posts—right? When I get this busy I tend to have a little side project that I chisel away during breaks. This week it was this one. I've been wanting to do it for a while and I finally decided to just jump in (no pun intended! ha!).

six layers

I used one of the photos from the day I went skydiving (going back in March-weeee!) and created a six layered illustration. This is only a 5" x 5" piece but I can easily imagine it as a poster (maybe down the road?) or on a t-shirt. I need to work on more projects like this. It's a great mental exercise of deciding what goes where and what gets cut out. Fun!

Well it's back to the drawing board for me. Today's the last day I'm alone because the kids will be out on Thanksgiving break all next week. Gotta run!

Have a great weekend everyone!


simple monday - paper punch flower

paper punch flower

Sometimes you just need a quick project that you can mindlessly work on while watching TV or listening to good music. This is one of those—super easy.

Materials
1.75 in. circle punch
- 1 in. circle punch
- Button
- Foam dots
- Glue

Instructions
- Punch out one 1.75" circle to use as a base and 30 1" circles for the petals.
- Attach the button with foam dots to the center of the large circle.
- Fold all the small circles in half. Glue them around the button (with the edge of each circle tucked under the button). I creased some all the way and some only slightly which make the latter petals appear more open—giving the flower an uneven look/texture.

This flower is similar to the one in a previous tutorial but the difference is that these petals are standing upright and not on their side.

Tips!
- Leave the center empty (no button) and use green paper to use it as a wreath gift topper!
- This is a perfect project to use up scraps—make it multicolored!
- It can also be a recycling project by using magazine pages.

Happy Monday!

paper punch flower

cardinal wall art

cardinal wall art 1

I have a real soft spot for cardinals (if you're curious why you can read about it here) and I'm surprised I hadn't worked on them sooner. Inspiration finally struck because I've seen many cardinals flying about in our neighborhood. The timing was now—so that's how this Cardinal Wall Art set was born.

It also fits in perfectly with my idea of making a set of framed Christmas paper decorations. I purchased the shadow box frames in Ikea. I originally removed the glass to avoid glare but now I prefer them this way.

Love them! I hope you do too. The SVG and DXF files are available in the shop now.

Have a great evening!

cardinal wall art 3

simple monday - going 3D for the holidays

simple monday - poinsettia

This year I've decided that I will be going 3D with most of my paper decorations for the holidays. I want to make an arrangement of framed artwork. I'm not sure if it will be on the wall or something for our mantle. I started with this simple project of my new poinsettia. Easy! More to come...

How about you? How do you intend to decorate for the holidays—any ideas yet? Here are a few from the blog vault.

Happy Monday!
--
The Friday freebie was posted a bit late but it's there!