handmade gift ideas

It's funny that while I've been trying to come up with more gift ideas for the holidays, I've forgotten that I don't need to reinvent the wheel. I was going through my library of craft books looking for some inspiration (and to move my thoughts in a more leisurely direction) when I decided to give my own book, Home, Paper, Scissors, another look. Kind of silly I hadn't done that sooner, huh?

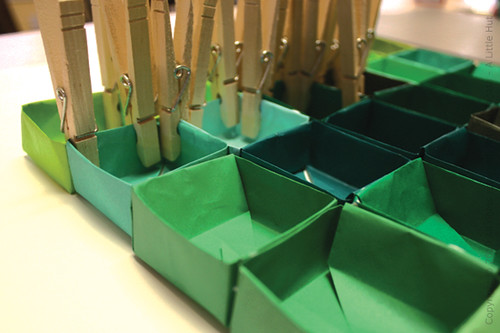
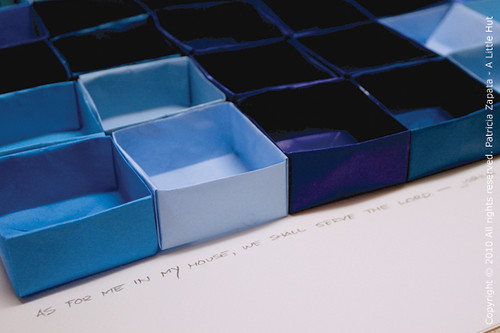
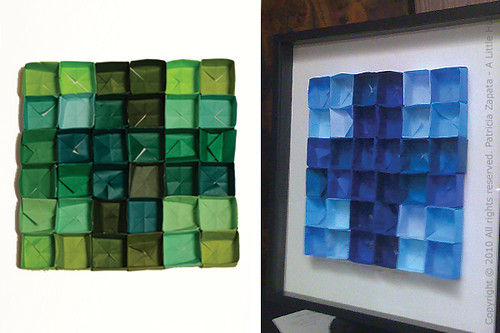
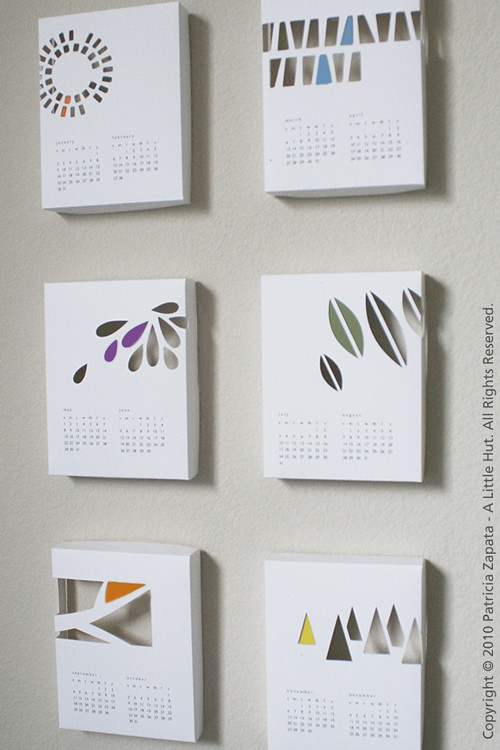
I almost decided against posting this because there are those of you that already have the book (a huge thank you!) or have seen it—but I think there are some (budget friendly!) ideas here that may help those of you in need of some inspiration. These are just a few of the 30+ step-by-step projects that you can find in the book.

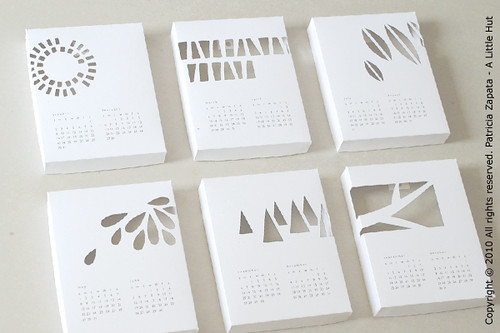
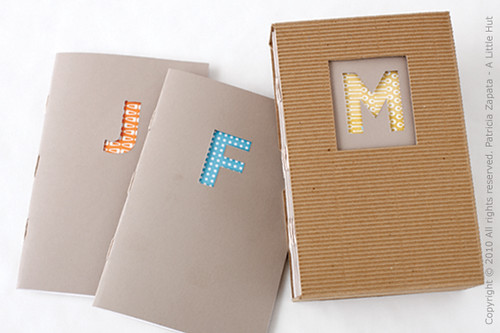
Monogrammed Journals Set
This is a set of twelve books—one for each month of the year. How about giving this set to a new mother to record her first year experiences with her new baby?

monogrammed journals set

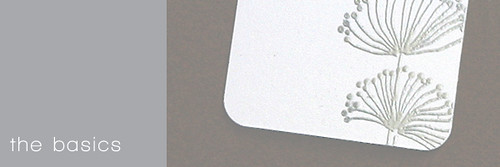
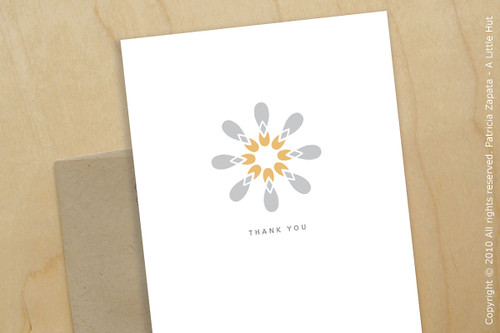
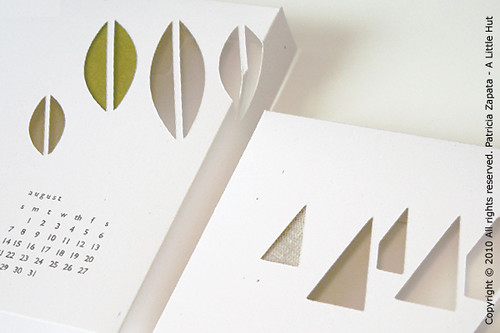
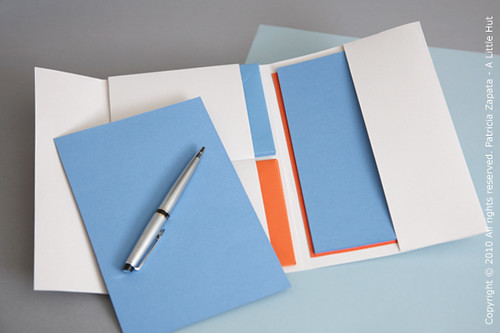
Just a Note Stationery Set and Folder
This is a basic design, but imagine the ways you can customize both the stationery and the folder—endless possibilities. This is another project I think I'll be working on.
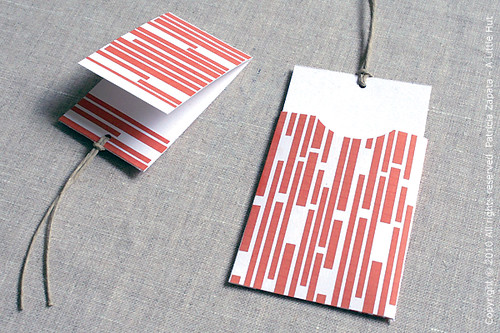
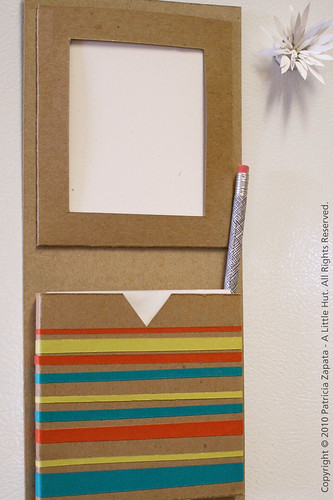
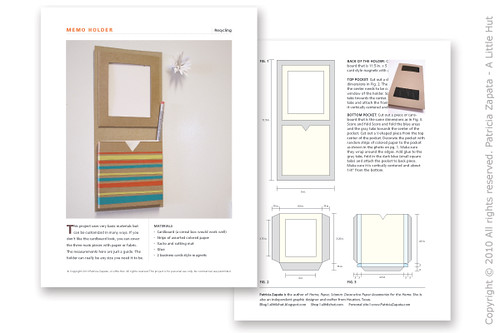
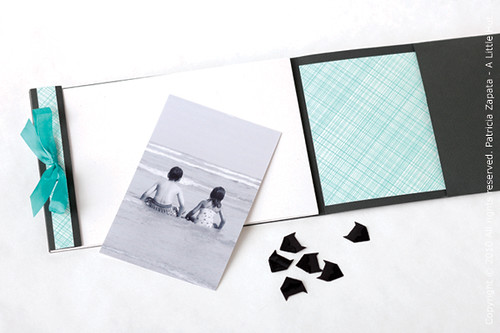


Pocket Photo Album
Here's another project that that lends itself to customization and embellishment (this is where I included a photo of my two little ones)—the right side has a pocket for extra photos or a card.


And lastly...
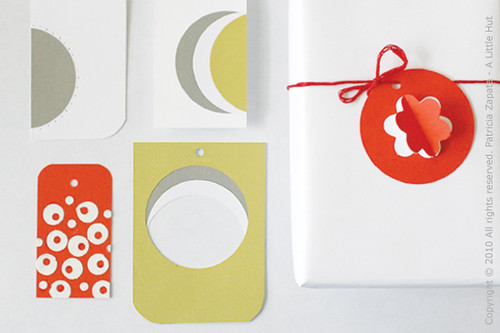
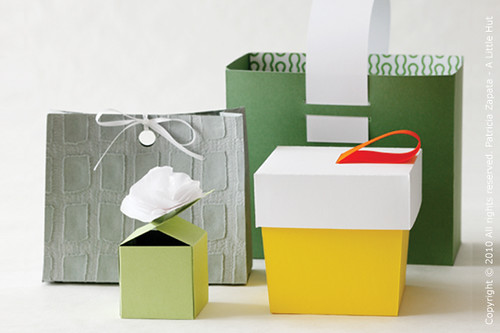
If you need ideas to wrap small gifts, there are instructions for making these bags and boxes in different styles and sizes. My favorite design is the yellow box, which was inspired by a little girl's toy purse.


If you're interested in a copy for yourself or to give as a gift, Home, Paper, Scissors can be ordered at Random House, Amazon, Barnes & Noble, and Paper Source among others.

• • •

I had other plans and ideas for the blog this week but as I'm sure you can understand, things got a bit derailed this week. So bear with me while I catch up again. Meanwhile, thank you so much for all your kind comments on my previous post—I really appreciate them all. XO.

in memory of my grandmother

Today my 95 year old grandmother and godmother peacefully passed away at home surrounded by family—albeit not all. I wish we could have been there. However, I am grateful that we got to see her when we went to Colombia this past summer.

For several weeks we've been on pins and needles not knowing when this would happen. We knew it was a matter of days and today it became a reality. It still seems a bit surreal.

my favorite

These two photos are among the last things my grandmother ever gave me. Even though she looks quite serious in the top one, it's my absolute favorite. She's with my grandfather (who passed away 17 yrs ago) and I believe they were still dating at the time. I think they look so sharp. It was taken by one of the freelance photographers that lined that particular street in Bogotá. The second photo was taken on their wedding day in 1945.

wedding day

The things I'll remember most about my grandmother are that she was very strong willed, determined and classy, she taught me how to knit (I'll be forever be grateful about that) and she knew how to cook really well but it definitely was not a hobby. My Mom and I both inherited that gene and often remember her saying on the subject... "The sooner I can get out of the kitchen, the better."

Now that I think about her knitting, I remember she used to crochet a lot too—a LOT. I also remember seeing her sewing and mending a little something here and there. The more I think about it the more I realize that a love for handiwork is deeply ingrained in our family.

She wasn't a sweet, huggable type of grandmother but she fervently loved her family and she took care of her own in the best way she knew how. She certainly was the family matriarch. I'm so glad that our children, her only great-grandchildren, got to visit with her on a few occasions.

Although we are obviously grieving her passing (I'm surprised at how the waves of sadness just come and go, come and go...), we're relieved that she's no longer suffering and at peace.

My hope is that she is with my grandfather and that they are enjoying each other's company again.

more gift tags

I hope that those of you that celebrate Thanksgiving had a great day yesterday. Our get together went really well and all tummies were happy and full. The clean up wasn't too bad either—I was on a roll.

Today I'm just popping in here really quickly because we're still in a post-Thanksgiving mellow mood. I just wanted to let you know that I posted a small tutorial on how to make the tags below over at Good Look Cookbook.

digital pattern + easy handiwork

Friday Tidbits
I have two totally different ones today...

- Good Luck Cookbook... again. I just want to point out a great post on how to achieve white balance in your photographs.

- Nuno Magazine - Elizabeth was kind enough to send me a preview of her 2010 Winter issue and it is full of great ideas. I'm particularly struck by how easy and intriguing the egg carton wall art is. Preview the magazine here and if you're interested in ordering click here.

• • •

Thank you! The answers to my survey keep coming in. I really appreciate all of your feedback and ideas. I've read every single thing you've written and I'm completely touched by the things some of you have said. You're all the best!

Have a great weekend!

how to make simple gift tags - part 2

So here's part 2 of the series. Just as I did with part 1, I'm keeping the ideas simple and easy to make. This time of the year who has time for more than that, right?

gift tags - part 2

For this set, I've included paper punches as an additional tool. I just used circles and a flower but use whatever you have and hopefully the video will inspire you to make something of your own.

If you do make some tags inspired by this series, would you be willing to share? If so, head on over to my A Little Hut Projects Flickr group (long abandoned!) and add photos of your creations.

If you haven't seen part 1 you can check it right here.

recycling project - memo holder

I'm back with another project and video. This segment, for Going Green with Yolanda Green, was shot in August (time sure flies) and it aired a couple of weekends ago. The project is a little more elaborate, because there are more precise measurements involved. But the basic idea is rather simple.

memo holder

Watch the video below. If you're in a reader you'll need to visit my blog to see it - and never mind my very white outdated kitchen (Santa please help!). You can download the tutorial sheet here.


memo holder sheet

fun + games

Sometimes there are days that I could just stop mentally tinkering on project or work ideas. Really. It may sound a bit strange to say this, but it's just annoying at times. Thankfully there is a solution and it's to focus my energy on family time. It always works like a charm.

I went with my C to Paper Source on Saturday morning and took a class where we built a Gingerpaper House Kit. Talk about a brilliant last minute idea. For the first time in a long time I was simply making and not thinking. I was focusing on sharing some time with my C and it felt so good. However, I did have to work on keeping my mouth shut when things weren't as straight as I thought they should be. But never fear, C quickly picked up on the idea that the project was hers and that I was her assistant. I was put in charge of some gluing and cutting. She was the head decorator.

I thought it was really sweet to see other moms and daughters there as well. It was a girly, crafty, fun time and I could tell that my C enjoyed it as much as I did. It will definitely go on our 'must repeat again' list.

Here she is putting on some final touches at home.


In the afternoon we headed out to watch the first of two soccer games that ended the season for D. He was really wanting me to film him playing so the photo illustrates my designated spot. But this isn't a complaint. That's my typical and preferred spot regardless of the event—behind the camcorder or behind the camera. I was so proud of the fact that I caught both goals that he scored only to realize, when we got home, that apparently I didn't hit 'record' for the second one... umm... yeah. He was not happy with me—neither was I!


I'll have the kids with me this week and I have a lot to do for Thanksgiving. It'll be a crazy but fun week!

placeholder + christmas ornament

Typically we spend Thanksgiving at my parent's house, but this year everyone will be coming here. Thank goodness there is one big thing I don't have to worry about—my parents will be bringing the turkey.

So... I've been thinking to add one thing to my to-do list. I want to set the table with some sort of paper theme. This would be out of the norm because we are not the type to dress up a table a whole lot. I don't go much past my white dishes and neutral colored linens (surprise, right?). But this time I want to add a little more in the form of paper and this is an idea that I have in mind—a placeholder that also doubles as a take-home Christmas ornament.

table decor and/or christmas ornament

I got the idea by simply looking at my Twitter background this week and I'm sure you'll recognize the project from this post. The difference here is that this cube is about three times bigger and it's not cut by hand (thank you Cricut & Sure Cuts A Lot). Although I'm not quite done with it, I'm happy with the size. Next up—cutting all the ornaments plus adding some ribbon and a small name tag for each one. Matching tea light covers are also coming to mind. Hmm.

• • •

We're on our last weekend of soccer and the kids have all of next week off because of Thanksgiving. I'll be posting here but I'll definitely be on hiatus from Twitter et al.

In the meantime... have a great weekend everyone!

how to make simple gift tags - part 1

I've always had a thing for making gift tags (stating the obvious?) so I decided to make another small series of them, like I did a few years back.

Working on tags is fun because they are small and quick to make. They allow a lot of room for creative approaches and there really are no limits. That being said, I decided to constrain my approach by reducing the materials to a bare minimum. This will force me to create really simple ideas that...
- anyone can approach
- will use materials that everyone has (don't buy anything! use the scraps in your stash)
- are easy for kids to tackle if they'd like to join you
- can stay as is or can be launching pads for other ideas that you may have
- are not necessarily just for the holidays

red gift tags

It's much easier to pile on embellishments and be done with it. It's more work to create something out of less. That's the type challenge I really enjoy. I hope you like what you see and join me in trying some of these yourself.

I planned the general idea for each tag but you'll be able to get a tiny peek at my process as I figure things out along the way. The first three tags that I'll be showing you in this video are made by simply using paper, glue and cutting tools. You can't get any simpler than that.

Each set after this will have a new element, material or technique added. How does that sound?

three gift tags

A note on the video... Remember my horrible past attempts? Well, this is my first "finally-new-camera" version. I'm still learning how to edit and what not but there is definite improvement here. I'll keep trying to make these better, so hang in there with me.

EDIT - For those of you that asked about the corner punch - I used a We R Memory Keepers Crop-A-Dile Corner Chomper Tool.

Now there's a part 2 posted!

framed origami

Here are the final results of the class auction project that the fifth graders made. I bought Ikea box frames (30" square) and we used solid colored origami paper. I thought the patterned paper would look too busy for this.

I went to school one day last week and taught the kids how to make a simple origami box (so fun!). One class worked on the boxes for the blue piece and the other class worked on the green ones. It's quite interesting to see the differences in manual dexterity. Nevertheless, they all did great.

Putting it together at home
Clothes pins are great friends! Tacky glue comes in a close second place.

origami boxes

It is a Catholic school after all
We selected one bible verse for the green piece and one for the blue one. Each child copied the bible verse inside their origami box before folding it (you can't see it - more of a symbolic thing). I added the verse, at the bottom, as the 'title' of each piece.

origami boxes

Done!
Here are the two final versions. The cross in the middle of each one turned out just as I imagined. I forgot to take a decent shot of the final framed pieces, so I had to settle with a few iPhone photos like the one on the right. I took them this morning where the auction will take place this weekend.

origami boxes

Tossed my hat in the ring
I also donated some time to give a Cricut Expressions class as an auction item. We'll see how it goes. I use it primarily with SCAL (Sure Cuts A Lot), but I get so many questions about the machine itself, that I thought a class could be useful and raise some funds for the school. We'll see how it goes!

• • •

No Friday Tidbits. Sorry!—blame the crazy week and the depletion of brain cells at the moment.

I feel so sleep deprived that I could literally go to bed now (sun still shining brightly) and and not wake up until tomorrow morning. Dinner? A neighborhood restaurant will be the provider tonight, thank you very much. Yawn!

Have a great and restful weekend!

• • •

Houston friends!
Just found out that I'll be on Going Green with Yolanda Green this weekend. Ck it out Saturday at noon or Sunday at 10am on Ch. 39

2011 calendar again

Well... I've received emails in regards to my calendar and I've decided to move forward with a limited edition ready-made option. Here you can see how our calendar is already up in our studio—I added a bit of color to each box.

Thank you so much for those of you that are interested in ordering!
2011 Calendar ready made option, SVG files and printable PDF.

in our studio

the basics - composition

thebasics - composition

I thought of today's basic tip while I was working with new materials I purchased recently. Some of you may work with stamps, stickers and scrapbooking materials like paper die-cuts, so I thought I'd mention just one thing about composition in simple projects.

I'm getting affected by the holiday season jumping up all around us, so you'll excuse introducing holiday stamps so soon. Even the kids keep asking me why stores are already decorated.

Symmetry or Asymmetry
As you see on a couple of the gift tags here, symmetry works perfectly fine. But what if you throw things off balance? I like to push shapes off to the sides to see what happens and predictably that move makes everything change completely. My favorite part of this, is that the white space suddenly becomes an active participant. It goes from being just the background to an interesting part of the composition.

thebasics - composition

Notice the difference between the wreath and snowflake at the bottom with the top versions of the same stamps? The bottom tags don't look terrible, but they seem so uninteresting to me. The same stamps that are simply cropped off to one side, look so, so much better.

Don't take me wrong, centering something is perfectly fine. That tree stamp, for example, would certainly look at home centered on a card. As a matter of fact, symmetry was something that took me a while to stay away from when I first started a graphic design student (way back when!).

The bottom line is to look a bit beyond the obvious. Just play around and experiment.

• • •

About the stamps...
- Allium Stamp (Paper Source)
- Scandinavian Wooden Stamp Set (Martha Stewart)

Instead of scrambling for last minute gift tags, I'm making a handful to have ready. And believe it or not, these are the first stamps I ever purchase. I love carving out my own because I can never find anything I like. Some of these are still a bit on the frilly side for me, but having them will get me out of a bind for the holiday season—I'm focusing my energy on other projects. For now this is just one more thing to add to my wish list—designing my own stamp collection.

many think better than one

All I can say is thank you, thank you! Your response to my survey has been overwhelming and I can't believe all the great ideas you've been sharing with me. My future posts thank you too!

blue boxes made by 5th graders

I am so excited to be hearing from so many of you and so humbled by the generosity of your kind words. Your comments just propel me to work harder on this blog that I enjoy so much.

We all know that collaboration brings fruits of its own and this time it was no different. Everything you shared with me has really sent my mind into overdrive. And, yes, I consider your input a collaboration with the efforts that I do here.

There are so many options I could start working on! In order to keep myself sane and wanting to jump in and do this or that or ooooh that, I'm going to have to buckle down and put together a plan for the next few months. It'll be very nice to be more organized about my approach. I can't wait to get started!

And again... thank you!

If this is the first time you hear about this and you'd like to help me make A Little Hut a better place to visit, check out yesterday's post. I would love to hear from you too.

• • •

green boxes made by 5th graders

You know it's rare for me to leave a post without a photo right? This happens to be another collaboration I've been working on. These boxes where made my son's 5th grade class. I'll tell you the whole story and share photos of the final project on Thursday.

if I may be so bold...

I have an enormous favor to ask. I've been wanting to do this for a long time, but I didn't want to impose. However, I think the time has come to go for it. So here's the deal...

I love working on this blog very much and I want it to make it even better. More importantly, I want you to enjoy your time here. I think that one of the best ways to do this, is to ask you directly, what you'd like to see. I want A Little Hut to be a place where you can come and learn or be inspired by something new—but I need to know what that means for you. This isn't to say that my ideas and projects will change drastically, but it would be helpful for me to learn more about all of you and why it is that you stop by.

In the coming months I have some plans for improvement, so a simple survey will help me tremendously in moving forward. I know... a survey. Blah. Not the most exciting thing in the world. But I promise it will only take you a couple of minutes because it's only 5 questions long and it's completely anonymous. That's all! Painless and easy.

Although I can't wait to hear from you, I'll admit that I'm still a bit nervous—which is kind of funny since I've never had anything but kind messages and comments from all of you. So... if you would like to help me out I would be so very, very grateful—and thank you for making what I do so rewarding.

Click here to answer the survey.

thank you printable

As a small way to show my appreciation for you being here, whether you answer the survey or not, here is a new thank you card that you can pass on to someone that you think needs to hear from you. Download here.

And again...

Thank you!

EDIT - I will leave the survey open indefinitely. If you're reading this days or weeks after the fact I still would love to hear from you.

gifts

It never ceases to amaze me that there is such talent everywhere and that the internet allows us to share our ideas and work. Frankly, sometimes it's a bit too much to take it all in. But every now and then it's quite exciting to be wrapped up in the middle of it all and visit with real live people that you've met through the computer screen. That's what I got to do over the weekend at Quilt Market. So that is the theme for today...

Friday Tidbits

Cloud 9 (Michelle Engel Bencsko and Gina Pantastico) and Daisy Janie (Jan DiCinto) and her friend Corina.
I saw them all on Monday (lucky me!) at Quilt Market (a trade show for fabric and quilts) and I couldn't be happier for their success. Not only are they all quite talented but they couldn't be any sweeter. They are the real deal people—the real deal. Follow the links above to check out their fantastic work, all produced on organic fabrics.

cloud9

daisyjanie

The amount of interesting work I saw at Market was incredible and as a first time visitor it was quite overwhelming. I had to skip much of the show or I'd never make it to the people that I really wanted to visit. The fun part was visiting with friends (old and new) on Friday at Fabric 2.0. I had brief conversations/encounters with Caroline, Marisa, Lizzy, Melissa, Jenean and Rachel—they are all so inspiring.

As you know, I dabble with patterns but I haven't been too serious about it just yet. Maybe one day, I will get on with it and show my work somewhere like Quilt Market or Surtex. Only time will tell.

And a little extra one...

Gifted
Have you seen the new magazine published by Ez of Creature Comforts? It's a beautiful collection of design, tutorials and gift ideas. I'm so honored that my Gift Tags and Gift Boxes are included (pgs 212 and 216). Thank you so much Ez!


If I'm talking about gifts, why not be literal and show a gift box? This was totally a spur of the moment deal and I made it using the design of one of my calendar pages. See it? (top middle).

Have a great weekend everyone!

gift box

2011 calendar

You know when you have a great feeling about something you've made and you absolutely do not care whether anyone else gets it or not? That's how I feel about this calendar. It was one of those projects that just came out without much fighting with myself.

2011 calendar - all

This calendar will be offered as a DIY option—as a PDF document or printable/SVG files. I realize that this may not be what everyone would prefer but there are two reasons why I decided to do this. The first, is that (being perfectly honest with myself—and you) the production of any amount of calendars seems daunting to me at the moment. The second reason is that there are so, so many great ready-made options that I wanted to design something that you could really tackle and make your own.

In order to keep the project as simple as a possible, while still remain interesting to look at, I kept the shapes simple/approachable and set the design up with two months per page.

This will make a fun (& economical!) project to work on for gift giving. Work on it on your own or as a group at a crafty get together. Throw in some yummy snacks and drinks and you'll have a great time!

When I say you can make the calendar your own this is what I mean...

2011 calendar - customize

If you prefer more color in your calendar, all you need to do is use scraps of paper or fabric to the back of each calendar box. Here I used green paper and a piece of linen—but who's to say you can't make your version more sparkly and add glitter or shiny paper too? Remember that even if you don't add anything the color of your wall will show through each box.

There is a small window of hope...
If you are interested in a ready made (printed and cut) version (with some small assembly required) please email me [info at a little hut dot com]. I may decide to sell a limited edition depending on the interest level.

- To order a PDF printable version click here.
- To order SVG files compatible with SCAL (Sure Cuts A Lot) click here.

EDIT - By request of several customers I am now going to be offering a limited edition of a ready-made calendar. It will be delivered completely cut, scored and there will be minimal assembly required. Order here.

If you prefer a simpler calendar to work on, my blank DIY calendar is still in my shop (I had a few customers requesting the 2011 version in the summer—to get a head start on holiday gifts!) and my initial cutout calendar is still very popular too.

From where I stand, calendars are a lot of fun to design. My biggest hope is that those of you that do choose to work on your own diy calendar find it just as rewarding as I do.

So, here's to some fun paper crafting!

PSST! Remember that if you need some tips on working with paper projects you can check out some of my tips under The Basics section on cutting —here and here or about scoring here. (Thank you Trisha and Janet for recommending I mention this!)