
Materials:
- a magazine (I didn't use more than half of a magazine)
- glue gun
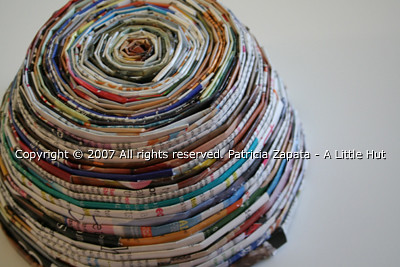
I started by making a tight little roll and making the flat circle that I showed you the other day. This can also make a useful trivet if you continue the flat shape to the desired size.

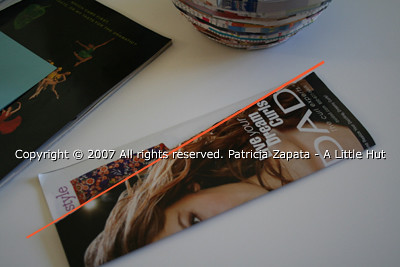
Each strip that I used is made from one page of the magazine. When the pages are torn out don't worry about them being perfect. Fold the page in half (the long way) pretending that it is a complete rectangle and make the sides line up. The photo below shows a page that I tore out. It's really crooked (I drew an orange line to show that a little better) and it still works. I folded each piece in half four times until I was left with a strip that is about 1/2" inch (about 13 mm) wide.
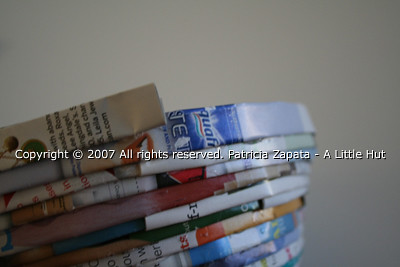
I added each strip to my piece by keeping the folded edge outside and the open side toward the inside. When I decided that my base was wide enough (5 in. across or approx 13 cm) I started going up by placing each strip about 1/8" (approx 3 to 4 mm) above the previous row.
As you place each strip down only do so a short piece at a time because the glue dries really fast. I didn't use something like Elmer's glue because that's the opposite - takes too long plus it makes the paper bend our of shape. For a cleaner look I only used a very thin line of glue. It was more than enough and it didn't seep out from under the edges.
I glued each strip of paper down, leaving a small piece unglued so that I could tuck in the following strip under it. See two photos below.
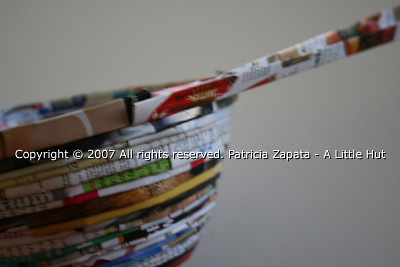
Here's my unfinished bowl. I'm not sure if I'm done yet because it may become more of a vase shape if I keep going. For obvious reasons if you decide to make a vase use a water proof container on the inside. The only thing that is really missing is to make the last row all even so there aren't any stray paper ends as you can see in the photo below.
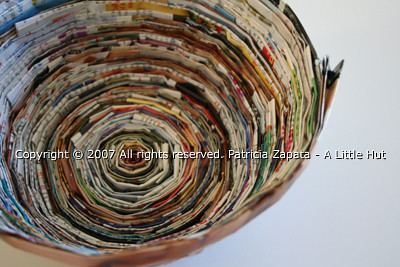
A photo just to show the scale of the bowl. I like the look of the colored pages but I'm also interested in seeing what it will look like if I spray paint it a solid color. The texture of the edges of the paper would probably look interesting. Since I've started seeing Halloween decorations at the stores I can totally see this spray painted orange and full of candy! Can't you?
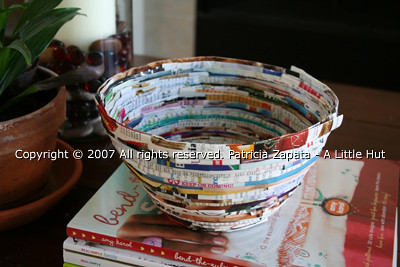
The beauty of this project is that you can make the bowl any size you'd like by changing the width of the base and by stopping at any point during the process of building the sides. I'm thinking that this bowl will look nicer if it's part of a set. So I'll probably make a couple more in different sizes.
By the way, I dropped the bowl a couple of times while making it and nothing happened to it. Nothing. It is really sturdy because of the thickness of each strip and because of the glue. So it's totally clumsy person and/or child proof too! :)
UPDATE - The bowl in these photos is over a year old now and it has been through a lot. It didn't have a set purpose until we recently started tossing our keys in it everyday. If you have any doubts about it durability I have proof that it takes a beating and still looks great. Just thought I'd share that.
This bowl is also part of 33 projects found in Home, Paper, Scissors, my first paper craft book. More details can be found here.


