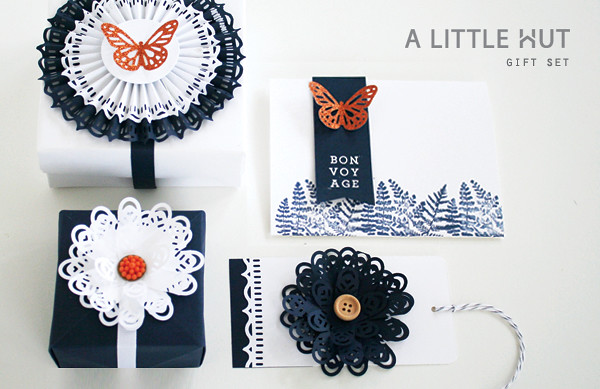
Since the busiest gift giving season will soon be upon us (whether we want to believe it or not) I decided to create a set that shows you how to combine different tools to make gift embellishments and a card idea. Keep in mind that the flower idea can be made with many colors and even be a useful way to use small scraps (you know I enjoy those
projects).
 Flower
The Martha Stewart Punch Around sets are a great way to add a decorative border to any project. But instead of showing you how that works (you can see that
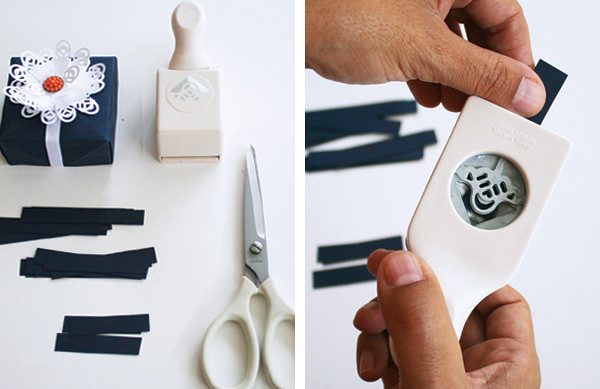
here) I decided to make something that uses them in a different way. This simple flower just uses the corner punch!
Materials:
- The corner punch of a
Martha Stewart Punch Around Punch
set
- One letter-sized sheet of dark blue paper
- Paper trimmer or scissors
- Glue
- Button
Steps:
- Using the paper trimmer cut 20 - 1/2" x 3" strips of paper and 3 - 1/2" x 2" strips of paper
Note: If you have a different corner punch design, experiment with the width of your strips to see what makes the most pleasing design for the tips. I started with a wider strip and started narrowing it down until I liked the shape that was formed.
- Punch the design centered on both ends of all the strips.
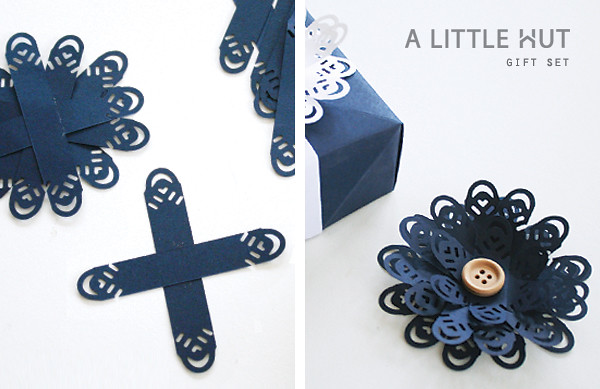
- Glue 10 strips in a crisscross fashion and keep them flat.
- Do the same with a second set of 10 strips but curl them up when dry.
- Glue and crisscross the 3 smallest pieces and curl them as well.
- Stack and glue all three flower pieces with the smallest one at the top.
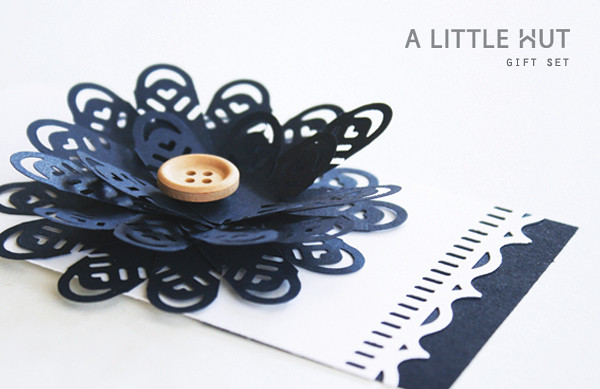
- Attach a button or other embellishment to the center.
Other ways to use this flower: frame several as wall art, add them to napkin rings, use as a gift topper or include one in a gift tag, scrapbook page or card design.
 Rosette
Materials:
- The edge punch of a
Martha Stewart Punch Around Punch set
-
Martha Stewart Crafts Mini Scoring Board
-
Martha Stewart Crafts Large Punch, Monarch Butterfly
- 1.25" Circle punch (punch one white circle and one dark blue circle)
- Paper trimmer or scissors
- Two 2" x 8.5" strips of dark blue paper
- Two 1.5" x 8.5" strips of white paper
- Orange glitter paper (in this case I used a sheet that is part of the
Martha Stewart Crafts Designer Paper Pad, Carnival)

- Glue
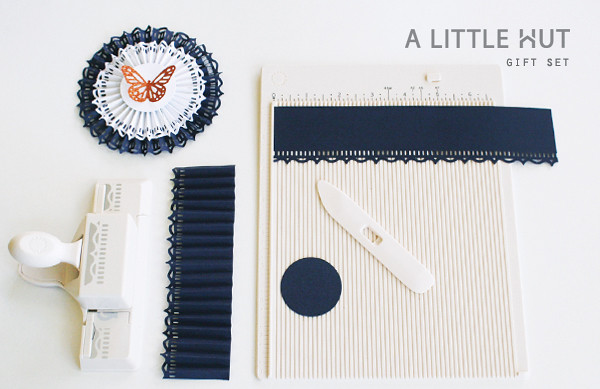
Steps:
- Punch all four strips of paper along one side with the edge punch.
- Using the mini scoring board, score all the strips every 1/4" and fold them in accordion style.
- Glue the two blue pieces together (along the short end) making sure that the punched designs match up. Glue the opposite ends to form a band.
- Repeat the previous step with the white strips of paper.
- Push and glue the straight edged center of the blue paper (now a cylinder) down and centered over the blue paper circle. Place something heavy on the rosette until it dries.
- Glue the white folded paper over the blue paper making sure that the folded edges match up.
- Glue the white circle over the entire rosette and set it aside to dry with something heavy on top.
- Cut out a paper punch butterfly from the glitter paper. Slightly fold it in the center and glue it to the center of the rosette.
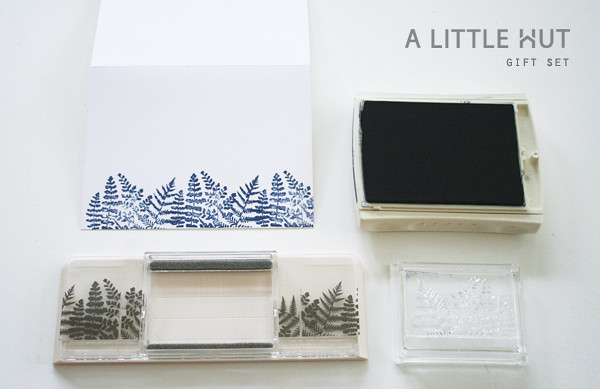
 Stamped and embossed card
(a replica of a card I made just last week for a friend that is going to live overseas)
Materials
- 8.5" x 5.5" white card stock folded in half lengthwise
-
Martha Stewart Crafts Around the Page Starter Set Stamp
- Dark blue ink pad
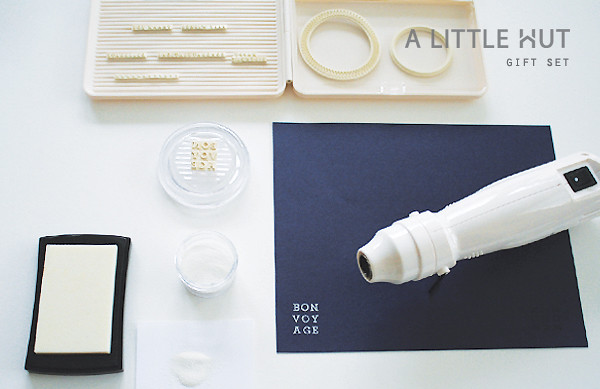
-
Martha Stewart Crafts Heat Tool
-
Martha Stewart Crafts Set Your Own Stamp Case
- Versa Mark ink
- White embossing powder
- Dark blue paper
- Paper trimmer or scissors
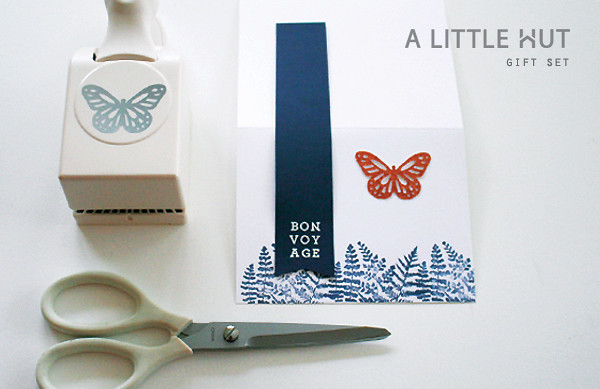
-
Martha Stewart Crafts Large Punch, Monarch Butterfly- Orange glitter paper (
Martha Stewart Crafts Designer Paper Pad, Carnival)
- Glue
Steps:
- Stamp the fern design along the bottom of the card.
- Arrange the sentiment that you will be adding to your card using the
Martha Stewart Crafts Set Your Own Stamp set. It's very easy and quick to do!
- Stamp your sentiment on the dark paper using Versa Mark ink. It will seem almost invisible.
- Before the ink dries dust white embossing powder all the letters. Shake off the excess.
- Heat the powder with the heat tool until you see that all the letters have been embossed. The powder will have a shine to it when it's completely set.
- Cut out the sentiment from your page using a paper trimmer. Allow for some room on either side of the message.
- Use scissors to cut out an upside down V (ribbon-like) ending to the strip of paper.
- Measure and cut the paper so that it fits on the front of the card only.
- Punch out the butterfly from glitter paper, slightly fold it in half and attach it to the blue sentiment paper "ribbon".
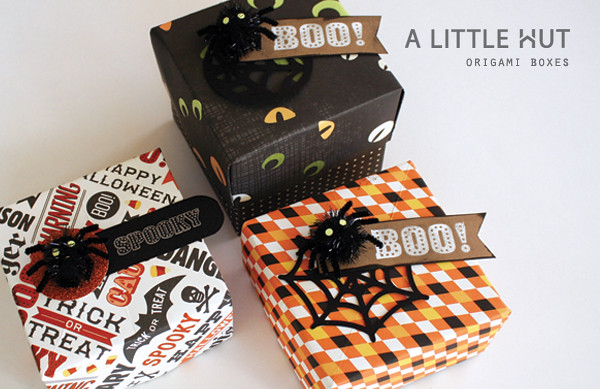
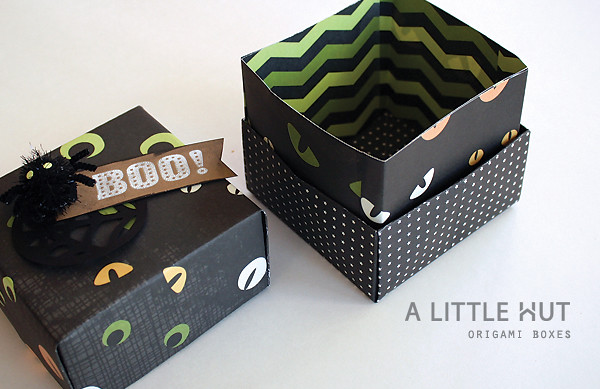
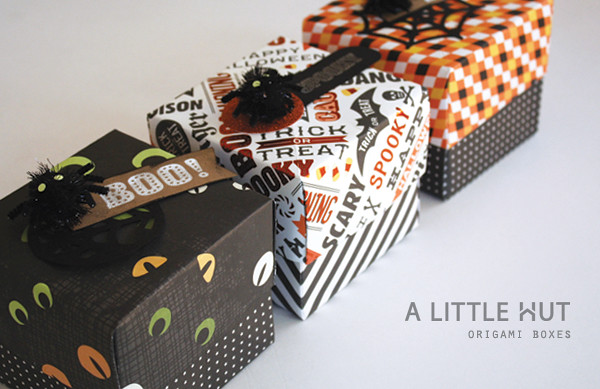
 Origami gift boxes
I simply used the same steps that I used for
this long ago project. Easy!

Martha Stewart craft tools always meet my expectations or exceed them. Their quality and versatility are of great importance to me because I do make a lot of handmade gifts and such and I know that I will be using them for a long time. One more thing, which may be minor for many is the fact that the tools are a neutral light color has always thrilled me to no end—they feel very me.
• • •
Disclosure: I received these craft tools to try them out as part of
Michaels Craft Month where you can find all these Martha Stewart products and so much more. All opinions are my own.