simple monday

simple monday

A quick and simple project for today

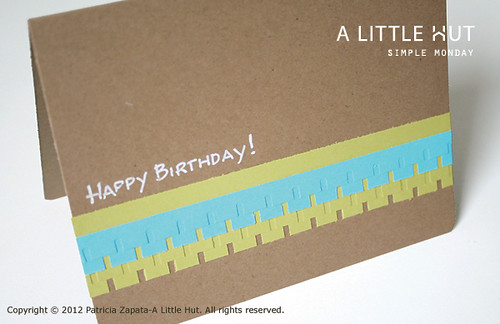
I made the card using the Fiskars border punch that I used in this post. I simple punched a strip of paper and then cut it in half. All the strips are simply glued to the card in an offset pattern and that's it!

simplemonday-paint

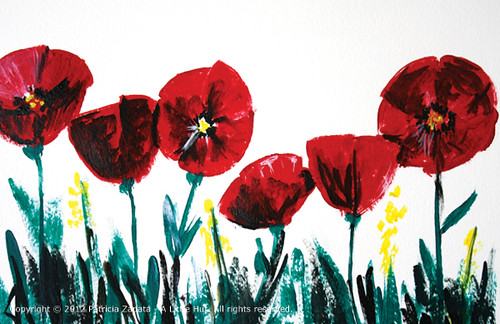
This is a super fast painting (15 min. max) made at the edict of my DD while making dinner a couple of nights ago.

Me: "I don't really feel like painting right now..."
Her: "I know you only like crafty things but you need to paint too." (hands on hips)
Me: "What should I paint?"
Her: "Anything."
She put the paint brush in my hand (big grin).
"Paint! Call me when you're done."
And I obeyed. Lol.

So, what did you make?
I hope you're all having a great start to the week!


flowers, flowers

alittlehut-3dflowerdaisy

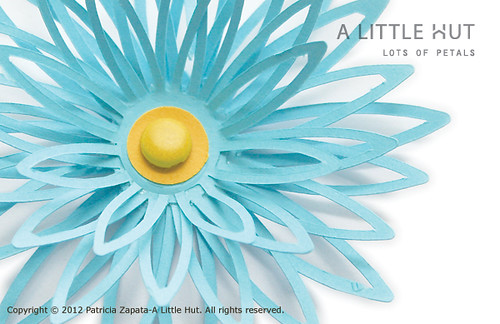
Maybe it's a spring thing but they just keep on coming. This is one I just made from my Lots of Petals collection. It isn't a new one. It is simply a collection that didn't make it to my site when I transitioned to the new design in January—somehow it slid off the to-do list. I had no idea it wasn't there until last night and this is my favorite of the group. It's a simple design that in repetition has such impact.

Adding flowers to any paper crafting project spruces them up instantly. In some cases all you need is one and you're done. I made a white flower (like the one in the photo) large enough to hold a tealight glass in the center and the shadows that it makes are incredible!

So...

I'm happy to announce that all the flowers in the shop are 25% off from today until May 3rd!

Code: flowers12
(make sure to input the code in the Shopping Cart page — not the checkout page).

• • •

Friday Tidbits
- Charlie Trimm on Folksy - a lovely interview of a talented paper cutting artist. (thank you for the kind mention!)
- A jumble of crochet, shapes and colors by Vera João Espinha that looks scrumptious. 
- I want to ride my bike down this road!
- What are we leaving behind? by Holly Becker - so much food for thought here.


I hope you all have a wonderful weekend! Make something fun or go out and enjoy this glorious weather (if yours are as gorgeous as they are here - the calm before the infernal summer!). 

XO


gift card holder sets

petals gift card set

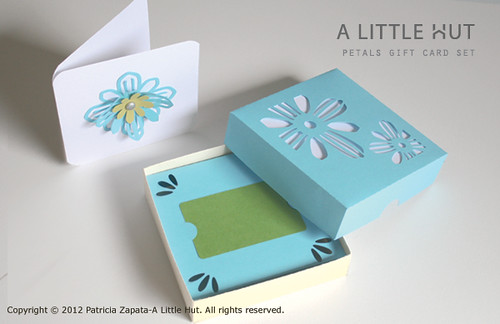
This is definitely a high gift giving season for us this year. There are graduations, first communions, mother's day, teacher's gifts and birthdays all jammed into just a few weeks of time. I'm sure you know what I'm talking about. So that got me thinking as to how I will want to present some of the gift cards that will be part of some of these gifts.

I like cards in some cases because I don't know what the person may want (teenagers!) or because I want them to get something they really, really like and I know where they will be getting it from. What I don't like at all is just tossing a gift card into a card. Even if I make the card it still seems too easy. Does that make sense?

petals gift card set

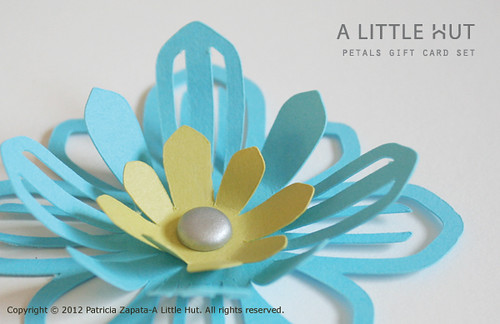
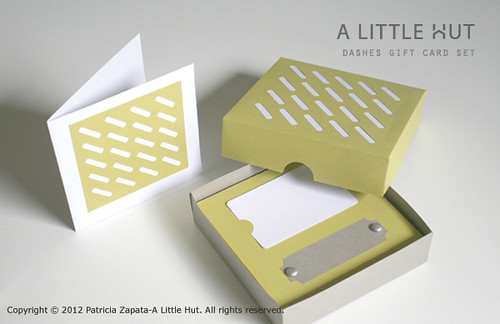
So I've come up with a couple of options for all of us. They are gift card holders that come inside of pretty boxes. They also include a matching card that fits inside the box. The Flowers Gift Card Set is obviously more feminine than the Dashes Gift Card Set. I think the latter would be a great option for the special boys and men in your lives.

dashes gift card set

Remember that even though these are gift card sets it doesn't mean that you can't use the different parts (the flower, the box backgrounds, etc) for other projects like cards, gift toppers, scrapbooking pages or other artwork pieces.

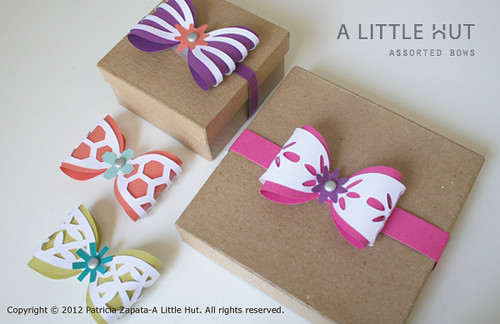
If you need more pop of color for your gifts I also have new Assorted Bows. Aren't these fun?

assorted bows

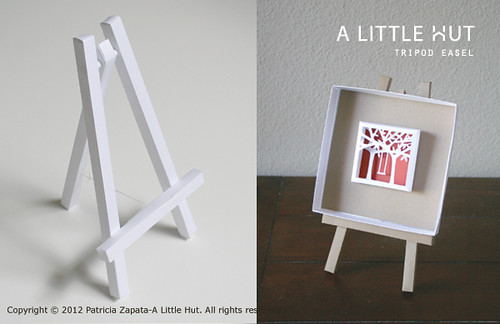
Speaking of artwork... I have another easel for you. A tripod easel! I love it. I hadn't had a chance to record the video but now it's up and you can see how easy it is to put together.

tripod easel


As always, if you have any questions about any of these projects just let me know!

You can find all these projects in my NEW section. Enjoy!

make a storage bin with a cutting mat

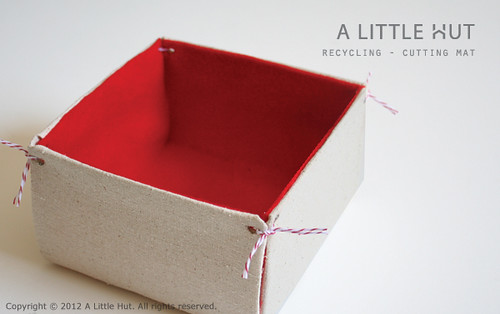
recycling project - cutting mat bin

Happy Earth day!

I promised to show you this cutting mat project long ago but it got pushed down my priority list. I decided that today was the day—very appropriate since I'm upcycling something I'm sure many of you have too. By the way, to avoid confusion, I'm not talking about a self-healing cutting mat. I'm talking about the sticky mats used for electronic cutting machines.

I don't know about you but I beat my cutting mats to death (I use the Cricut and Silhouette mats). Once they are done, they are done! I don't like to add new chemicals and whatnot to make them sticky again. Instead I save them and use them for other projects. This is one of the ideas I've actually made and used (great for sock drawers!).

This is a simple project, very useful and there are many ways to tackle this. I've seen similar storage bins made with cereal boxes and such and everyone does it differently.  I decided to use fabric, even though it isn't my first go-to medium (you all know me and sewing!) because it gives the project a 'homier' feel. It happens to look a bit "Christmassy" because I only used what I had.

Here is what I used and the steps I followed...

Materials
- one cutting mat (in this case it's a 12" square Cricut machine cutting mat)
- scissors
- ruler
- pencil
- hole punch
- fabric
- felt
- tape
- Aleene's Tacky Glue
- We R Memory Keepers Crop-A-Dile Eyelet and Snap Punch (optional)
- twine


Step 1
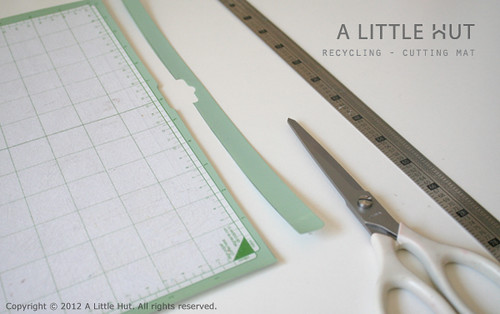
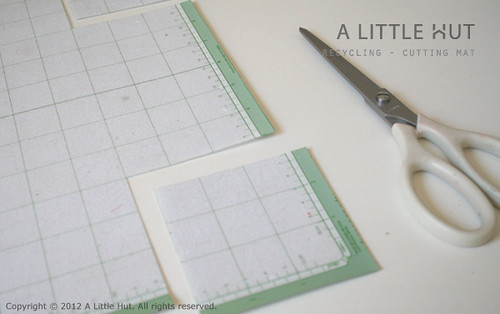
Cut off the excess from the top and bottom of the cutting mat. I measured the width of the green side borders and used that as a guide for the top and bottom. In essence we need a perfect square and keeping the grid of the mat in the center is essential for making the rest of the project go smoothly. Keeping the grid in the center helps to use it as a guide for the following step.
recycling project - cutting mat bin

Step 2
Cut out a square from one of the corners that is a little over 3" (5cm) wide. I cut along the 3" mark on the cutting mat until the adjacent sides intersected. Repeat this for all the remaining 3 corners.

Note: If you don't have a We R Memory Keepers Crop-A-Dile Eyelet and Snap Punch use a regular hole punch to make holes in each of the corners (as shown in the diagram). If you do have one, you can skip this step and do it in Step 6.
recycling project - cutting mat bin

Step 3
Cut out a piece of fabric that is at least 1" (2.5cm) wider than the cutting mat. Make the diagonal cutting marks shown as black dotted lines in the diagram below. As you can see in the photo (step 5) I didn't exactly follow strict measurements but I will tell you that a minimum of a 1" (2.5cm) border is much better to have.

Gently bend each corner of the cutting mat along the red dotted lines. Be careful that you don't apply to much pressure or crease to roughly. My mat cracked a bit when I tried to make my crease a bit more defined.


Step 4
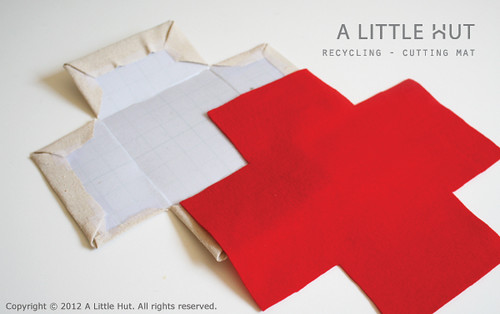
Place the mat (sticky side down) onto the fabric. Fold over the outer corners of one section of the fabric first and tape them down to the mat (yellow triangles in the diagram). Fold over and tape the remaining three sides (blue areas) like you're wrapping a gift. Repeat the same steps for the remaining three sides of the mat.

Note: the taping doesn't look pretty but it won't be visible in the end. Another option is to do this whole bin as a sewn project but I went the easier (for me) route.

recycling project - cutting mat bin

Step 5
Cut out a piece of felt that is about 1/8" (3mm) smaller than the wrapped cutting mat. Glue the felt to the taped side of the cutting mat.
recycling project - cutting mat bin

Step 6
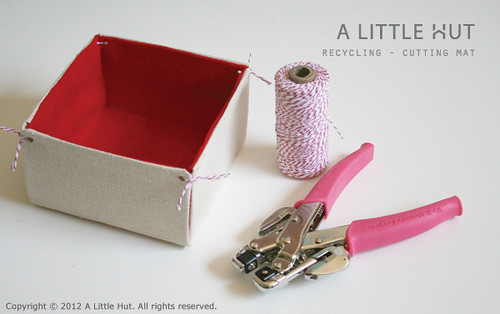
Using the We R Memory Keepers Crop-A-Dile Eyelet and Snap Punch I made holes in each of the corners (it cut through all the layers like butter!). Cut a double strand of twine that is about 4" (10cm) long, thread it through the holes on two adjacent sides and tie it with a double knot.

Note: I decided not to use eyelets (the only thing I have here at the moment) because I didn't want that "flowery" opposite end of an open eyelet to be visible on the inside of my bin.
recycling project - cutting mat bin

If you don't have a Crop-A-Dile you can use a simple hole punch. I would recommend punching holes in the cutting mat before wrapping it in fabric. Once you are ready for the twine, use a large embroidery needle to thread the twine through the fabric where you feel the hole that you've made at the beginning of the project.

• • •

There are many other projects that can use cutting mats in place of cardboard for support. Some other ideas include:
- mini-album covers
- small booklets or matchbook covers lined with either fabric or paper
- the inside bottoms of handbags or totes
- etc. etc.

If you have any other options or you try this project let me know in the comments. I'd love to see!

Have fun!
make a 3d frame with an edge punch

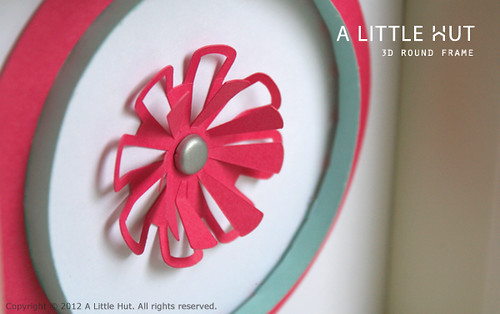
3d frame

I try to make Friday mornings my 'maker for fun' day and I catch up on my Project Life pages. Today I decided to work on a little framed piece for my studio.

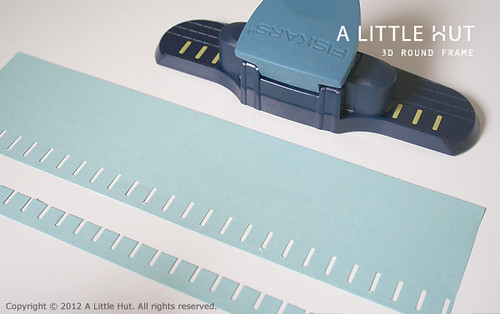
I used my Fiskars Border Punch, Leave It to Weaver punch which I typically use with ribbons. This time I decided to make a 3D frame for one of my Spring Bouquet flowers. If you'd like to tackle something similar here's how I did it:

Step 1
Punch out the border of a page and cut the sheet 3/4 of the way through the punched out slits. That will leave you with a strip that a solid edge and one that has slits down the other side.

3d frame

Step 2
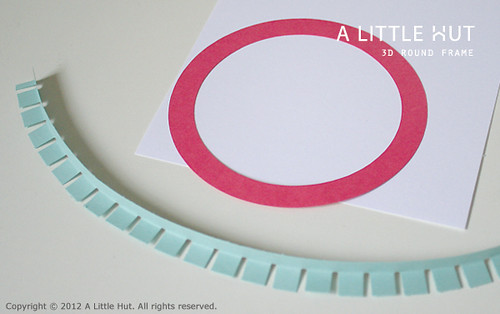
Fold all the tabs on the strip in one direction. Cut out a ring that is just a bit wider than the tabs. I used my electronic cutter but you can just as easily use a circle cutter.

3d frame

Step 3
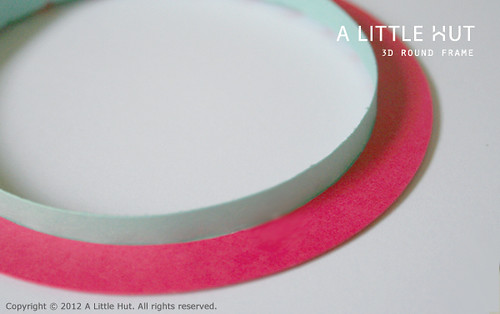
Place the folded tabs strip through the paper ring and let it slide into position until there are no gaps between the raised edge and the ring. Once both pieces are in place use glue to secure the tabs to the underside of the ring.

3d frame

Step 4
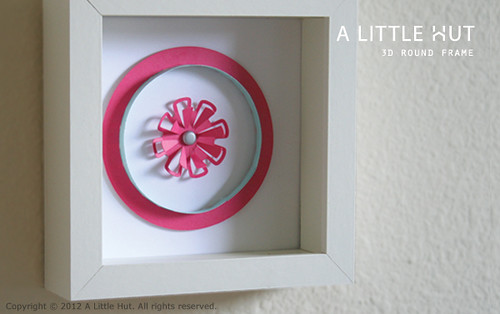
I attached the ring to the back of my frame with adhesive foam so that it's a bit raised and adds more dimension to the piece. Lastly I added the flower to the center with a brad and it's all done!

3d frame

Tips
If you have other paper edge punches you can do the same but you'd have to manually cut the tabs on the opposite edge. If you do have the ribbon punch you can use it in combination with another edge punch and use the tabs on one side and the decorative edge on the other.

If you have any other questions just let me know!

Have a great weekend everyone! 

good monday

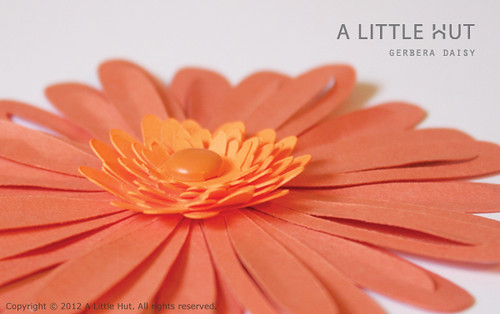
gerbera daisy

I could hardly stand it last night. I wanted this week to start because even though there's a lot to do I wanted to just start—and here I am with my mind going a million miles an hour (or so it seems). I feel like I have many ideas and not enough time. I guess there's nothing new there.

While I have more goodies to show you, I do have a new gerbera daisy in the shop. I don't know why I hadn't made it sooner. It's my favorite one in real life. It seems like such a happy flower and the colors are really gorgeous.

More to come! But enough about me...

I get such a thrill when I see what other people do with my files. Today the visual treat comes from the talented Lowri McNabb. I just had to smile when I first saw it. Check out how Lowri used my Office Companions Hanging Frame/Note holder . The tabs in the pocket are genius and the new Echo Park paper makes the whole project pop. Awesome job Lowri!

nine


And to round off my random Monday...
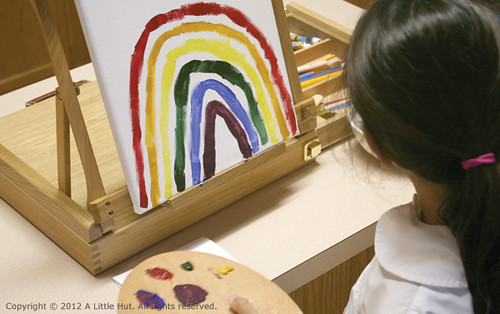
This is a little scene from last week. Melt!
She turned nine last week and she wanted was an easel and paints for her birthday. Who am I to say no? She's on a roll and I'm going to run out of room to hang her artwork. Love it. Love it.


Happy Monday!

question of the week (again)

alittlehut-3dpsring

"What would you do if you couldn't do what you are doing now?", my D asked me this week.

He's asked me this before. My answer has always been: I really don't know. This is what I was meant to do—at least for today that's true.

I believe that if you're doing what you are meant to do you just feel it and it flows. There are no other options that seem better or necessary. That's how I've been feeling about my work lately. It seems to just be pouring out. On some days I almost feel like I should be waiting for the other shoe to drop. Will I hit a dry spell? Maybe. But for now I'm enjoying the ride.

• • •
FRIDAY TIDBIT

Tutorials for toddlers
My apologies for the scarcity of tutorials. Trust me it's not for lack of working on any. It's just that some are coming along and still need to be under wraps. In the meantime I do have a few that you can see now and that you can enjoy with your little ones. Check them out on Disney Baby!

Have an awesome weekend!
• • •

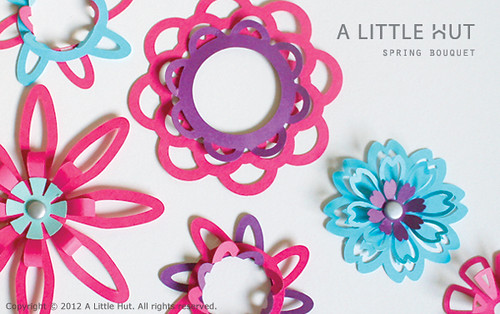
My Spring Bouquet collection of flowers is now in the shop! I wanted to create flowers that are more 3D so that they can used on gifts, cards, garlands, centerpieces or in shadow boxes. I hope you enjoy them!

spring bouquet

pink + orange

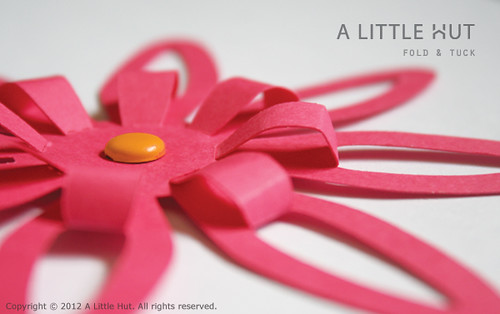
fold & tuck

That's my favorite color combination for this season. Last fall I was all over raspberry—the deep rich almost purple-y kind with a neutral (black/gray). Right now it's definitely pink and orange. Proof: I wore this for Easter.

What's your favorite color combination for the season?

This may be over the top but here's some pink/orange inspiration from Pinterest.

Happy Thursday!

now it's a water lily

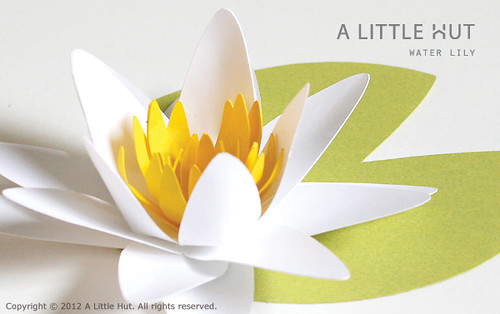
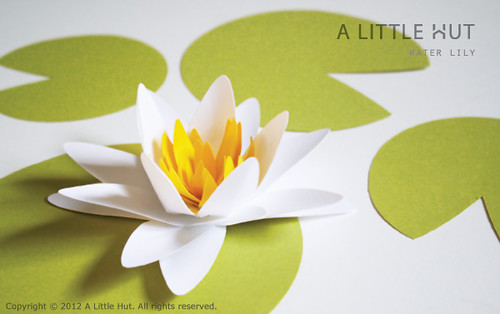
water lily

I'm definitely on a flower roll—and I'm thoroughly enjoying it. This time it's a water lily. The new center shape that has several petals in a row (when you see the video you'll know what I mean) is something new for me. I wanted to come up with a shape that would stand up, stay that way and still let the petals appear natural. I was inspired by another flower project of mine (remember?). Those petals are all separate and allow for more creative interpretation but I wanted to create something a little easier/quicker to put together.

I can see these water lilies being used for gift toppers, on a cake, as table decorations for a party and much more. The petals are very versatile because you can come up with other flower combinations—specially if you have any other of my flower sets.

The water lily is now in the shop in SVG, DXF and PDF (to print out and cut by hand) formats. You can see the assembly video tutorial below.

water lily


gift wrapping idea

gift wrapping

I hope you had a wonderful Easter—we sure did! We had a two-for-one type of day because we also celebrated our little C's birthday. She will be 9 this week.

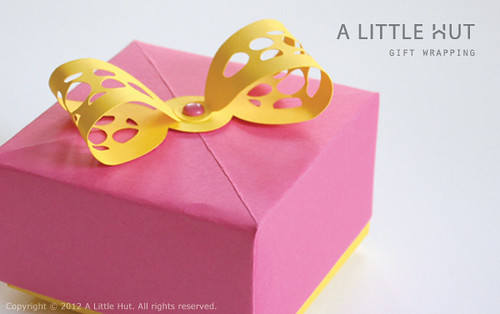
There is a little something coming in the mail for her (still not here) so we printed out a picture of it and wrapped it in this box. I'm so glad she's old enough to understand this type of thing.

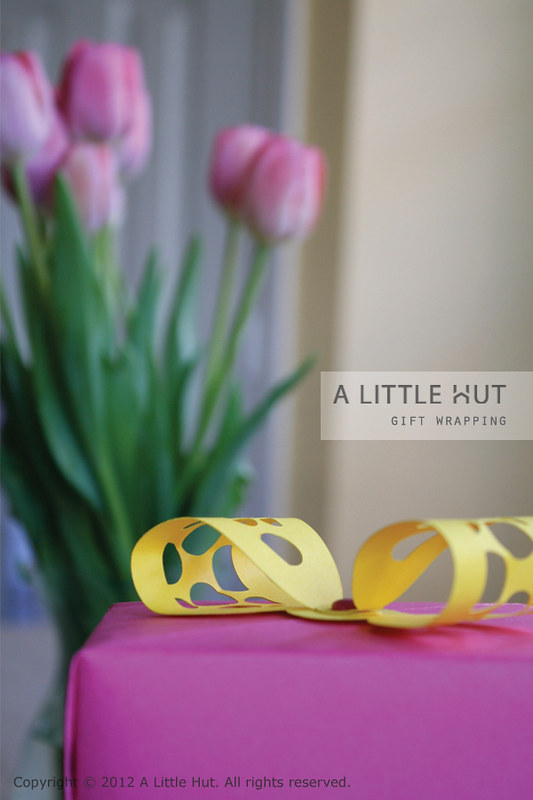
I used the same origami box design that I used here (they are addictive to make!) and one of my Easter Eggs/Bows. There's no need to wait for Easter to come again—I told you they're multi-purpose! I made the box while the bow was being cut on the machine and I was done in a matter of minutes.

Graduation parties, first communions and teacher's gifts are all coming up so this is a perfect way to wrap small gifts or gift cards. You know that I favor solid colored paper but imagine this with different patterns or embossed paper—truly endless possibilities!

gift wrapping

Pinterest
My blog and site can be pinned with proper credit given. I have reread their terms and they have changed to the point where I feel comfortable allowing this again. Protecting my rights as a creator is important so this is a learning process and every new situation and/or terms will be considered with that scope in mind. I hope you understand.

Happy Monday!

happy easter!

alittlehut-eastereggs1


I wish you all renewal, peace and the love of a wonderful time with your families.

Happy Easter!


alittlehut-eastereggs2

ribbon handle boxes

ribbon handle box

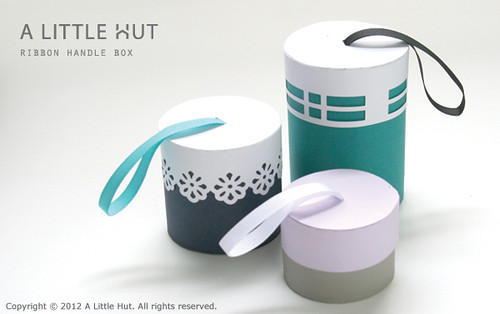
This is an idea that was inspired by one of the projects in my book Home, Paper, Scissors. This time around the boxes are cylindrical and I decided to add a touch of pattern so that they can either work alone or with other things in my shop. The square versions of these boxes are coming too!

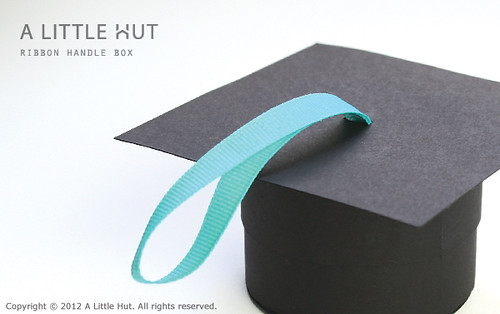
Interestingly the only reason why I came up with this cylinder version of the project was because I was trying to figure out how to make a graduation hat box. When I remembered my Ribbon Handle project it all clicked! So, a graduation party set will be in the shop shortly as well.

ribbon handle box

The floral border is an exact match to the Moroccan Party Set and the grid pattern is related to the Mission Style Party Set. I've also included a plain shorter cover for those of you that would like to customize the box in other ways. The different covers, heights and ribbon options make this project very easy to customize—no two people will make it alike—and I love that!

The video below will show you exactly how to put the boxes together. Enjoy!


• • •

Easter is just around the corner and spring is in full swing! To celebrate all items in the A Little Hut shop are 20% off until Sunday, April 8th!

CODE: spring12 
(make sure to keep it all lower case and add the code to the Shopping Cart page —it will not work at checkout).

Have a great day everyone! 

lily flowers

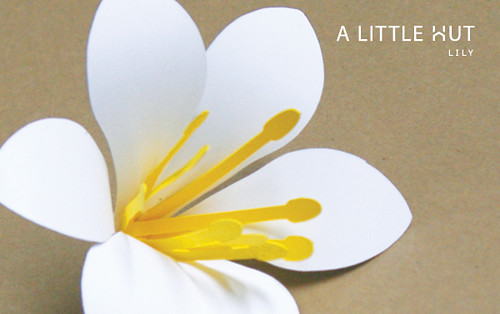
lily white paper

You should see my studio! A paper bomb went off here. I have SVGs of boxes, wall art, easels, graduation artwork and more coming your way. I'm also getting a couple of videos (for the lily and the boxes) finished so hang in there. I'm having some technical difficulties so bear with me please.

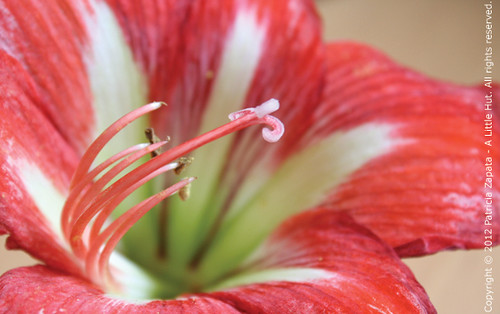
In the meantime I hope you enjoy my new SVG Lily Flower. An obliging flower from our garden gave me the inspiration (and the right petal shape). It turned out nicely but there is nothing like the real thing is there?

(psst! if you have a Silhouette account you can already some new projects up there now).

lily red

EDIT -

Here's the video for the lily! The files are now in the shop.