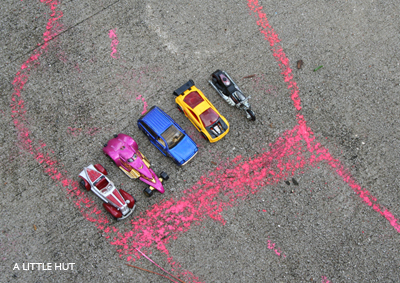
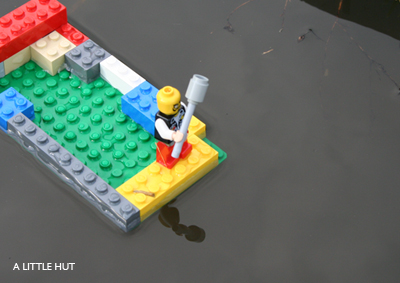
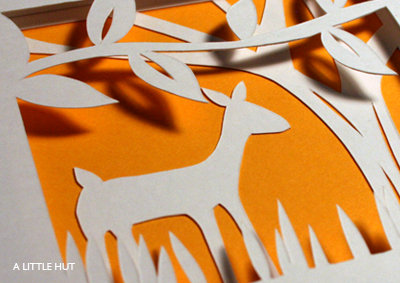
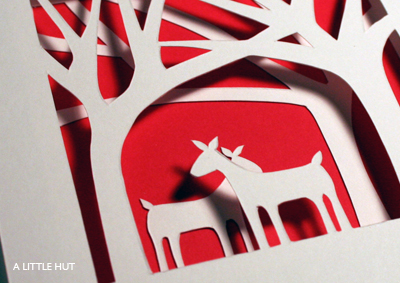
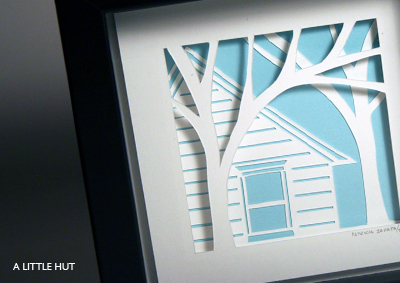
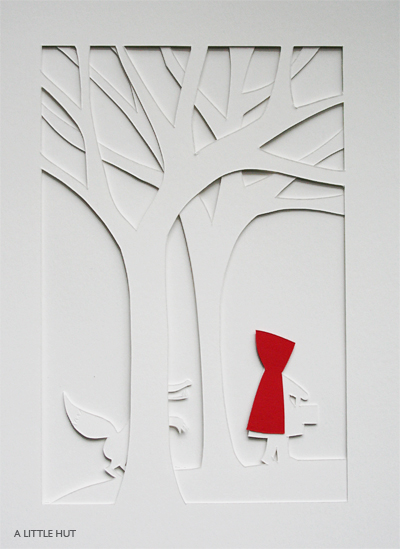
she's back...

By popular demand. What is it about Little Red Riding Hood? I like making her and apparently several of you, that have asked about her, do to. I just added two new versions to my site (here and here). I wish my photos made these pieces justice. The gray day that we started out here today didn't help one bit.

Into the Woods II


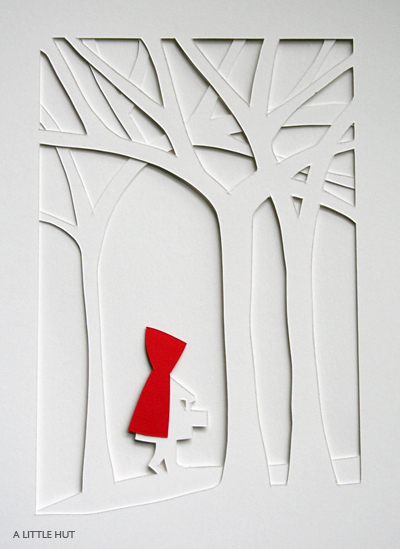
Hiding - I've been wanting to add the wolf for a while but never got around to doing it.


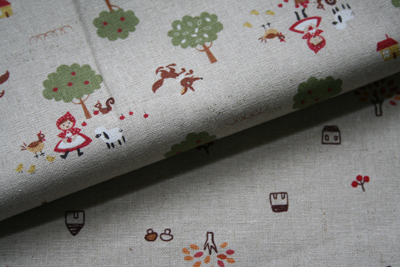
Speaking of Little Red Riding Hood these are a couple of the fabrics that I got from Sonatine that I found out about through Hillary. I don't typically buy cute looking fabrics but I just fell for these and thought I'd include them in a couple of Christmas presents I have in mind for little C. Yes, I'm going to tackle a sewing project. I don't really know if it's realistic of me to work on something like this right now (lack of time - what else is new?) but I'm going to give it a shot.


You're probably tired of me giving thank yous in my posts but I just feel I must. Lisa Solomon, who needs no introduction, for example, said the nicest things about my work at Sew Green. Thank you Lisa. I think I was blushing when I read all that.

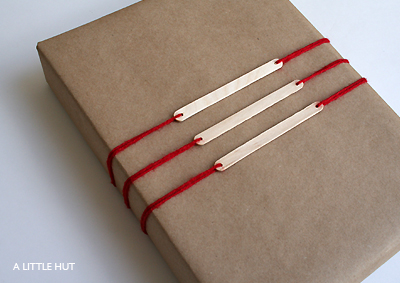
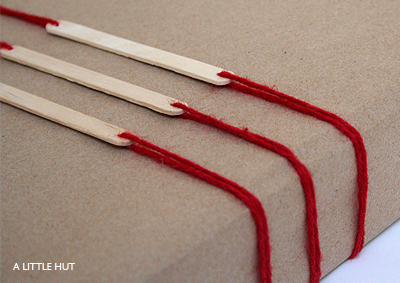
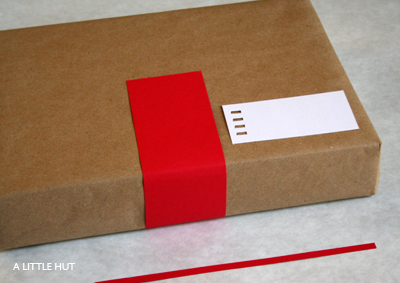
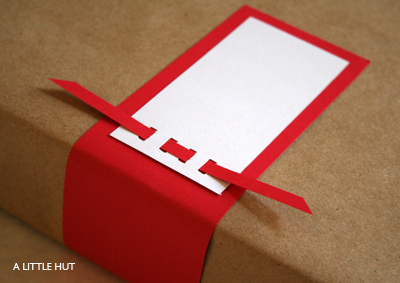
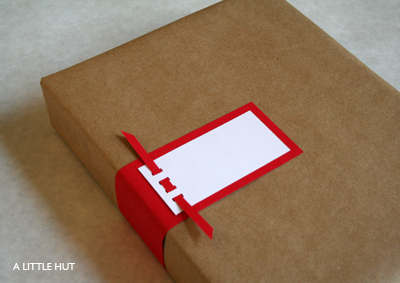
More thank yous to Amy and Ready-Made for posting about my popsicle sticks tags. They sure have been getting around! I didn't post a gift tag idea this week because I just couldn't come up with something that was worth posting. It gets frustrating when I can't come up with an idea, but I can't force it. I think what makes these little projects interesting for me though, is the fact that when I'm not too busy I have a little something to mull over.

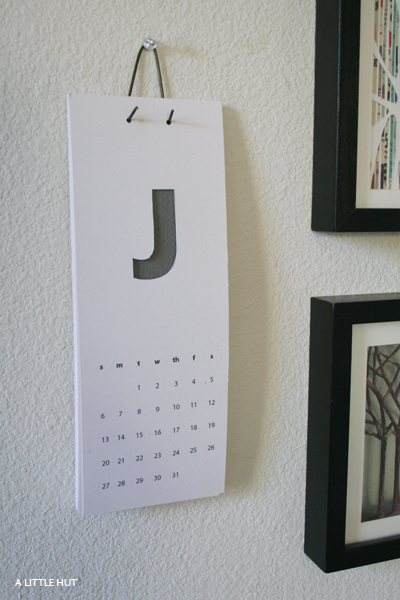
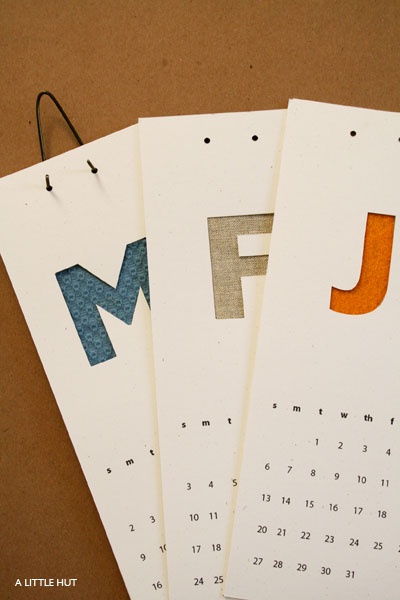
Saving the best for last - I owe a HUGE thank you to those of you that have ordered my calendar template and have sent me such lovely emails. All your kind words are very encouraging and I just love that this project has been so well received. I had no clue that it would go like this but it has been a great, great week. Thank you. Thank you. :)

Have a great weekend and see you in December!

a quick update (edited)


After some technical difficulties the 2008 calendar project template is now available. You can find it on my site here. I really appreciate the emails that I received from some of you yesterday to let me know about the glitches.

I offer all the how-to information in English but the templates themselves are offered in English, Spanish, French and Portuguese.

International buyers - please email me directly for payment instructions.
Thank you so much for all of your lovely comments regarding this project. It was a fun idea for me to work on so I'm very happy that others will be enjoying it as well. I also owe a couple of more thank yous - to Jan and Natalie for mentioning this project on Poppytalk and Craft respectively. Another thank you goes to the Parents - Goody blog for mentioning my gift tag project series.

Have a great day!

recycle project no. 10 - 2008 calendar


There are so very many tempting calendar options out there but over the weekend I decided that I wanted to make my own (even though I still have a doll house in the wings and another gift tag idea coming). I also decided that I want to continue my effort to use what I have here at home. So here is my 2008 calendar using eco-friendly paper (the same that I use for my cards) and tidbits of fabric and colored/textured paper.

Yes, this project would be easier if I just printed out the letters of the months using some fancy patterns and/or colors. But cutting them out and showing fabric or colored paper through the negative space is sooo much more interesting. The letters are easy to cut out because I picked a "chunky" font with very little detail and mostly straight lines. If I had enough wall space (no such luck though) it would be nice to hang these all up without anything behind them and just count on the shadows for a nice effect.

As an example I used only fabric here - upholstery, linen and felt.


I thought this would be a great idea for my recycle series and a way to start offering my new templates. So, if you are inspired enough to try this out I'm offering a downloadable PDF with all the templates and how-to information on my site. Many of the scraps of colored paper, newsprint, magazines and fabric that you probably already have will work well for this project. All instructions are in English but the templates are available for English, Spanish and French calendars. If you'd like a different language just let me know.

This is the first PDF that I will be selling so if you purchase it and anything is unclear please let me know. I'm still figuring out the whole automatic download thing so for now I will email you the PDF directly once it is purchased.

I'm happy to start taking my first step into selling templates (I mentioned thinking about it a few posts back) because the creative part involved in this is something I truly enjoy. I hope you find them fun to follow as well.

Remember that the goal of my projects is for you to use what you have. Enjoy!

whew... we're ready


I hope everyone had a great holiday weekend! We sure did. We went to my parents house on Thursday and we had a great time. Friday, hubby and I tag teamed with the yard work and Christmas lights chore that lay ahead of us. After the yard work was done and while my husband tackled the lights on the roof I went inside and worked on the inside decorations with the kids. The tree is up, the mantle is decorated and now we're officially ready for Christmas. It was a looong day but so worth it because 99% of the reason we do it is for the kids and they were thrilled.

This is the first time we've done all this right after Thanksgiving. Usually I would've waited one more week but we were just in the mood and the memories of last year were haunting me. For some reason it took us forever to put up lights and decorations last Christmas and all we heard was the kids' disappointment because they saw everyone else's homes decorated (lights are a big thing in this neighborhood!) except ours. Not this year. We're ready.

We couldn't have planned our decorating schedule any better because the weekend was cold and it rained and rained and rained. We had a very quiet couple of days at home playing games, reading and watching movies and I started a new project which I'll be posting about shortly. Stay tuned!

recycle project no. 9 - doll house

Many of us are going to be inundated with cardboard boxes over the holidays or you have them already. Save them and you can tackle a project like this. A parking garage would be great for a little boy. I can see it my head already with several floors and ramps.

This project is still very much a work in progress. I will be adding some touches of color with paper but I really want to keep it simple (you know me - what else is new). The house is about 17" tall and is made out of chipboard that I had leftover from a previous project. I'll post it in all its humble glory when I'm done. Oops... I forgot to take photos of the process.

Rainy day = poor lighting - This is the best shot I have. The clips are there because it was still drying at the time. The house is all dry now and the glue isn't visible.


As far as this project is concerned you're probably wondering why I didn't save it for Christmas. Well I don't know the answer to that one. Call it a spur of the moment-need to entertain daughter (and mom)-project.


Today the kids have also been outside playing with several of our neighbors. They've all been drawing on our drive-way (guess who provides drawing materials/chalk?), racing cars and proving Mom wrong by showing off how Legos do float in puddles (provided by today's on-again off-again rain).


I probably won't be posting for the rest of the week so I hope that everyone enjoys the rest of it. To those of you who celebrate the upcoming holiday like we do - Happy Thanksgiving! Until next week!

warm and fuzzy

The kids are on vacation this week because of the upcoming holiday. I've had time to enjoy them and just be a Mom.

We had a busy weekend so at one point on Saturday afternoon I kind of crashed and fell asleep (such a rare occasion when I can do that). My husband was around the house with the kids so I think subconsciously I just felt like I could drift off. I was slightly awakened at one point because my two little ones were covering me with a blanket and giving me kisses on the forehead. They were tucking me in! How's that for an 'awww' moment.

I'm so very grateful for all of you that have left such encouraging comments regarding my tags series. Wow! I really didn't expect all that. I also noticed some mentions of my work last week... here, here, here, and here. I can't tell you how gratifying it is to know that my work is appreciated and enjoyed by others. Really, truly, - thank you.

Last week Danielle de Lange of Style Files opened an online shop called Le Souk. I designed her new logo, business cards and thank you cards. Danielle asked me to keep the project under wraps until she opened her shop so it's so nice to talk about it now.

Among the many lovely things she has in her shop these are a few of my favorites: this stool, this lantern and this jug. Be sure and visit to see more of her wonderful finds.

Danielle was such a pleasure to work with and I wish her the best!


Over the weekend and out of the blue I received a couple of books from Princeton Architectural Press. I suppose they'd like me to review them but I don't know how much clout I have - if any. Regardless, it sure felt nice to receive them. I'm mentioning them because I truly did find them quite interesting.

I had never heard of the first book - The Day-to-Day Life of Albert Hastings. It's a small, quiet, unpretentious but poignant book. It photographically narrates the daily life of Mr. Hastings who is a widower in his late 80's living in Wales. All photographs are by KayLynn Deveney. By the end, I had a lump in my throat and I was close to tears. It's not really a sad book per se but it just really touched me. Even my husband, who I read it with, had a similar reaction. I'd like to give someone else the opportunity to enjoy this book too (plus no more books fit in this house!) so if anyone is interested in it just send me an email with your address and I'll send it to you. --- EDIT - The book is on it's way to Australia.

I've definitely heard of the second book but didn't really know much about it. It's The Guerilla Art Kit by the well known illustrator, Keri Smith. It certainly is sparking a lot of ideas. The book is described really well in the link I just provided above so feel free to read about it there. I'm still reading it - not in a sequential fashion for some reason. I keep going back and forth, back and forth. It's a great food-for-thought book.

So yes, hooray for wonderful surprises in the mail. Speaking of which, I used to be really good about writing letters and I haven't done that in quite some time. Maybe the Modern Letter Project which I found out about in a blog (don't recall which) would be something worth looking into. Hmmm...

EDIT – I just posted a new interview on Crafty Synergy. Enjoy!

gift tag no. 3 - popsicle sticks


Here is a new gift tag/gift decor project for the series that I'm creating because of the holiday season. I didn't use any paper for this one. I'm trying to use what I have so this version is using a tiny part of my popsicle sticks stash. The design is fairly simple - one stick to use for a holiday message, another for "FROM" and the last one for the "TO" information.

Materials:
- 3 popsicle sticks
- yarn (enough to make it around the gift about two-three times.
- drill

I drilled a hole on each end of the sticks (1/4" from the end). Then I started wrapping the yarn around the gift starting from the back and threading it through each of the sticks. The ends are tied in a knot on the back.


What the back looks like. Kind of interesting too.


The diagram below shows the way I wrapped the yarn around the gift. I created the illustration hoping the it would be easier to understand. I hope it is. The dotted lines indicate the yarn that is behind the box.


That's it!

Hints + tips:
- There are wider craft sticks that can be used for this. With the wider versions you could probably make a hole big enough to use ribbon instead of yarn. The possibilities are endless!
- Test what size of hole you can make on your stick without it cracking. One of the first sticks that I drilled cracked open because I was using the wrong drill bit size (too wide).

EDIT - Tonia gave me the following tip regarding the cracking in the comments below. I thought it would be better for everyone to read it. Here it is:
"Here's a tiny secret--if you ever want to drill a "large" (anyting bigger than 1/8") hole in any surface that has the potential to crack, just start with a small drill bit (1/16") and gradually work your way up. The surface won't crack then, and you can have as big of a hole as you need."

Thanks Tonia! :)

wip - martha has her version and I have my own


I saw these kits in Michael's today. They're very cute but I had already decided that for the holidays my white trees needed some little houses for company. So here is my first little village house in progress. In case you're curious it's 3" tall. I'm trying to decide if I want to embellish it at all or keep it really simple. I may be leaning towards the latter.

Thank you! - To Molly for posting my magnet project on the BabyCenter MOMformation blog a few days ago and to Natalie for posting my fabric + gift tag on the Craft blog. Thank you so much.

just a thought

Se me acaba de ocurrir que es muy probable que algunos de ustedes entienden solamente Español. Si es el caso y necesitan que les clarifique algún projecto ó tienen alguna pregunta no duden en escribir un email. Con gustó les contestaré las inquietudes que tengan. Se que las traducciones automáticas no siempre son fáciles de entender.

No escribo mi blog en Español simplemente por que me demoraría mucho más. Hablo Español pero se me facilita más esciribir en Inglés. ;)

-------

I just had the thought that some of you that some of you may only understand Spanish. If that's the case and you need help with a project or you have a question please feel free to send me an email. I'd be happy to answer any questions you may have. I know that the automatic translations aren't always that easy to understand.

I don't write my blog in Spanish simply because it would take me much longer to do it. I speak Spanish but I feel more comfortable writing in English.

late night = no thoughts for a title

I stayed up late last night working and I'm not very sharp this morning so excuse any blunders in the next few paragraphs. I wish I could say I was working at the speed of light but actually the opposite is true. I didn't get as much done as I had hoped.

I couldn't work during the day was because the whole weekend was packed full of things to do. We had a soccer game, boy scouts event, my brother's birthday get together, attending the school fund raiser, and oh those lovely chores. In the middle of all that I managed to get myself a little something (I won't get to use it as much here but I really really need it this year), a quick hair cut and before we knew it the weekend was over. So here I am at the drawing board again.

This gives you an idea of my semi-new look. Don't worry it's not you. It is a blurry photo. It's straight because this is perfect weather for straighting out my hair (another one of the reasons why I love the fall). I've always wanted straight hair and those that have it straight wish they had mine. Isn't that the way it always goes?

This post is mostly to thank those of you that have emailed me over the weekend and this morning regarding Friday's lost post. Apparently my post lingered on as an RSS feed and several of you kind ladies took the time to email me the whole thing. Thank you! :)

If you managed to read it before I deleted then you can skip it. For those of you that missed it and want to see the whole version vs the mini summary I ended up posting on Friday here it is:

I've been thinking about the work I've been doing for my shop and where I'd like it to go. For starters my block print cards will no longer be available in the new year. Block printing won't be completely out of the picture but it may appear in a different form. My paper cut illustrations will stay but I'm also starting to explore other variations of that medium.

The other idea I've been pondering (this is where I need your help!), is whether I should offer templates/instructions/tutorials for different projects like the one's I post here (and I'll still be posting) for sale as downloadable PDFs or small booklets for a reasonable fee. So what do you think? Is this a crazy idea? Would there be interest in something like this? I'm really interested in your thoughts so all comments (or emails) are more than welcome. Your feedback will be very helpful.


So that's where I'm at today. Thinking. Thinking. Thinking. I go through periods of self-evaluating and I'm definitely doing that today.


Oh... notice anything different around here? Thanks to Jessica and her
post about how to change a Blogger template I decided I wanted to try out the three columns here. It seems a little busy - or is that just me? I'm going to live with this for a bit and see if I decide to keep it or not. In the meantime pardon my indecision as I move things around every few hours! Back to work...


Oh and one more thing! I posted a new interview on Crafty Synergy for this week. I haven't been able to post as frequently as I'd like but I'm trying to keep the blog alive. Enjoy!

thinking ahead


This is what I get for working on my blog at the end of a long day!! I just deleted the post that was here! I'm so sorry to those of you that had already made comments. I was editing some things (like I always have to do a million times because I think faster than I type) and one thing led to another and poof!! the post was gone. I'm too tired to recreate it.

In a nutshell (and without typing the four paragraphs that I had earlier today) - I talked about the future of my shop. There will be no more note cards next year and maybe the offering of some PDF tutorials. I also made a tiny introduction to my three columned blog (courtesy of Jessica's post).

I think it's time to give up for today. Have a great weekend!

gift tag no. 2 - fabric + paper

I tried something a little different by including fabric in this tag. I think it gives it a softer more organic feel, but the design is still contemporary. You'll also notice that with this tag, as well as the first, you probably don't need any more embellishment (ie. bows. ribbons, etc) on your package. I'm calling these projects tags because that's they're primary function but they really are a decorative element for a gift as well.

Materials:
- strip of paper
- strip of fabric that has raw edges all around and is wider than the paper
- spray adhesive or glue

You'll notice that I didn't include any measurements for these materials. It all depends on the size of the box and whether you prefer a wider band or not. Just make sure that the fabric is wider than the paper and that both can go all the way around your gift box.

Glue a strip of your chosen paper on to your fabric and make four folds. The two center folds need to be at least 2"or 3" apart - this is where you'll write your to/from message. The outer two folds go outward and will meet in the center. The photos below illustrate this. Make the creases of the folds nice and crisp and then glue the whole thing (folded) onto your gift box.


Here I've used a different color of paper to show how contrast can make this tag more attractive. My white-on-white version looks much better in person. Experiment with the use of different textures, colors of paper and fabric. Make it your own!


Yes, the tag doesn't exactly stay closed. I actually like that. I don't think it would look as interesting if it were completely flat.


Here's another tag using the same materials and general idea. This is just a strip of fabric with paper on both sides (to make it sturdier). The raw fabric edge goes all the way around. I made this a narrow long tag but it can be any size and width that you prefer. A tip - if you make this tag make sure to cut a tiny hole in the fabric before gluing it to the paper. This way your hole punch only needs to cut through paper. I learned that the hard way. ;)


Here is a failed version of a tag (at least in my opinion). I used the same technique for making a magazine bowl. I made a ring instead of a tight center by using the bottom of a tall skinny mug as a mold.


In my mind the idea was much better. It's in the trash now. :( The bottom two red strips were to be used for the to/from message. I decided to show this failed option because it may inspire someone else to take it further, make it better or create something completely different. After I decided that I didn't like this idea at all I actually wrapped the ring of paper with a torn piece of fabric (the same white one I used above) and it turned out to be a funky looking and very sturdy bangle. I won't use it because it's not exactly my taste but it may be food for thought for someone else. That's why experimenting is fun. You never know what you'll come up with.

Thank you!! -- To Natalie for mentioning my first gift tag tutorial on the Craft blog. I mentioned it on my Maker Faire post but I'll say it again. I also owe her and Jenny Ryan a big thank you for giving me an Editor's Choice blue ribbon at the Faire. The list of winners was posted this week here. Last, but not least, a thank you to Whip Up for posting my magazine bowl project. :)

taking a breather

There are days like today where I'm on the computer all day long and my hands crave something to do. I find that if I take a small 'crafty' break I get more ideas for my digital work. Does that make sense? I guess it's just the way my mind works. Here are the results of one of today's mini-breaks. Just a "for fun" piece - with a tiny piece of junk mail that I got yesterday.


Something else I did on another break was to look at the new work and websites of some of the artists that are participating in November's Poppytalk Handmade market. There is so much wonderful work to look at! In no particular order, these are just some of my favorites:
- industrious lily
- green chair press
- alyssa ettinger
- bookhou
- cedar seven
- and here's my page :)

new month, new work

It was a productive weekend because I finally got some work done for the shop. It was nice to work while listening to some of my favorite podcasts. Now I'm only frustrated because my web site isn't functioning! :( My husband is working on it right now. He still doesn't know what's going on. So here's a little idea of what I've done. You can also see it at my Poppytalk Handmade page. The artists for November are online now and everything looks wonderful. Holiday shopping anyone? ;)

Exploring


Inseparable (sold)


Stroll (sold)


I'm working out the next tag idea in my head. As soon as I have it made I'll post it. I'm so glad that my first one was so well received. :)

nothing like home


This is something I worked on tonight for a much needed shop update. I hope to have more done in the next couple of days.

Have a great weekend!

gift tag no.1

As predicted Halloween was a lot of fun. We didn't venture too far because one of the little ones in our group was a little tired - he's only 2. But the kids were excited because there was plenty of candy to go around. When we got back, we sat in our neighbor's driveway with people from other neighboring homes and we all gave candy away in what we called a candy buffet. Those that came by got treated to candy from 5 different families so it was a great big stop for them and the kids had a lot of fun giving the candy away themselves. Thank goodness we gave away every last piece of it. I don't need that temptation around here!

Can you believe it's November already? I honestly don't know what happened to October. It just flew by. I went to the grocery store yesterday and it's already decked out in holiday decorations (yikes!). It made me think that I'd like to come up with some projects for the next few weeks that are quick and easy and that could be useful for this season. Inspired by the new Craft cover (different gift wrap ideas) and my tag feature I thought I'd explore different options for gift tags.

My style tends to be in the "less is more" category so you'll see that these ideas will follow that theme. My hope is that these can be springboards for you to embellish to your own taste and inspire other ideas too.

On to the project - When going to a party or holiday event haven't you ever had a beautiful bow/decoration that just gets crushed under the weight of another gift that someone stacks on top? Argh! This idea is a solution to that and it's super easy to make.

Materials:
- One wide red strip of paper (2.5" wide - length depends on the box)
- One thin red strip of paper (1/4" x 4.5")
- One white card (2" x 4")
- Hole punch (I used a rectangle shape in this case)
- Double-sided tape (or glue stick)

I wrapped a box with packaging paper to use for all these upcoming gift tag ideas. I love this paper because of it's slight texture, color (it makes the brighter ones pop) and the fact that it's recycled. I'll specially be using it for these projects so the focus is on the tags.

I used the tape to attach the wide strip of paper to the box. I centered it on the front of the box and it wraps around to only the half of the back. The back looks just like the front.


I punched four holes in my white card and threaded the thin red strip of paper through the card and cut the tips of the strip on a diagonal. I attached the card to the box with tape and centered it in the top area of the red wide strip.


Voila! A simple pretty gift that won't get ruined. :)