Showing posts with label cutting files. Show all posts

fantasy bloom gift set

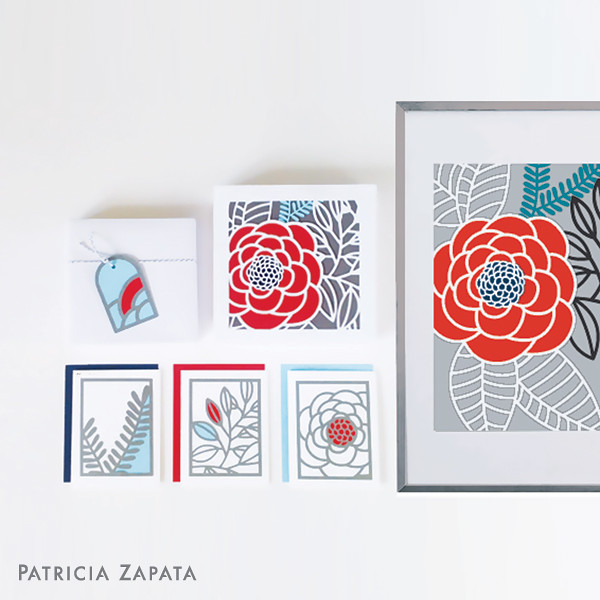
Fantasy Bloom Gift Set

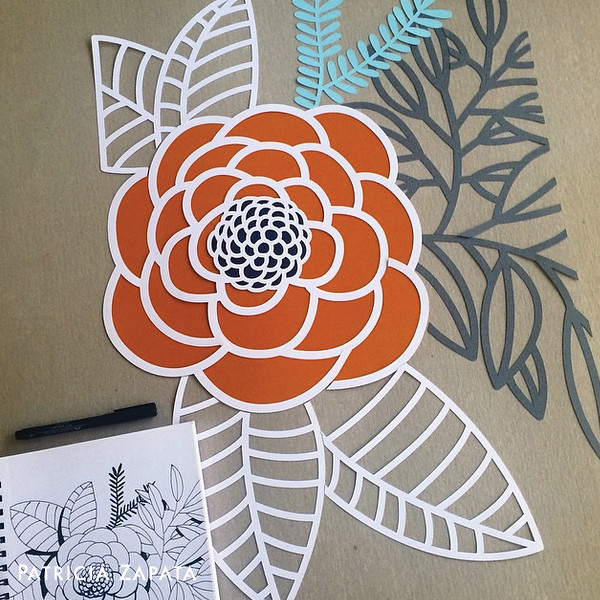
This one took much longer than expected. It's been in the making since I translated a hand drawn sketch into a much larger paper cut version. I'd been wanting to get back to it and it just hadn't happened until today.

We're having a spectacularly uneventful holiday weekend because both kids are studying for finals (read: a lot of long faces around here!). So... in between going back and forth asking questions, I got to finish this.

I really like that I stayed very close to my sketch. It gives the piece a little more of an organic feel that translates well in any size.

I hope you enjoy working with this set as much as I had making it!

Have a wonderful weekend!


Fantasy Bloom Gift Set

halloween kit no. 2

halloween kit 2

This is part of my new Halloween Kit 2.  I wanted to design a set that could be used for decorating, card making and just be plain versatile and still look like me.

I just love the door knocker! It may not knock loudly but it does move. That was the first thing that the kids tested. I think if it hadn't moved I may have gotten a thumbs down—lol.

The Bony Rosettes are included and are great for wall decorations like the sample wall project that you see below.

halloween kit 2

My son:
"A small version of these would work well as cupcake toppers!"

Me:
Why yes—that too!
(I love it when they give me advice related to my work :) )

halloween kit 2

How about rosettes on gifts, cards and scrapbook layouts? And don't forget that there is also a new set of Halloween Backgrounds in the shop.

Good news!
I'm offering a 25% discount on any purchases over $15.
Coupon code: laborday12
(be sure to add it to the Shopping Cart page; NOT the Check Out page.

• • •

Friday Tidbits
- What a sweet project for little girls!
- A beautiful/simple structure and shape.
- If you're in NYC you can get my book at The Museum of Arts and Design!
- I kept it up! One every day... My favorite so far? Number four.

Have a great weekend everyone!

how to make a paper pendant

paper pendant

I made this specifically to wear to the paper craft class that I taught at ALT Summit. It was entirely a last minute thing. If I'm completely honest I think it was a procrastinating-on-other-last-minute-things kind of project. In any case, I love it and got many compliments on it. So, here are the instructions so you can make one for yourself.

Materials
- White cardstock paper (I used basic craft store scrapbooking paper - 65lb)
- Cutting machine or craft knife and cutting mat
- Silver finding
- Pliers

paper pendant - cutting


If you have a cutting machine
1. Import  the SVG or DXF file to your cutting software. Use a 12" square piece of cardstock to cut out 12 pendants. Each one should be 2.75" wide.

2. Add glue to each layer and stack them neatly one on top of another. I cannot emphasize enough how important is that the shapes line up. If they don't the pendant will look messy and will, quite frankly, look cheap. Neatness counts big time here!

I like squeezing the glue bottle on a scrap piece of paper first—until the glue flows smoothly. That avoids the having a big blob of glue on a thin strip of your pendant. The rest of the gluing can be done using two methods—you pick your favorite.


- Add strips of glue on to each section of the pendant or...


paper pendant - gluing

- Add glue by using dots.

paper pendant - gluing

In either case, just make sure that you're not using too much glue. When the pieces are pressed to one another some glue may squeeze out from the sides—just clean it up as you go. If you keep the glue to a minimum this issue will be reduced significantly. Rub the piece that is added to the stack (to spread the glue a bit) and then line it up in the final position.

3. Once all the pieces are glued and dry you can add the finding. Use pliers to open it enough so that the pendant can slide in. Once the pendant is in place close the finding again. This can get tricky. Even though all the layers of paper will feel quite sturdy you still need to be careful to avoid tears.

4. Slide your new pendant onto a necklace and enjoy!


If you're cutting by hand
1. Print and cut out one of the pendant shapes.

2. Cut out 11 pieces of cardstock that are 2 1/4" x 3" and glue them all together. Add the glue in zig-zag fashion across and up-and-down each piece of paper until you have a neatly glued stack. Rub each sheet a bit against the stack before placing it in its final location—this allows the glue to spread evenly.

3. Glue the cut out pendant shape to the top of the stack.

paper pendant - cutting by hand

4. Start cutting out the pendant with a really sharp craft knife and using the pendant cut out as a template. I thought I was going to use a ruler but it wasn't necessary. Using the first cut out as a template was enough.

paper pendant - cutting by hand

Important! - Cutting the pendant will take some patience. Go slowly. It took me at least 7 strokes in each segment to get all the way through the stack of paper. The first couple of strokes should be done lightly (so that there are no mistakes with the others). The initials cuts will make a groove that will guide your blade the rest of the way down.

I cut the outer perimeter first and then the triangles inside the pendant but it doesn't necessarily need to be done that way. If you go slowly you'll be fine.

5. Follow steps 3 and 4 in the cutting machine section and you're done. Enjoy!

Downloads:
- The SVG, DXF and PDF files can be downloaded here.

 • • •

ALT Design Summit - Paper craft class — an awesome group!
(see me wearing the pendant?)
Photo by: Brooke Dennis

Alt Design Summit 2012 - Saturday

project life: day one

valentine's day kit

"You're little boy is all grown up."

He said that and it hit me (he's going to be twelve in 7 days). He's right—and other than photos I don't have much else to remember this amazing adventure with him or his sister. What about all the stories and conversations that go along with those photos? (enter mom guilt—gulp) So, I'm going to remedy this situation this year.

I've been eyeing Project Life for a long time. For those of you that don't know what it is: in a nutshell it's scrapbooking in a minimalist way—or at least that's the way I see it. It's more about the stories and the photos, then it is about layouts and embellishments. As with any creative project, styles vary wildly. There is no surprise in the fact that I prefer the minimalist side of things and that's why I lean towards work by Ali and Liz.

I have journaling cards that I bought a long time ago and some photo pocket pages that I'll be putting to good use. Now that I think of it I may have mentioned this a while back. That effort obviously didn't take off. But now it will. I'm looking forward to designing some simple journaling cards for myself too (oopsie! another project I will have to make room for—but very worth it).

valentine's day kit

I know these photos don't relate but in a way they do. As cheesy as it sounds, Project Life will be my labor of love for me and for the family. I'm going to try to make it a creative outlet where I'm not as picky on the design of it all. I'm just going to dive in. Day one is all about getting organized and putting those first words to paper. Here I go...

Photos: New Valentine's Day kit in the shop!

• • •

Thank you so much to Kate Pruitt on DesignSponge for featuring my Etsy shop in her post 10 great etsy shops you need to know. So flattered to be included with such talent. I love every single one of those shops!

And thank you to those of you that have send in the kindest messages and emails about my new web site. I'm quite excited about it and it looks like it's all running smoothly.

a little hut has a new web site!

new web site! 

We're starting off 2012 with an awesome completed project. The new site for A Little Hut is here! It has been a long time coming and I'm very excited about this big improvement.

It was a LOT of work. It was a total team effort—I don't know what I'd do without my Mr. Z who did all the programming. He's so patient with all my requests! So, so patient.

Improvements:
- You will no longer need to wait for an email from me. You will be able to download all files immediately after paying for them. Only freebie files will need to be approved internally by me—which only means you'll just need to wait a bit (like with orders on the old site).
- You will be able to see your order history. You will have a handy list to remind you what you have ordered in the past.
- Products will be easier to find. The navigation from one section to another is quite simple.
- More photos and views will be available for products that I upload in the future. For now they have about the same amount of photos that I've used previously.
- I've added the icons below to clearly describe files that are available for each product. Some of you like to use cutting files, some of you want to print and cut by hand, some of you want to print only. Now you will know what is included in each set. The Product Information page explains these symbols in more detail.
For previous customers:
For those of you that have registered and made purchases on A Little Hut in the past don't worry, your information (personal contact information - not previous order history) was transferred to the new site. The only thing you'll need to do is create a new password. Sign in with your email address, click on Forgot Password, you'll get an email with a temporary password. Use that password to sign in and in My Account you can change your password to whatever you prefer. That's it! If you have any questions just use our Contact Us page. 

I think we accomplished what we wanted—a better experience for visitors and a more efficient and up-to-date site. I happen to like how it looks too! Hehe. 

If you find any glitches, typos or anything that you think we can work on please feel free to let me know. I want to make the site the best that it can be.

Stop by and visit the A Little Hut to check it out. I hope you like it! 

review: silhouette cameo

silhouette cameo

I ordered the Silhouette Cameo a few weeks ago and just had a chance to use it this week. So far I'm quite pleased with the results.

It is an electronic cutting tool that is simple to use. It hooks up to your computer and with the help of the Silhouette Studio (a free software provided by the machine maker) you can cut purchased files or make your own. I like that the machine is clean in design (not pink or girly) and that it's fairly small (smaller than a Cricut).

silhouette cameo

I tried using the instructional video to learn how to use the machine but it didn't work with my Mac. It kept skipping parts of the presentation. I used the instruction manual to fill in the gaps of information that I missed. I later discovered that I had to download the entire video on to my computer in order to see it. It never played directly from the CD but it played on my computer without problems.

The blade was easy to install. With the use of the software the cutting depth and speed can be easily adjusted. I've heard that there are people having trouble with the blade but I haven't had any yet—then again I just started.

The cutting mat holds up to 12" square sheet of whatever material you're cutting. So far I've only cut paper but vinyl and fabric are other materials that can be used. The width (12") is what finally made me go with the Cameo. The previous SD Silhouette option only cut paper up to 8.5" wide. The cutting mat is  really sticky. I had a hard time detaching larger images. I'm assuming that will not be the case after I've used the mat a couple more times.

silhouette cameo

The control panel and buttons are very easy to use and understand. One particular feature that I like is the pause button. If you've cut the wrong size, the wrong color of paper or you changed your mind about anything, this button is key.

silhouette cameo

I cut my Four Petal Lattice at the 10" square size and it was difficult to remove from the mat without tearing the paper. I suppose that after a couple of uses the stickiness will be more manageable. What I really wanted to see was a smaller version of the file to see how the cutting would hold up with detail. It didn't disappoint. The shapes are crisp and the machine had no trouble at all. The bottom square is only 3" wide.

So...
Pros: 
- I like the way the machine looks and works. I specially like the detail work it can cut.
- Good price point. I ordered my machine when it was $260-ish.
- Free software to use with the machine. I like that it has an easy way to sort and label all images in a library.

Cons:
- As far as I've seen the replacement blades and mats aren't sold anywhere near me. That means I'll be ordering online. Not a big deal, but if I happen to need something urgently, it will be an inconvenience.
- The mat is definitely too sticky but I'm sure that will change with time/use of the mat—it's not a deal breaker.
- When the machine cuts it seems louder than what I'm used to—again, not a big deal.

So far I'm very happy with this machine. The next thing I want to try (if I only had the time now) is the print and cut feature. That will be really interesting to see in action. I'll post my thoughts when I get to it.

lattice

Typically the Silhouette Cameo is sold for $299 but as I said, it can be found at a lower price on occasion. The replacement blade is $19.99 and the cutting mat is $14.99.

For those of you that have asked—all A Little Hut files can be cut with the Silhouette Cameo. If you have the free version of the software you can import DXF files. If you have the designer edition (additional cost involved) then SVGs can be used.

One last thing...
This was a personal purchase. I was not sent this machine for review, nor was I asked to comment on it.  Only my personal opinions are part of this post.

• • •

EDIT —It's been a few days since this post. I just wanted to add a tip regarding the mat. I know I said it wasn't a deal breaker but it's getting frustrating. The mat is too sticky and the paper tears when I pull it up—and yes I'm carefully using a spatula. I rubbed a piece of fabric on and off of the mat to remove some of the stickiness and it worked.

Another thing... the setting for the depth of cut is something I'm still struggling with. The machine doesn't completely cut through my Paper Source card stock. The Cricut does it with no problem. I guess it's another learning curve.

back

graphic arches

Well hello there! I had no idea I'd be gone for a couple of weeks. I've been so wrapped in projects here and there that I simply didn't have the time to put together anything decent to blog about. I think I may have also reached one of those "need to take a break moments"—it happens.

So... what have I been up to?
- Still working on my book proposal (rethinking some projects-but almost done!)
- Working on some projects for local clients
- Designing new patterns and projects for my shop
- Visiting with great friends at Houston Quilt Market. Some photo evidence via Diane here. It's always so much fun to get together with such driven and talented women.
- I went to paint a collaborative/fun raising project with my little C's 3rd grade class. A lot of fun!
- And basically just going on with our crazy life...

I've regrouped and today I start off with some limited edition goodies at Poppytalk Handmade. The collection includes assorted paper cutouts (for framing, scrapbooking or coaster making) and new graphic fairy tale art work. If you see something that you'd prefer in a different color just send me an email and maybe we can work something out.

a little hut @ poppytalkhandmade


This is a limited edition collection because I am actually making and putting these items in the mail to whoever orders them (I haven't done that in a while). I will only be doing this during the month of November.

For those of you that work with cutting machines you can take a look at the paper cutouts there to get some inspiration on what other things you can make with my Christmas Paper Quilt and Falling Leaves collections. I will be putting the digital files to the new items (like the Graphic Arches Tags) in my shop in the next couple of days.

Be sure to check out the other artists at Poppytalk Handmade. There are beautiful things that can help you get your holiday shopping started!

Happy Monday everyone!

christmas paper quilt and boxes

christmas boxes

So here it is! You had to know this was coming, right? I've been planning it for weeks and weeks. I kept changing my mind about some of the designs. In the end I think I accomplished what I wanted—something fun, contemporary and versatile. I wanted to include some boxes that can be used even after the holidays have come and gone.

I want to use the houses for a house warming gift or the stripes for a birthday with contrasting ribbon or something like that.

I always show my designs to the kids while I'm working on them. I like to do that because they point out  things that are so obvious and that I don't see because I've been so absorbed in the project. I was lucky that this time they saw exactly what I was hoping they'd see when I hung the Christmas Paper Quilt on the wall.

"Oh, you're working on Christmas!" = Perfect!

christmas paper quilt

I have other holiday goodies coming but I really couldn't wait to unveil this one. I'm going to make small 3" box covers and putting them in this frame this weekend. I can't wait to see what it looks like!

You can find my Christmas Paper Quilt in the shop now!
[The shop is finally sporting my revised logo. I am my own worst client!]

• • •

Friday Tidbits
- More of my work is now on Lettering Delights. See it here!
- Mia Liu - I love, love this paper mural. Amazing. Her whole portfolio basically blows my mind.
- This project caught my eye this week. Vases, paint and rubber bands! So simple and stylish at the same time.

Have a great weekend everyone!

christmas boxes

news! - I'm on lettering delights

gift boxes

My Paper Quilt is now being sold on Lettering Delights as separate boxes (make up your paper quilt design set up) or as a set as the Intricate Designs Gift Box Collection (so you can make the paper quilt yourself!).

I'm thrilled to have my work on LD's site! It's the first time I license any of my work and to have this happen with my cutting files is really exciting for me. It's been so hard to keep quiet about it.

For those of you that are still not set up to work with cutting files they have some cute paper packs and images that you can print and use in a myriad of ways. They are having a huge super bundle sale!

Thank you to Lettering Delights for the warm introduction today and welcome to those of you that are new to my site and blog.

Happy Thursday everyone!