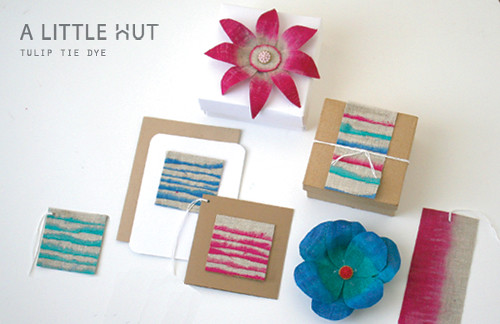
When I was offered the opportunity to work on this Tulip Tie Dye project I jumped at the chance simply because it's something I've never done before. In the end I ended up going in my own direction and although I did use fabric I decided to apply it to my tried and true love—paper goods. As you'll see I used the materials in a non-conventional way and because of this I have more than plenty of dye left over for more projects that I have in mind.
Materials
- Tulip Tie Dye
- Tulip Surface Cover
- Fabric stiffener
- Glue
- Small bowls (one for each dye color)
- Sandwich bags (optional)
- Scraps of linen
- Fabric scissors
- Paper trimmer or scissors, pencil and a ruler
- Paper towels
- Wooden clips
- Card stock and/or blank cards
- Decorative buttons (optional)
- Twine for gift tags or bookmarks (optional)
The Tulip Tie Dye kit comes with all the inks (even replacement packets of dye), plenty of rubber bands, gloves and very clear instructions. The bottles are perfect for the traditional tie dyeing projects that are described in the booklet (read it before starting and then save it!) but I went a different route and used bowls instead. The Surface Cover was very necessary to protect the area where I worked and the gloves are a definite must.
FLOWERS
- Cut two pieces of linen that are 3" x 10" (8cm x 25cm) each. Roll up the linen lengthwise and tie it with one of the rubber bands that are included on the kit.
- Dip the fabric in the ink of your choice. I used sandwich bags to wrap around small bowls but you can use disposable cups or plates or any type of container that has a narrow base.
- The roll needs to be removed when it is about half way to the point where you want the ink to rise. The ink continues to rise after the fabric is removed from the ink.
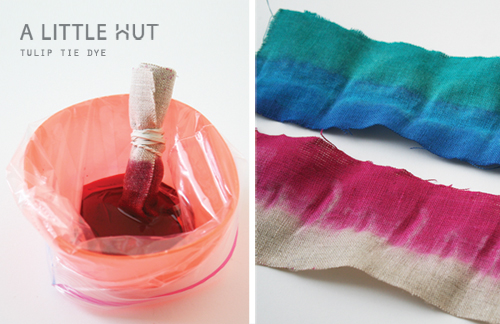
- Set the fabric aside for about two hours so that the ink penetrates the fabric.
- Unroll the fabric and air dry it. I placed it on our lawn on a very sunny day and it dried rather quickly. I wouldn't recommend using your dryer because it would probably get stained since my tutorial doesn't include rinsing the fabric.
- Once the fabric is dry, iron it and add fabric stiffener with a brush (follow the manufacturer's instructions). Let the fabric air dry again.
Important! Please keep in mind that the steps to dye fabric that will be washed (like t-shirts, cushions, etc) is very different. This tutorial is only for fabric that will never be washed.
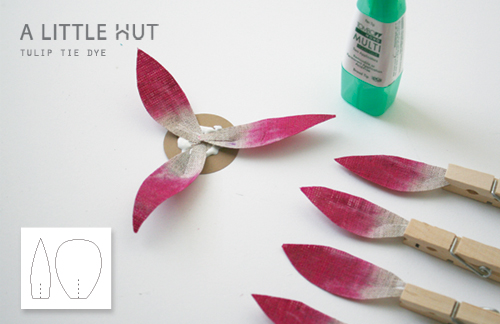
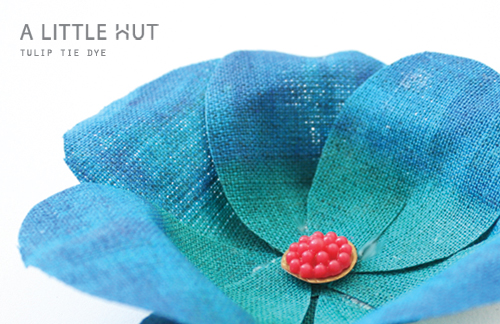
- Using the fabric scissors cut out 8 petals that are approximately 1" x 4" (2.5cm x 10cm) in the shape that you prefer. The two shapes of petals are in the inset illustration above. The pink flower uses the petal design on the left and the blue one uses the shape on the right.
- Cut a slit in the center bottom of each petal that is about 1" (2.5cm) long.
- Overlap the two tips of each of the petals and glue them together. Use wooden clips to hold the petals together until they are completely dry.
- Cut a circle out of card stock that is 1 3/2"(4.5cm) wide.
- Add glue to the center of the circle and attach the petals to the center of the circle. Make sure they overlap a bit so that the card stock isn't visible.
- Cut out a linen circle that is 1 1/4" wide (3cm) and lightly ink the edges of the circle by rotating it as it is dipped in the ink.
- Glue the circle to the center of the flower and attach a decorative button to embellish the project.
- Curl the top of the petals downwards.
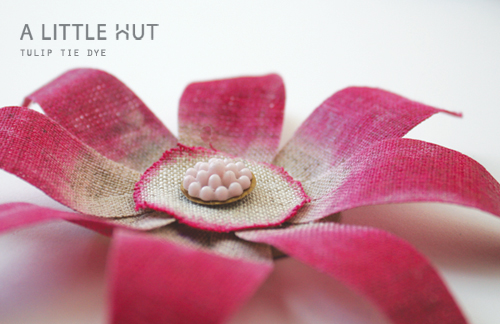
The blue flower is made differently because the rolled fabric was dipped twice. I dipped it once in blue dye, let it set for about one hour and then I flipped it over and dipped the opposite end in green dye. Another difference is that this flower does not have the linen circle in the center. Note that the center of these flowers lends itself to many customized options.
STATIONERY
- Cut strips of linen that are about 1/2" x 3" (13mm x 8cm).
- Hold a piece of linen by folding it in half and dipping one of the long ends lightly in the dye. I folded the strips in half simply because of the small size of the bowls I used. Repeat this for each piece of linen. Place the strips of fabric on paper towels until they are completely dry.
Note on dipping: Practice first! The linen needs to touch the ink only for one second (literally!). The ink quickly rises even after the linen has been removed from the ink. After a couple of tries you'll get the hang of the amount of time and ink that is needed.

- Using the paper trimmer (or a ruler, pencil and scissors) cut squares of card stock that are 3" (8cm) wide.
- Add strips of glue to the surface of the square and add linen strips one at a time.
- Using the fabric scissors and the card stock as a guide, trim the excess fabric that overhangs the edges of the square.
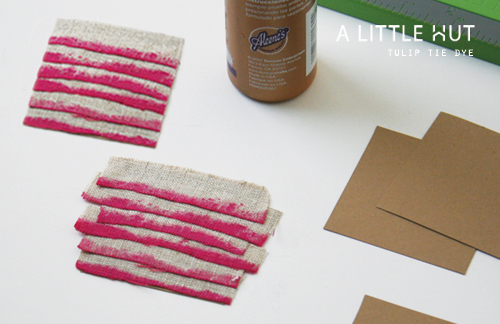
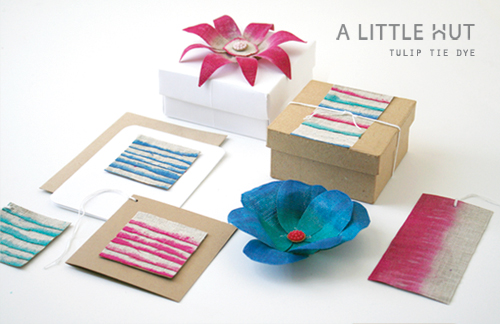
- Glue the linen squares to blank cards that can be used as note cards or as gift tags. Larger linen pieces can be used for gift wrapping, book marks or for scrapbooking.
- Most of the squares I made are monochromatic but combining the colorful strips (as seen on the gift box) is another clear way to go.
- Remember that these are just ideas. Make them your own! Cover different shapes of card stock or cut more intricate shapes out of your fabric. The possible variations are truly endless!
Now I have to fulfill a promise. My daughter is begging me for a t-shirt. I promised her we'll work on it this coming weekend. We'll see how it turns out!

Click on the image to the right to make it larger and read about fun techniques that you can follow for other tie dye projects.
Tulip Tie Dye Kits are available at Walmart, Walmart Canada, Michaels, JoAnn, A.C. Moore, Hobby Lobby, Hancock Fabrics, Meijer. Tie dye kit contents and colors may vary by store.
I wrote this post as part of a paid campaign with iLoveToCreate.com and Blueprint Social. The opinions in this post are my own.
Visit iLoveToCreate.com for many inspirational ideas and crafty projects:


No comments:
Post a Comment