

I made this specifically to wear to the paper craft class that I taught at ALT Summit. It was entirely a last minute thing. If I'm completely honest I think it was a procrastinating-on-other-last-minute-things kind of project. In any case, I love it and got many compliments on it. So, here are the instructions so you can make one for yourself.
Materials
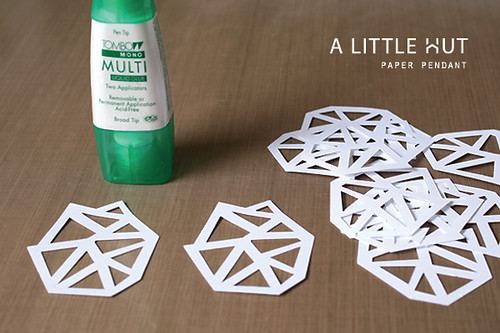
- White cardstock paper (I used basic craft store scrapbooking paper - 65lb)
- Cutting machine or craft knife and cutting mat
- Glue (I prefer Tombo Mono Multi Liquid Glue )
)
- Silver finding
- Pliers
If you have a cutting machine
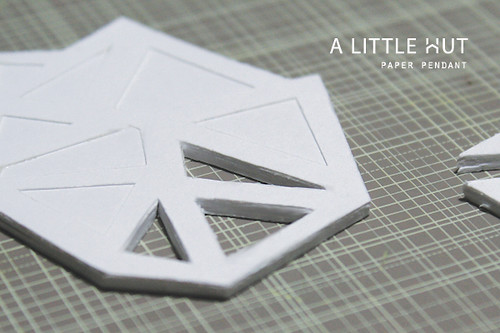
1. Import the SVG or DXF file to your cutting software. Use a 12" square piece of cardstock to cut out 12 pendants. Each one should be 2.75" wide.
2. Add glue to each layer and stack them neatly one on top of another. I cannot emphasize enough how important is that the shapes line up. If they don't the pendant will look messy and will, quite frankly, look cheap. Neatness counts big time here!
I like squeezing the glue bottle on a scrap piece of paper first—until the glue flows smoothly. That avoids the having a big blob of glue on a thin strip of your pendant. The rest of the gluing can be done using two methods—you pick your favorite.
- Add strips of glue on to each section of the pendant or...
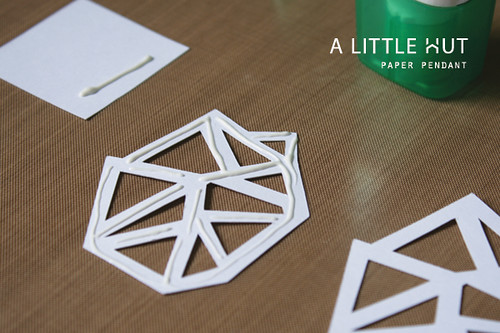
- Add glue by using dots.
In either case, just make sure that you're not using too much glue. When the pieces are pressed to one another some glue may squeeze out from the sides—just clean it up as you go. If you keep the glue to a minimum this issue will be reduced significantly. Rub the piece that is added to the stack (to spread the glue a bit) and then line it up in the final position.
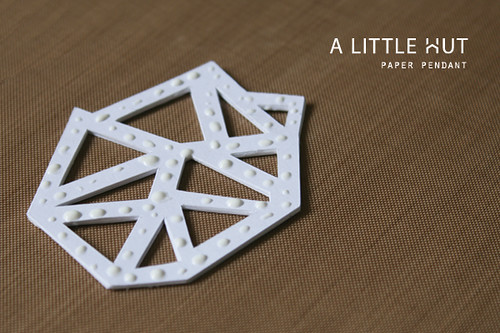
3. Once all the pieces are glued and dry you can add the finding. Use pliers to open it enough so that the pendant can slide in. Once the pendant is in place close the finding again. This can get tricky. Even though all the layers of paper will feel quite sturdy you still need to be careful to avoid tears.
4. Slide your new pendant onto a necklace and enjoy!
If you're cutting by hand
1. Print and cut out one of the pendant shapes.2. Cut out 11 pieces of cardstock that are 2 1/4" x 3" and glue them all together. Add the glue in zig-zag fashion across and up-and-down each piece of paper until you have a neatly glued stack. Rub each sheet a bit against the stack before placing it in its final location—this allows the glue to spread evenly.
3. Glue the cut out pendant shape to the top of the stack.
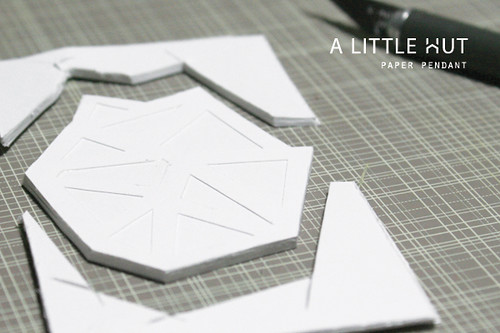
4. Start cutting out the pendant with a really sharp craft knife and using the pendant cut out as a template. I thought I was going to use a ruler but it wasn't necessary. Using the first cut out as a template was enough.
Important! - Cutting the pendant will take some patience. Go slowly. It took me at least 7 strokes in each segment to get all the way through the stack of paper. The first couple of strokes should be done lightly (so that there are no mistakes with the others). The initials cuts will make a groove that will guide your blade the rest of the way down.
I cut the outer perimeter first and then the triangles inside the pendant but it doesn't necessarily need to be done that way. If you go slowly you'll be fine.
5. Follow steps 3 and 4 in the cutting machine section and you're done. Enjoy!
Downloads:
- The SVG, DXF and PDF files can be downloaded here.
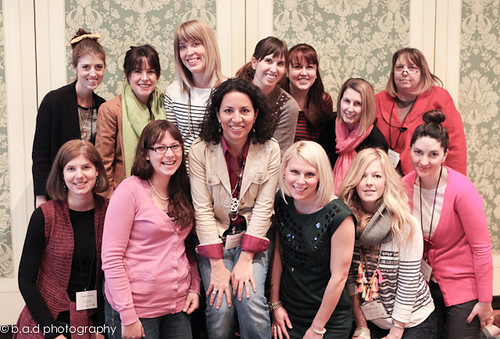
ALT Design Summit - Paper craft class — an awesome group!
(see me wearing the pendant?)
Photo by: Brooke Dennis
Important! - Cutting the pendant will take some patience. Go slowly. It took me at least 7 strokes in each segment to get all the way through the stack of paper. The first couple of strokes should be done lightly (so that there are no mistakes with the others). The initials cuts will make a groove that will guide your blade the rest of the way down.
I cut the outer perimeter first and then the triangles inside the pendant but it doesn't necessarily need to be done that way. If you go slowly you'll be fine.
5. Follow steps 3 and 4 in the cutting machine section and you're done. Enjoy!
Downloads:
- The SVG, DXF and PDF files can be downloaded here.
• • •
(see me wearing the pendant?)
Photo by: Brooke Dennis
No comments:
Post a Comment