our friday morning

embossing card

embossing + cut out

I've tried many things with paper, but heat embossing had not been one of them, until last weekend. A lovely person at Paper Source taught me the process. I couldn't help myself and bought the tools needed to try at home and this is my first attempt.

for embossing

For this card I used my flower stamp—again (need to make a new one!), a heating tool, a VersaMark watermark stamp pad and opaque embossing powder. I cut out one of the petals so that a piece of the Peacock colored paper (new Paper Source color) would show through.

making birthday cards

While I worked on my card the kids worked on theirs. They made birthday cards for a friend's party that we'll be going to tomorrow. I will never get tired of watching them when they are tackling a crafty project. Never.

Friday Tidbit
- Heat embossing tutorial: A video for those of you that may be interested in using these craft materials.
- We Love Indie: A site for those of you in need of some eye candy.

Have a great weekend everyone!

to indulge

According to Webster:
a: to give free rein to
b: to take unrestrained pleasure in : gratify

According to me:
1. To go to the new Paper Source store twice in two days. (Friday and Saturday)

Saturday was the grand opening of the Houston store and it could not have been any more fun than it was. I met very friendly people and among them was
Sally Pofcher, the CEO of Paper Source. I'd never seen a PS shop in person and it surpassed my expectations. There is nothing like seeing the colors and textures in person. Just look at that rainbow of paper!

An extra-special treat was to see my book on one of the shelves of the store!

paper source in houston!

2. To visit the new Sprinkles right next to Paper Source. (Saturday)

I waited in 90+ degree weather, no shade in sight, for 30min, standing in a line that was out the door (never done that before - probably won't again - phew!).

sprinkles

But fortunately it was worth it. Yum!

sprinkles = yum!

3. To ignore a mountain a laundry in order to hang out with the family and work with new crafty materials purchased the day before—see #1. (Sunday)

4. To drive 1hr. and 40min. to Brenham, Texas to visit the home of Blue Bell Creameries with the kids. (Today)

We ate fresh ice cream, saw how it's made/packaged and did it all while visiting with a great friend and her kiddos. (We all had an awesome time Rachel!).

Hanging out in downtown Brenham...

brenham, tx

recycling project - security envelopes stationery set

I've been collecting security envelopes for a while now but I hadn't done anything with them recently (there was a small something long ago). My hands were itchy to make anything with paper so I decided to create a small set of stationery goods.

recycling using security envelopes

Materials
- security envelopes
- Xacto blade or scissors
- ruler
- cutting mat
- fine tip marker
- glue stick
- hole punches of different sizes and designs
- white card stock
- envelopes
- pencils
- wooden clips

Stationery - Having blank stationery on hand is a must for me. Here I decorated a couple of flat cards with hand drawn branches and leaves and bits of the envelopes. I cut the leaves by freehand with my Xacto and the flowers with a hole punch.

recycling security envelopes - stationery

recycling security envelopes - stationery

Gift tag - The gift tag is made with card stock and the window of a security envelope. Make sure to leave 1/4" frame around the plastic. Using hole punches of different sizes I punched out circles from security envelopes of different patterns and colors. The yellow paper is part of a manila envelope.

recycling security envelopes - gift tag

Using white card stock, I cut out two identical rectangles that are slightly wider than the plastic. Each card has a small window and a hole at the top for ribbon or string. I rounded the corners of both with a corner punch.

recycling security envelopes - gift tag

I folded the plastic in half and filled it with the security and manila envelope circles. I added a couple of staples at the top to seal that area off. The other two edges were sealed with a glue stick. I cut the corners on a diagonal so that they wouldn't peek out from behind the card stock.

recycling security envelopes - gift tag

Here is the final result. The tag on the left was made with two windows from different envelopes. They were glued face to face.

Come to think of it these could make good bookmarks too.

recycling security envelopes - gift tag

Wooden clips - I measured the top of a clip and cut out a template with card stock. I used the template to measure and cut out each of the pieces of paper and attached them to the clips with the glue stick.

recycling security envelopes - clips

Pencils - I covered the pencils with a rectangle cut out of the security envelope and glue. The paper is a bit over 1in. wide and as long as the pencil. This variation of using mechanical pencils is a great idea so you get to enjoy your handiwork for a longer time.

pencils covered with security envelope paper

For those of you interested in downloading a project sheet for future reference click here for the PDF.

security envelope - project sheet

the way I find balance

I've been thinking a lot about how I balance family and work. I try not to be too hard on myself, about not getting it all done, but some days it's easier said than done. This summer it seems I'm leaning towards staying away from the internet and quietly working behind the scenes.

Working from home makes it more difficult to draw the lines between the two worlds. I don't have an office that I can drive away from every day. It's more noticeable during the summer when the kids and I are together all day long. Maybe that's why it's on my mind lately.

wip

I'm always curious to read about how others handle the balancing act so I thought I'd share some of my thoughts on this. Here's is my coping list:

1. It doesn't have to be perfect. Let's face it some days, things are just crazy and I barely make it through a 24 hour period. As long as we make it all across in one piece and are well fed, so be it.

2. Remember that the to-do list is a friend—a big one. I'll admit that many days I simply forget to check my list throughout the day (sounds silly but it's, sadly, very true). And yes, it throws me completely off. The days I get to check everything off my list I feel worthy of a parade.

3. Be flexible. Take the day (or season) as it comes. This is when the to-do list gets whittled down to what absolutely needs to get done vs. what I had hoped to accomplish during the day.

4. Carve out some personal alone time every day. Even if it's just a few minutes during the day or when everyone is asleep I always make it a point to do something for myself. I'm not picky so, leisurely flipping through the pages of a magazine with a cup of coffee in hand is all I need on some days. Other times a crafty project, like this blanket I started over the weekend, does the trick.

Last but certainly not least...

5. Make room for gratitude every day. As messy as the house may seem, as much work as may be in queue, as many errands as I may need to run, the fact is that I do have a lot more than many.

So there you have it. My short version of how I make it through the day. Now if I can discover a way to keep up with the exercise routine (that we started this weekend) I'll have it made.

wip

how I see color

I took some random photos that I will be adding to my 'inspiration folder' and in this case they all deal with color.

Color can get complicated (which one to pick) or really simple when it's staring you right in the face and it resonates. I'd have to say that the objects that are around me give me the quickest color ideas. Yes, I use books and the internet as other sources of inspiration but light bulb moments tend to go off as I'm mixing ingredients for a recipe, arranging the laundry or out and about with the family. It's in the everyday that I find my best color concepts.

If you want more of a bullet point explanation, here are a few ways in which I find an interesting color combination or a variation of one specific color. It occurs when...

- One object has a pleasing palette all within itself.

green

- A group of objects create a coordinating palette.

combination

- A combination of texture and lighting offer a variety of colors in the same family.

raspberry

- Lighting alone reveals a variety of tones of one color.

orange

It's strange to write about color so clinically. The reality is that I work with color in a more intuitive fashion. I think we all do. It's just a matter of keeping our eyes open.

Where do you find your inspiration for color?

• • •

Friday Tidbits
There are so many sites that I could point out for color inspiration but to keep things manageable I'll only mention a couple of my favorites, one with a focus on design and the other more on the crafty side of things.

- Grain edit - Talk about eye candy! Color is just one tip of the iceberg. Illustration, design and creativity are all widely and well represented.

- Inchmark - Designer Brooke Reynolds has color (and so many other creative endeavors) down pat. Her blog is beautiful and she has wonderful projects and ideas.

• • •

Have a wonderful weekend everyone!

PS - Spain or the Netherlands? It's going to be an awesome game to watch. We are avid fans!

design and its applications

What a week!

Aside from the fact that our nine month old water heater needs to be replaced and that this detail wasn't discovered until Mr. Z came home and smelled the house was full of gas (ahhh that's why I had a pounding headache all day!) and other work related stuff, yesterday we lost our dog.

After an hour of looking for our little guy, in the pouring rain, I decided to make some 'lost dog' signs and the graphic designer in me kicked in.

As soon as I sat in front of the computer, I had flashbacks of the thoughts that run through my mind whenever I see other people's efforts. I always think of ways to improve them, in the nicest, non-snobby designer way.
- Don't use fancy fonts (clear is more important than fancy)
- The phone number should be larger (I've seen them itty-bitty many times)
- Replace the ink in the printer or use a photo that has more contrast. A dark box doesn't help much.
- If handmade and written use a very thick marker.

I whipped up some quick signs, we drove around hanging them in visible places and they did the trick. After 3 hrs. of going through awful scenarios of what we'd do without our Otto (who looks just like the second one here), we found him in the care of a lovely (and unknown until yesterday) neighbor. Phew.

In less dramatic and happier graphic design news...

One of my logos was selected to be included in the LogoLounge Master Library Series (Vol. 3) Shapes & Symbols. It's the third time my work makes into one of their books and I'm so very flattered to be included. Thank you LogoLounge!

carving tagua


When we visited Colombia last month we stayed at a friend’s finca (country home) in a small town called Tinjacá. It is a three-hour car ride from the capital, Bogotá. There we entered a small shop owned by the man you see in the photo. It has been in his family since 1912 and he’s the third generation that works carving tagua.


He led us into his studio and here's a bit of what he taught us - It takes a tagua palm about seven years to produce it's first fruit or pod (slightly bigger than a basketball).


Inside the fruit there are about 25-30 bark-like covered nuts. They are dried out for two years before they are ready to be carved.


The shop owner was kind enough to crack a nut open and show us how he works. The first thing he did was to peel and polish the nut. In a matter of minutes we could see what he was making.


He left part of the bark on one small area as a decorative element and he was kind enough to give to me for free as a souvenir. He wouldn't accept any money. Melt.


The talent and patience of the people that work with tagua is boundless. Look at these little cups and saucers. The key to the right of the picture will give you an idea of the size of these miniatures. Amazing! He also showed us nativity sets, chess sets, bracelets, earrings, and many tiny figurines.


A big point that the shop owner made with us is that nothing goes to waste. If you'll notice in the first two photos there is a lot of material left over as the carving is being done. Guess what they use if for? To make paper! They also use the dark-colored bark to create mosaics that I'm sorry to say I didn't photograph.

As if this wasn't enough, he also showed us a small showroom of recyclable products he sells. There were baskets weaved out of newsprint, handbags crocheted out of shopping bags, a few things made with cardboard rolls and paper lamps.


I would've loved to have a camcorder with me on the day that I visited this shop. He was such a nice man and although it's obvious he's told his story thousands of times he didn't sound rehearsed. He seems very proud of what he does.

I'd love to host a show like Dirty Jobs except I'd be interviewing artisans such as this man and learn about handmade artifacts made throughout the world. Stories like these need to be out there. It would also be nice to ask tons of questions without appearing nosy!


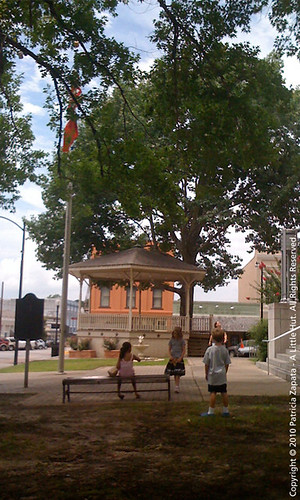
BIG apologies for the poor quality of all the photos except the last two - this was the day my camera died and I had to use my iPhone. So sad.

An interesting article about tagua here.