
I have a confession to make. I can act just like my eight year old daughter when I see cute paper. We were both oohhing and ahhing over the sheets inside the paper pack that I received from Martha Stewart Crafts.
The package included:
- Martha Stewart Crafts Enchanted Woodland Paper Pad
- Martha Stewart Crafts Valentines Day Heart Shape Treat Bag
- Martha Stewart Crafts Hearts Stamp and Ink Set
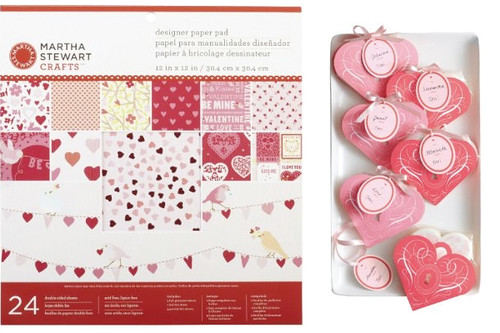
Yes, I love contemporary lines and designs but there is still that little girl inside of me that enjoys a little cute every now and then. My little C has already staked a claim on some of the sheets and I played with them a bit too. Some of the sheets have Valentine's Day message cards that C wants to use to give her classmates next Tuesday with goodies in the heart bags that we received too. I like that the goodie bags have everything you need: hearts in pink and red, name tags, ribbon strips and pointed cello sleeves that fits in nicely.
What you can't see in photos is that this paper pack has a lot of foil in it. The darkest red hearts you see in the photos of the pad cover (center and a few of the sample squares) are foil paper. There are a some glitter pages too. I was curious and I a piece of the foil through the Silhouette
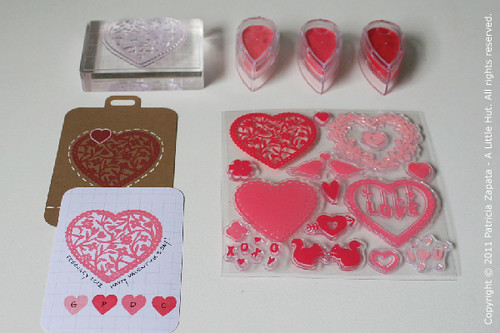
I purchased the Martha Stewart Crafts Stamp And Ink Set Valentines Day Heart & Key
(The hang tag version is a preview of something you'll see later today.)
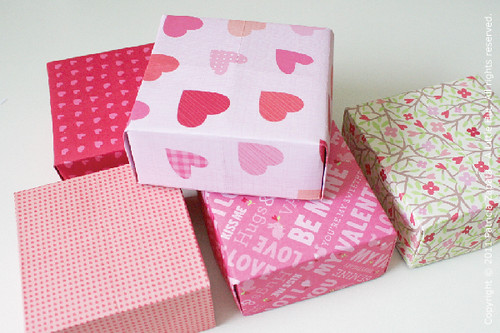
To make the base of these origami boxes I used the instructions shown in this video.
The instructions for the cover:
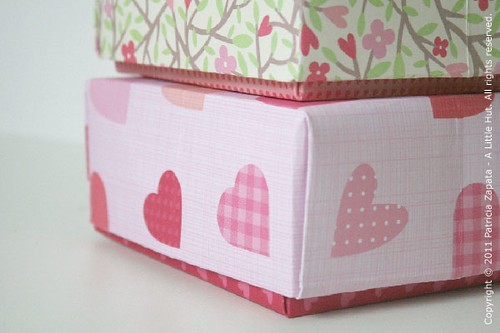
If you'd like the cover to be slightly larger and have some of the bottom of the inside box show (like the photo above) there is one slight change you need to do. I changed the step that you see 47 seconds into the video (the step where there are folds that meet at the center). Instead of having the folds meet at the center they are each 1/4" away from the center so there will be a gap between the sides that meet. The same for the other two sides of the square. I made my boxes from a 12" square sheet of paper so if you make it smaller you'll have to adjust the 1/4" accordingly.
Step in minute 2:00 of the video: since the change above was made the folding over of the sides may not be exact. Just adjust the folding over the edge as needed. You'll see what I mean if you try it.
If none of this makes sense then just email me and ask! Haha!
• • •
Thank you Martha Stewart Crafts for the goodies!
No comments:
Post a Comment